Tunisian Style Braised Venison Shank with Bone Broth

Before coming to America, my grandparents on my dad’s side took a detour through North Africa. They lived on the outskirts of Tunis, where my dad was born and raised. My Nonno had an eclectic series of business ventures, from driving taxis to operating a canned fish factory. My Nonna took care of everything else. Ultimately they would leave when the climate towards Europeans shifted, but during those two decades during the 1940’s and 1950’s they absorbed a lot of the food culture from the region. This dish is reminiscent of something my Nonna would make during her time in Tunisia and something she brought with her when she immigrated to America. It’s traditionally centered around lamb, but I’ve swapped out the lamb with venison shanks. Beef would be another option that would work well. It is meant to be served family style and makes for an impressive centerpiece to the dinner table. Video of the whole process below.

shanks from above.jpg

Bone Broth:

Simmer deer neck (or whatever bones you are working with), onion, garlic, carrots, bay leaf, and a little salt for 4 - 6 hours until meat is tender and falling off the bone. Pull all of the meat off the bones and set aside for any recipe where shredded meat would be ideal (ie: tacos). Return the bones to the stock and continue cooking for as long as you have time for. This can be made a few days in advance.

bone broth.jpg

Aromatics:

Heat up a drizzle of olive oil in a large pot to medium heat. Layer in ¼ cup of tomato paste, 1 teaspoon of caraway seeds, 1 teaspoon of coriander seeds, halved onion, 2 garlic cloves, salt, pepper, dried chilies to your liking, a few teaspoons of plum vinegar. Saute gently for a few minutes and then add in 2 cups of bone broth. Continue to simmer on low.

shanks in fire.jpg

The Shanks:

Brown the meat in wood fired oven or in cast iron skillet. Transfer the shanks to the simmering broth and cover. Braise in the oven at 300F for about 4 - 6 hours until almost perfectly tender. 

While the meat is cooking, peel your carrots and squash, breaking them down to uniform medium sized chunks.With about 30 minutes to go add in the carrots, squash, pre-cooked chickpeas and ¼ cup diced dried apricots. Return to the oven, covered, and finish cooking for about another 30 minutes until all the vegetables are fork tender.

As it finishes, prepare your couscous. I like using Les Moulins Mahjoub brand which is hand made in Tunisia but you can use whatever couscous is available. Gently layer in the cooked couscous onto a platter and drizzle with a nice olive oil.

shanks final.jpg

Assembly:

Remove from the oven and start layering all of the cooked vegetables on top of the cous cous. Next take the entire shank(s) and lay it on top of the mountain of couscous and vegetables. Set aside a bowl of the rendered juices to ladle on top of the individual portions. Garnish with fresh mint.

Meatball Sub (With Venison)

This sandwich was inspired by Daniel Uditi, the chef over at Pizzana. My spin on the classic meatball sub was to swap out the beef with freshly ground venison from this year’s harvest. Since the venison is so lean I cut the blend with 50% ground pork to add some fat back into the equation. The meatballs were packed into homemade sesame rolls and finished off in a wood fired oven. Video showing the entire process below.

whole sandwich.jpg

The Meatballs

1 pound ground venison (or substitute with beef)

1 pound ground pork

2 cloves of garlic (finely minced)

¼ cup chopped parsley

1 cup of torn stale bread pieces, soaked in buttermilk*

¾ cup grated parmesan

Dried chili flakes (to your liking)

1 Egg

Salt and Pepper

Buttermilk

*I like to use any stale homemade sourdough bread I have laying around, but store bought works just as well. I like larger torn pieces as they give the meatball some airiness that you won’t get with the store-bought breadcrumbs. But if the pieces are too big, the meatball might begin to fall apart.

Stale bread soaking in buttermilk

Stale bread soaking in buttermilk

balls.jpg
browning.jpg

I brown my meatballs in a wood fired oven to give it a little smokey flavor but this can easily be done in a cast iron skillet. Brown all sides of each meatball and set aside as they cook. Once all the meatballs are browned, transfer them over to your simmering pot of red sauce and continue simmering (on low) for another 30 - 45 minutes until the meatballs are cooked all the way through.

in the sauce.jpg

This is my Nonna’s classic red sauce that I rarely deviate from. 

Stewed whole San Marzano tomatoes

Garlic

Yellow onion

Basil

Parmesan Rind

Salt

Pepper

Extra virgin olive oil

The key here is simplicity, and good ingredients (especially the tomatoes). Lightly puree the tomatoes in a processor or with a stick blender. Be careful not to aerate the tomatoes too much. For a chunkier sauce you can simply crush the tomatoes by hand. Set aside in a bowl. Peel and dice three to five cloves of garlic and set aside. Peel and chop the onion in half. By cooking the entire halves you will impart the flavor of the onion and the sauce won’t have chunks of onion in it. 

Heat a generous pour of EVOO in your saucepan at medium to low heat. Add your garlic and onion halves and let simmer for a few minutes. Be careful not to burn anything. Add a piece of parmesan rind into the hot oil, and let it simmer for another minute. The oils from the cheese will add depth to the sauce. Add your tomatoes to the pan, and bring to a simmer. Add salt and pepper to taste. My Nonna would often use a pinch of white granulated sugar just to add a little more sweetness but if you’re using good quality tomatoes this step is not necessary. Add some chopped basil, stir, and set on medium/low. You want your sauce to simmer for about 30 - 45 minutes. Stir frequently to make sure it's not sticking to the bottom.

melting cheese.jpg

Finishing Touches

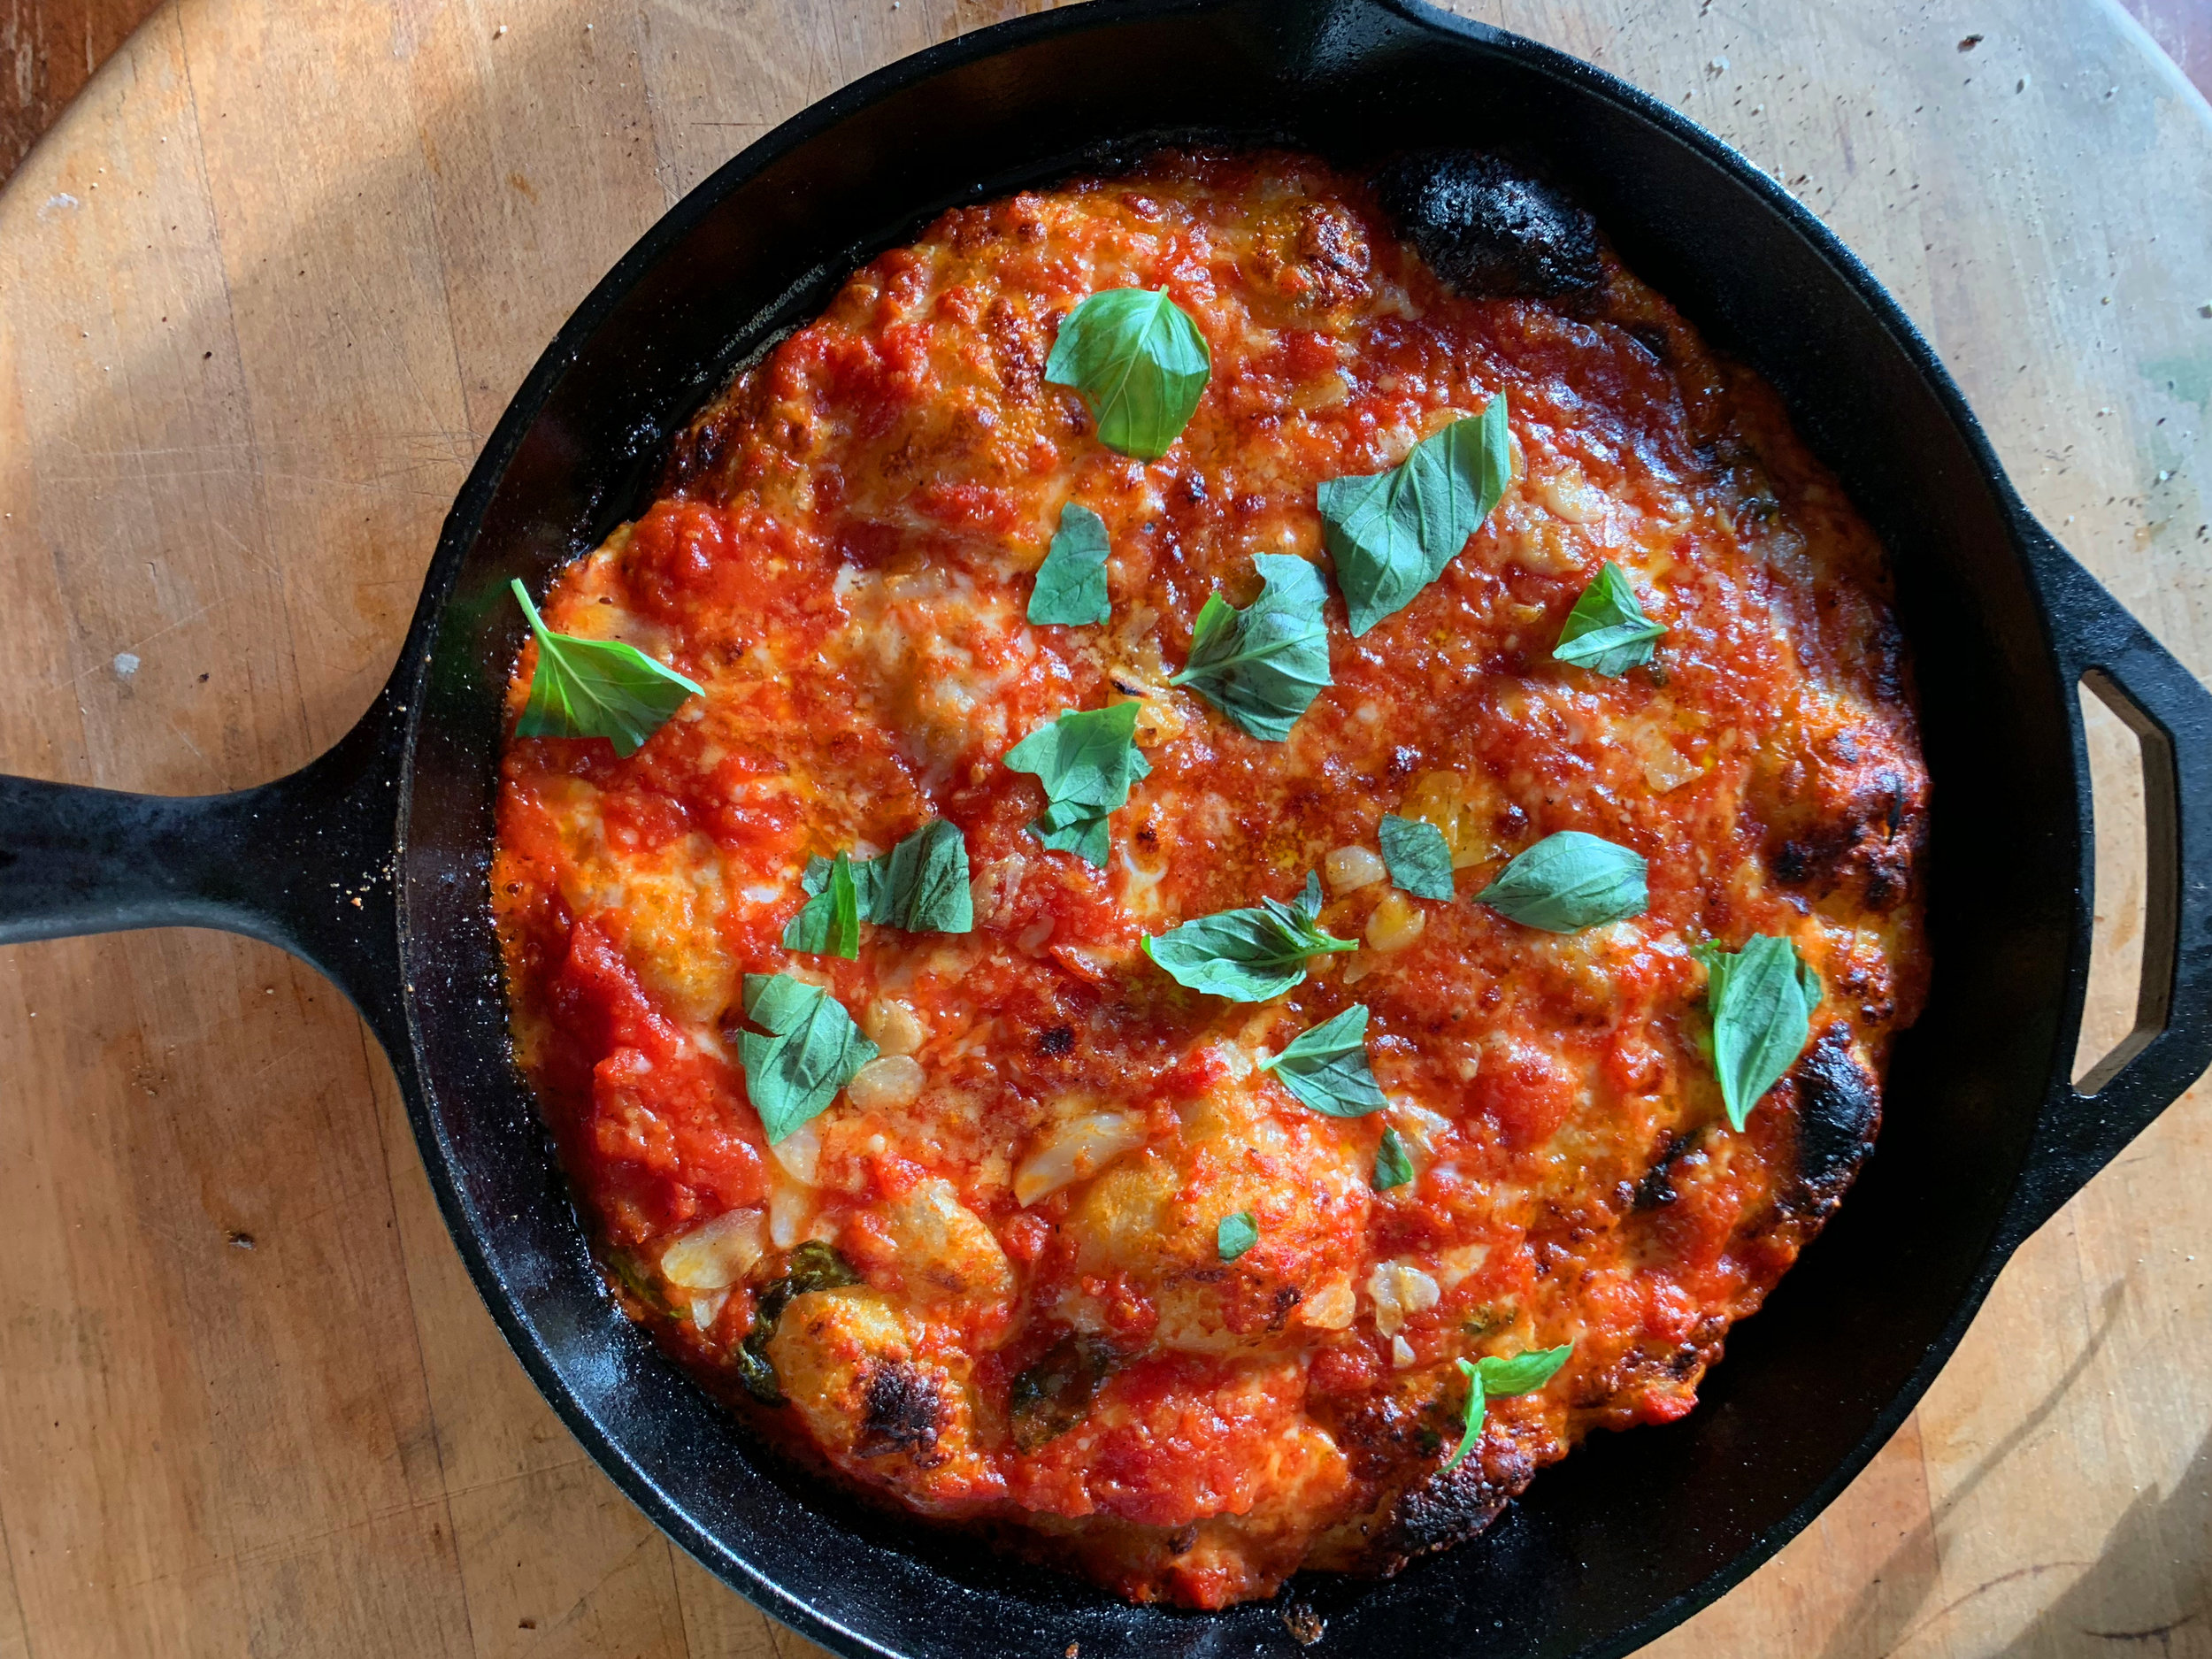
I serve the meatballs (and sauce) on homemade sesame rolls that I’ve been iterating on this for the past year. That recipe can be found here. Slice each roll and open up like a book and set into a skillet or pan. Fill the entire surface with meatballs and ladle on a generous helping of sauce. Top with good quality buffalo mozzarella. Put the entire skillet back into the wood fire (or in your oven) until the cheese is completely melted. Remove from the heat, garnish with some fresh basil and your sandwich is ready to go.

two halves.jpg

Homemade Cannoli

dusted.jpg

My first encounter with a cannoli goes back to the 1980’s when we had large (and loud) family Sunday suppers. The older generation of grandparents, great aunts and uncles that immigrated to Brooklyn were still living and cannoli were always a key part of any large family get together. Someone would always show up with a neatly packaged box from Circo’s Bakery, tightly bound with string. On more rare occasions my Nonna would make them in her small kitchen in Bushwick, assembling them on the limited space she had on her bright orange Formica countertops. 

A freshly filled cannoli is decadent in all the right ways. It’s is a sublime textural experience that I never dreamed I could create myself. The thought never even crossed my mind. There were several trips to Sicily where I’d experience some of the best cannolis I’ve ever had. And then, a few years later, as I began revisiting old family recipes and food traditions I decided it was time to give it a try. The first attempt was a disaster. The shells exploded in the hot oil and the taste wasn’t quite right. But after a lot of trial and error I arrived at a recipe that I’d be proud to share with my Nonna. 

While it’s definitely not an easy or quick thing to make - great homemade cannoli can be had if you’re patient and careful about the details. The process requires a few key tools; a hand cranked or electric pasta roller, circular punch forms, and cannoli tubes (I use aluminum ones).  Video about the process below.

draining ricotta.jpg

The Cannoli Cream

Traditional cannoli cream uses a sheep’s milk ricotta which I prefer - if I can get my hands on it. Any other high fat unpasteurized milk will work. Or if you want to cut some corners or are tight on time you can start off with any decent premade ricotta. Skip the low fat stuff, you’re making cannoli. 

3 cups of drained ricotta (I will be posting a recipe for this soon)

1.3 cups of confectioner’s sugar

1.5 tsp vanilla

Orange Zest

Using a hand or stand mixer, whip together these ingredients for a few minutes until well incorporated. Transfer from a bowl to a piping bag and keep in the refrigerator until ready to use.

cream.jpg

The Shells

This is part that can easily go wrong and where you need to have a zen mindset. This recipe makes about 45 small to medium sized shells. 

1.5 cups of all purpose Flour

.5 tsp cinnamon powder

1.5 tsp cocoa powder

2 tbsp white sugar

.5 tsp salt

3 tbsp cubed and chilled butter

2 tbsp Marsala

.5 tsp white vinegar

.25 cup of water

1 egg (for the wash)

  1. Heat a neutral, high heat oil to 350F in a deep pot or fryer.

  2. In stand mixer, combine all of the dry ingredients and mix well. Add in wet ingredients (except the egg) and continue to blend for a few minutes. Mixture will be somewhat crumbly. Remove from the bowl and pour out onto a large working surface.

  3. Knead with your hands for 5 - 10 minutes until you have a mostly smooth and homogenous ball of dough. Wrap in plastic wrap and let rest at room temperature for 1 hour. 

  4. Remove the dough from the plastic and cut into about 5 smaller pieces. Flour the dough balls gently. Pass each ball through the pasta maker, going from the widest setting down about 6 settings. Be slow and methodical, and don’t skip any steps. 

  5. Lay each sheet of dough out on your work surface and gently flour again. Using your circular punch out form, cut circles and save all of the excess dough which you’ll use for one final pass through the pasta maker. 

  6. Carefully and tightly wrap/roll each cut circle around the cannoli tube, and seal the edge with your egg wash. Be extremely careful not to let egg get all over the place. Avoid getting the egg on the cannoli tube or the dough will end up sticking to the tube while frying. Clean up any egg that gets on your work surface. 

  7. When the oil temperature has reached 350F, drop each tube into the oil and fry until golden. Using tongs, turn the cannoli in the oil so they cook evenly. This should take only about 1 minute. 

  8. Transfer to a rack lined with paper towels and carefully slide the shells off of the tubes while it’s still hot. You’ll want to use more paper towels so you don’t burn your fingers. 

  9. The tubes should be wiped down, and chilled in the refrigerator for just 1 - 2 minutes before starting the next round of shells. This avoids a lot of mess ups.

dry mix.jpg
crumble.jpg
dough ball.jpg
circles.jpg
pistachios.jpg

The finishing touches

Once the shells have completely cooled you can start filling the cannoli. This is made easier as a two person task and makes for a fun family activity, but is manageable by one person if necessary. Using the piping bag, fill each shell starting with the center and working outwards. Nothing worse than a cannoli with a big empty pocket of air in the middle. Once completely filled, you can garnish with whatever you like. Traditional toppings include candied fruit, crushed pistachio, or chocolate chips. When the cannoli are all dressed up and ready to go, you can give them all a final dusting of confectioner’s sugar. They should be eaten fresh as they start to lose their textural appeal if they sit around too long and get soggy.

dressed up.jpg
Nonno and Nonna in Brooklyn in the 1970’s.

Nonno and Nonna in Brooklyn in the 1970’s.

Pani ca' Cori : Deer Heart Sandwich

This was the year that we lost my dad. It was also the year that I harvested my first deer after five years of trying. I grew up watching my dad hunt and was witness to the entire process from the forest, to the barn, and eventually to the dinner plate. He never forced it on me and as I became a teenager I grew disinterested. As an adult my appreciation of it returned along with my unease with concentrated animal feeding lots and the factory farm food system. But ultimately it was also a good excuse to get out in the woods with my dad as two adults even as I began to see his health begin to decline. He couldn’t come out the last two years but I persisted and kept him with me in my thoughts this season. I know he’d be smiling right now. This animal will be appreciated in the fullest sense of the word and I hope to transmit a sense of respect and responsibility that comes with it to my own two boys.

deer heart sandwich.jpg

The first meal I wanted to make was a tribute to my dad and his Sicilian origins. Pani ca' Meusa is a Sicilian sandwich traditionally made with stewed organ meats that get cooked over a long period of time in giant pots. It has become one of the most iconic foods in Palermo served at a handful of old school street vendors throughout the city. You’ll find them smothered in freshly grated caciocavallo cheese and served with a squeeze of lemon. The offal is typically spleen and lungs of a cow. Originally this was a sandwich designed for the poor but eventually, like other culinary feats of frugality and ingenuity, it has become widely popularized thanks in part to food fanatics like Palermo Street Food.

deer in snow.jpg
heart in the snow.jpg

For months leading up to this year’s deer hunting season I had been dreaming up different recipes in anticipation. I didn’t want anything to go to waste. What came to me was a spin on the classic Pani ca' Meusa but instead of using the traditional offal I would instead focus the sandwich on the deer heart. The heart was broken down into several beautiful steaks which were marinated with olive oil, garlic, homemade plum vinegar, salt and pepper. I then grilled them quickly on a hot grill and sliced them super thin, smothered them in grated caciocavallo from Jersey Girl Cheese and delivered them on my homemade sesame sourdough rolls. The concept, which I’m calling Pani ca' Cori, is distinctly Sicilian but it takes on new meaning with the notable addition of the deer heart. Video of the whole process below.

sesame rolls.jpg
grilling.jpg
dad with deer.jpg

My dad in the 80’s.

Fermented Hot Sauce

Every year I name my hot sauce something different. Last year, my older son Felix got to choose. But this year, in honor of my dad, I named this batch Caiman Bite which will remind me of a trip we took together to the Peruvian Amazon back in 2005. One evening, as the sun was about to set over the jungle, our guide paddled our small boat along one of the small tributaries near Iquitos. The next thing we knew, the guide casually reached into the water and pulled up a medium sized caiman which he then passed off to another member of our group. In a moment of panic, the woman next to my dad let go of the caiman’s mouth and it dropped to the bottom of the boat. As it thrashed around in anger it ended up sinking it’s teeth into my dad’s knee, giving him a proper souvenir of our trip and a memory that I’ll never forget. This year’s batch of fermented hot sauce was made with homegrown arapahos, hot paper lanterns, and sweet cornito rosso peppers - along with a little garlic, salt, and about 3 months of slow fermentation. Video about the process below.

with bottles.jpg

Recipe

Mix of hot & sweet peppers

2 teaspoons of sea salt

2 - 3 cloves of garlic

Water

White Vinegar

24 oz mason jar

Fermenting lid (Nourished Essentials)

This recipe is designed around having your own home garden. It comes together gradually throughout the summer as the peppers ripen vs doing it all in one big batch. It begins in the early part of the season (for me it was early July) when the first peppers start to ripen. I roughly chop the peppers and garlic in a food processor to make the mash. Depending on the type of peppers, I’ll add water very gradually so that the surface of the mash is covered with a thin layer of liquid (water + pepper juice). The mash is thick so there is not a lot of excess water. Eventually it all gets thinned out in later steps. For each 24 oz mason jar I’ll add approximately 2 - 3 teaspoons of salt. Mix very well to incorporate all of the salt. I like to use 24 oz mason jars with an airlocked fermenting lid to ferment my mash. Once I exceed 24 oz, I’ll just start another jar mostly because of the space available in my refrigerator but if you have the room this can all be done in one large fermenting vessel. 

08AD2A38-EAA4-4D40-9DD2-E5D3CB9ED633.jpg

Set out at room temperature for about a week. You’ll start to see the natural fermentation after a few days as bubbles begin to form in the mash. Stir once a day. After a week move the fermenting jar into the fridge where it will stay for the next three months. 

hot sauce mash.jpg

As more peppers ripen throughout the season, you’ll continue to make your mash and mix it together with the pre-fermented mash already in the refrigerator. Mix together very well. If you are exceeding the 24 oz jar and need to begin a new jar, it is important to first mix together the pre-fermented mash and the new mash in a large bowl before dividing into the fermenting jars. This ensures there is a healthy pre-ferment in each separate batch. It is also important to try to adhere to the same salt to mash ratio as you begin to increase the volume of your mash throughout the season. Some marker and tape on the outside of the jar will make remembering your ratios easy.

food mill.jpg
filling bottles.jpg

At the end of the season which for me is early October I’ll take all the slow fermented mash and pass it through a hand cranked food mill. This process removes all of the pulp and extracts just the pure liquid from the mash. At this point the mixture is quite thin, which will be further cut down with about 30 - 40 % of white vinegar (at room temperature). The blend will be bottled up in small hot sauce glass jars and stored in the refrigerator. The denser parts of the hot sauce will sink so the bottle just needs to be shaken before use. 

For a thicker hotsauce you could simply pass the entire mash through a Vitamix or food processor but this recipe is built around a lighter and more liquidy hot sauce.

Porchetta sandwich with salsa verde

porchetta sandwich 1.jpg

This was my first trial of an oven roasted porchetta sandwich with salsa verde, grated caciocavallo, on a sourdough sesame roll. Local cheese from Jersey Cheese and pork sourced from NK Prime Meats. There are definitely a few tweaks to be made on future iterations but overall pretty satisfied with version 1.0.

You’ll find countless porchetta recipes that all use different cuts of pork (from pork shoulder to pork belly) but the traditional method uses a large section of pork belly with the ribs removed and the loin still attached. If you can’t find a butcher who can prepare this more specialized cut for you, a compromise would be taking a skin-on cut of pork belly and a piece of pork loin, and working backwards to recreate the original cut. In the video below, you can watch the exact process of how the meat was broken down and rolled together with a blend of aromatics.

filling aromatics.jpg

The filling:

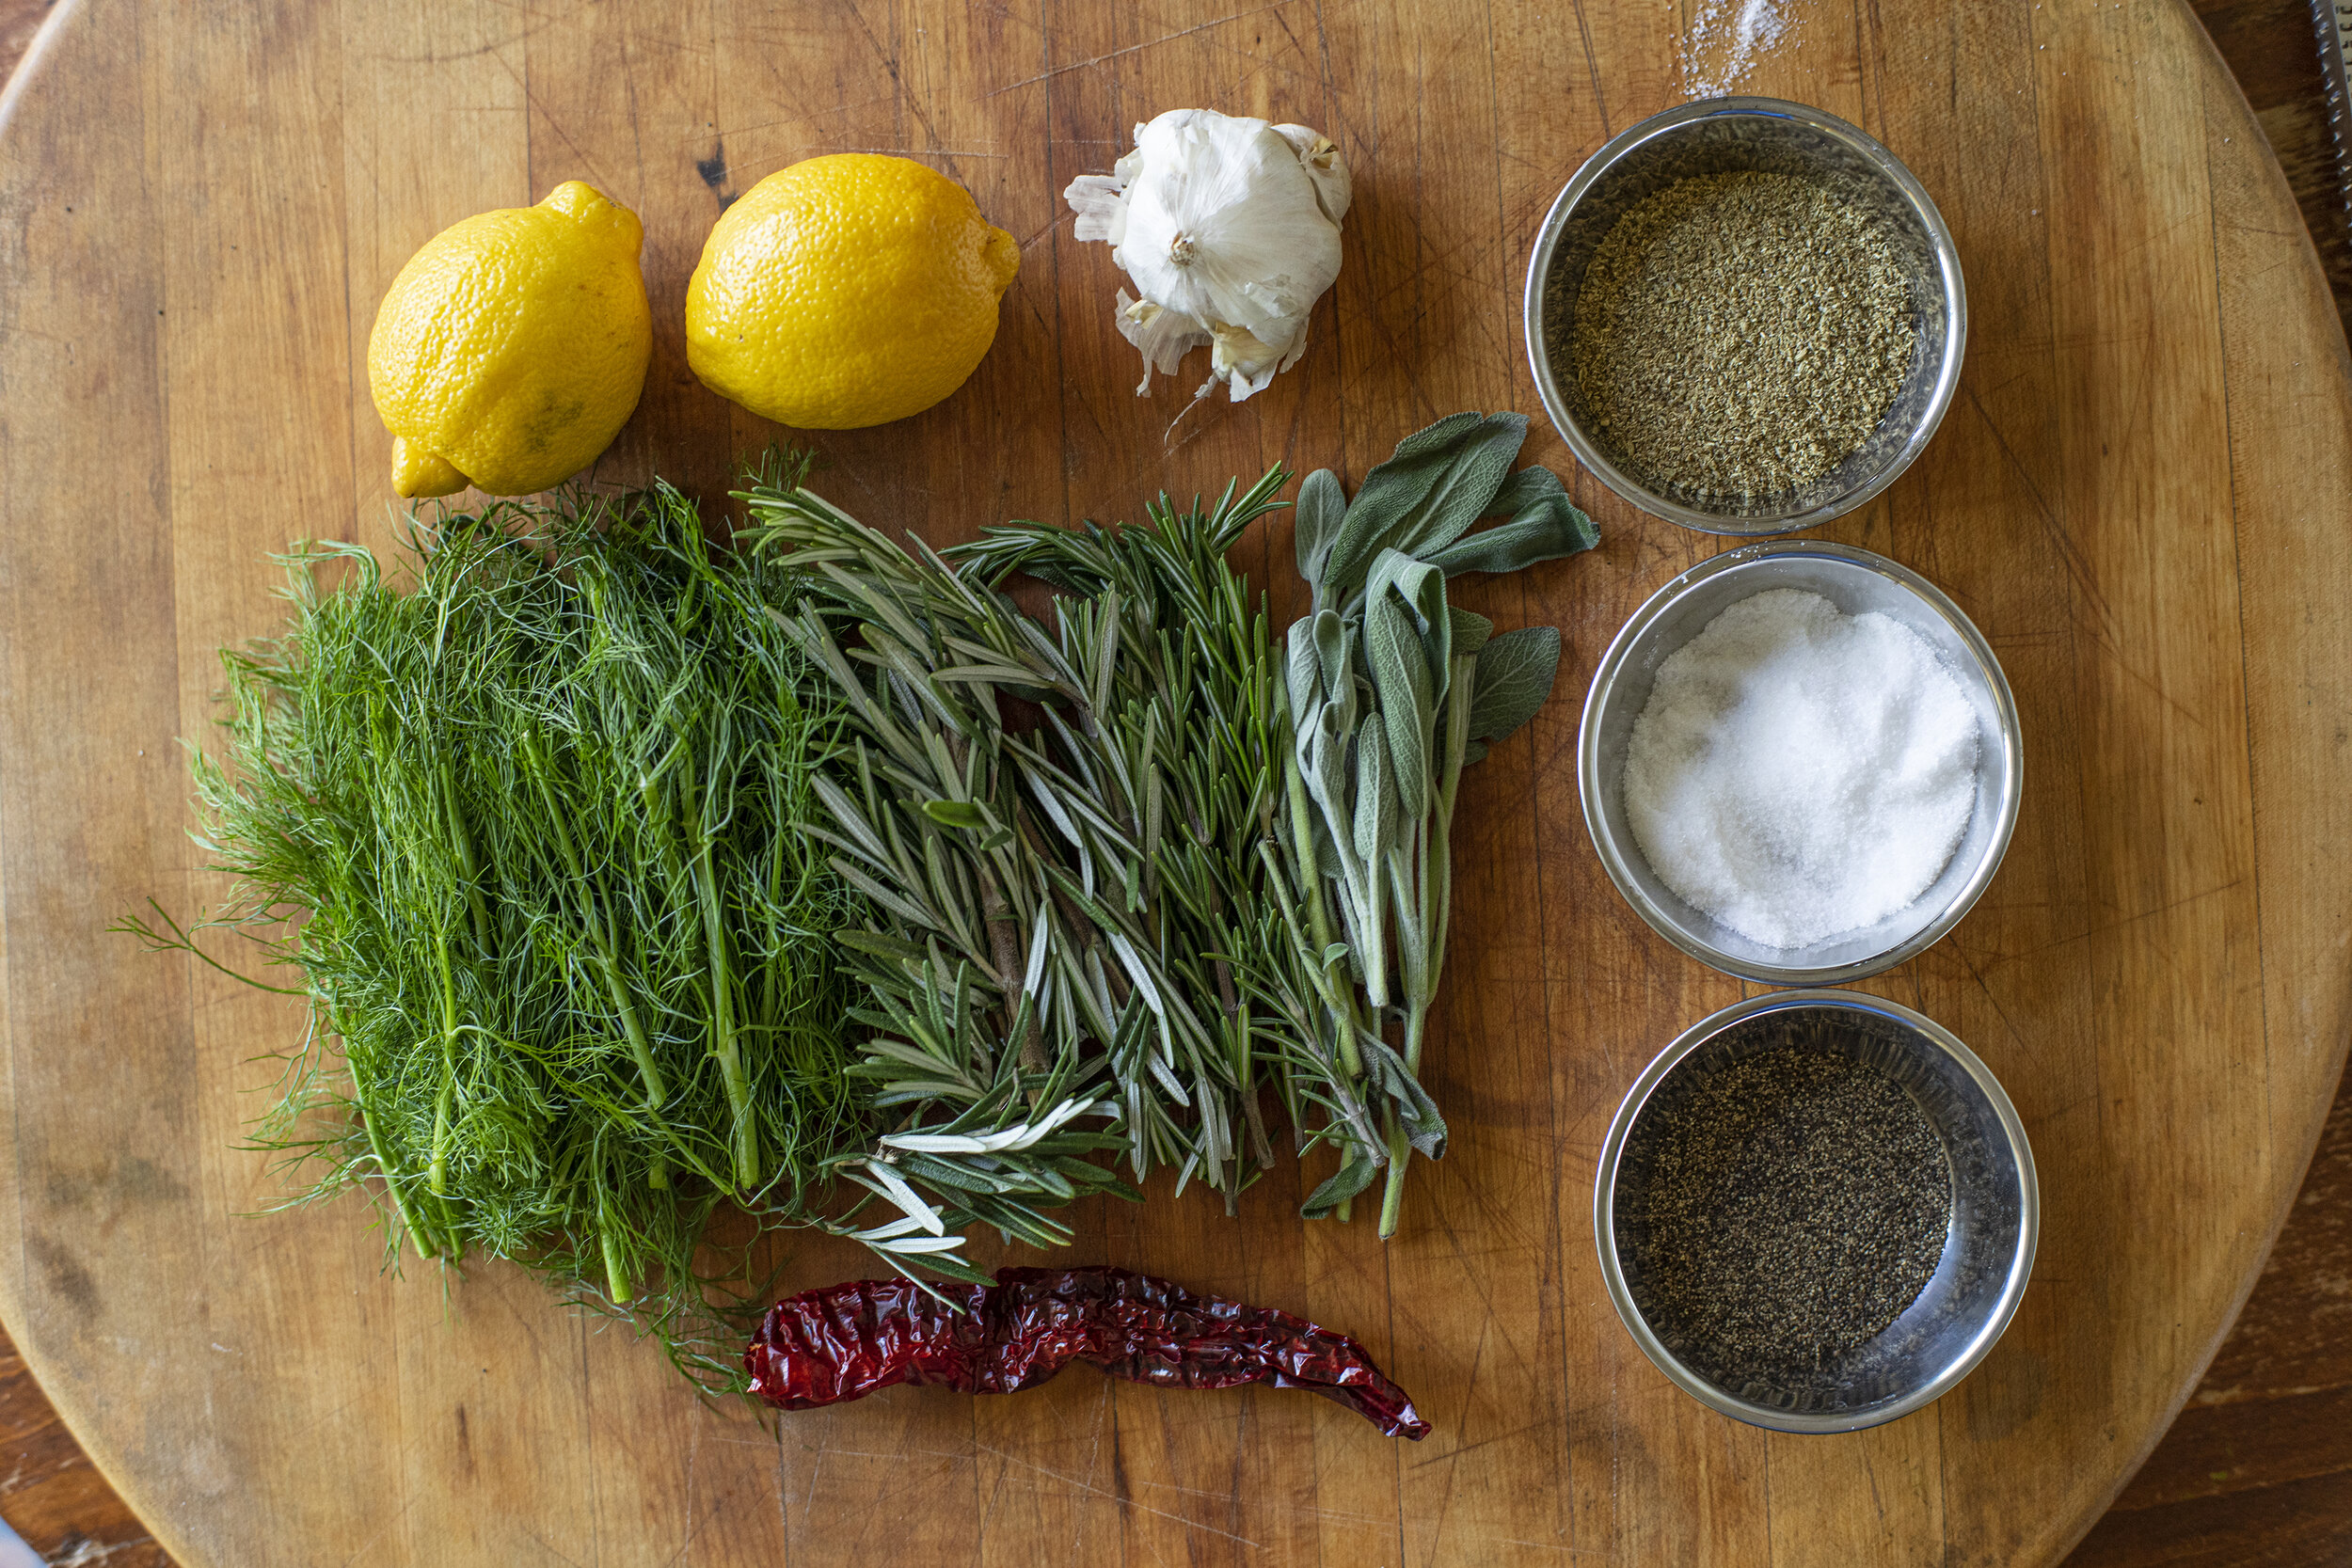
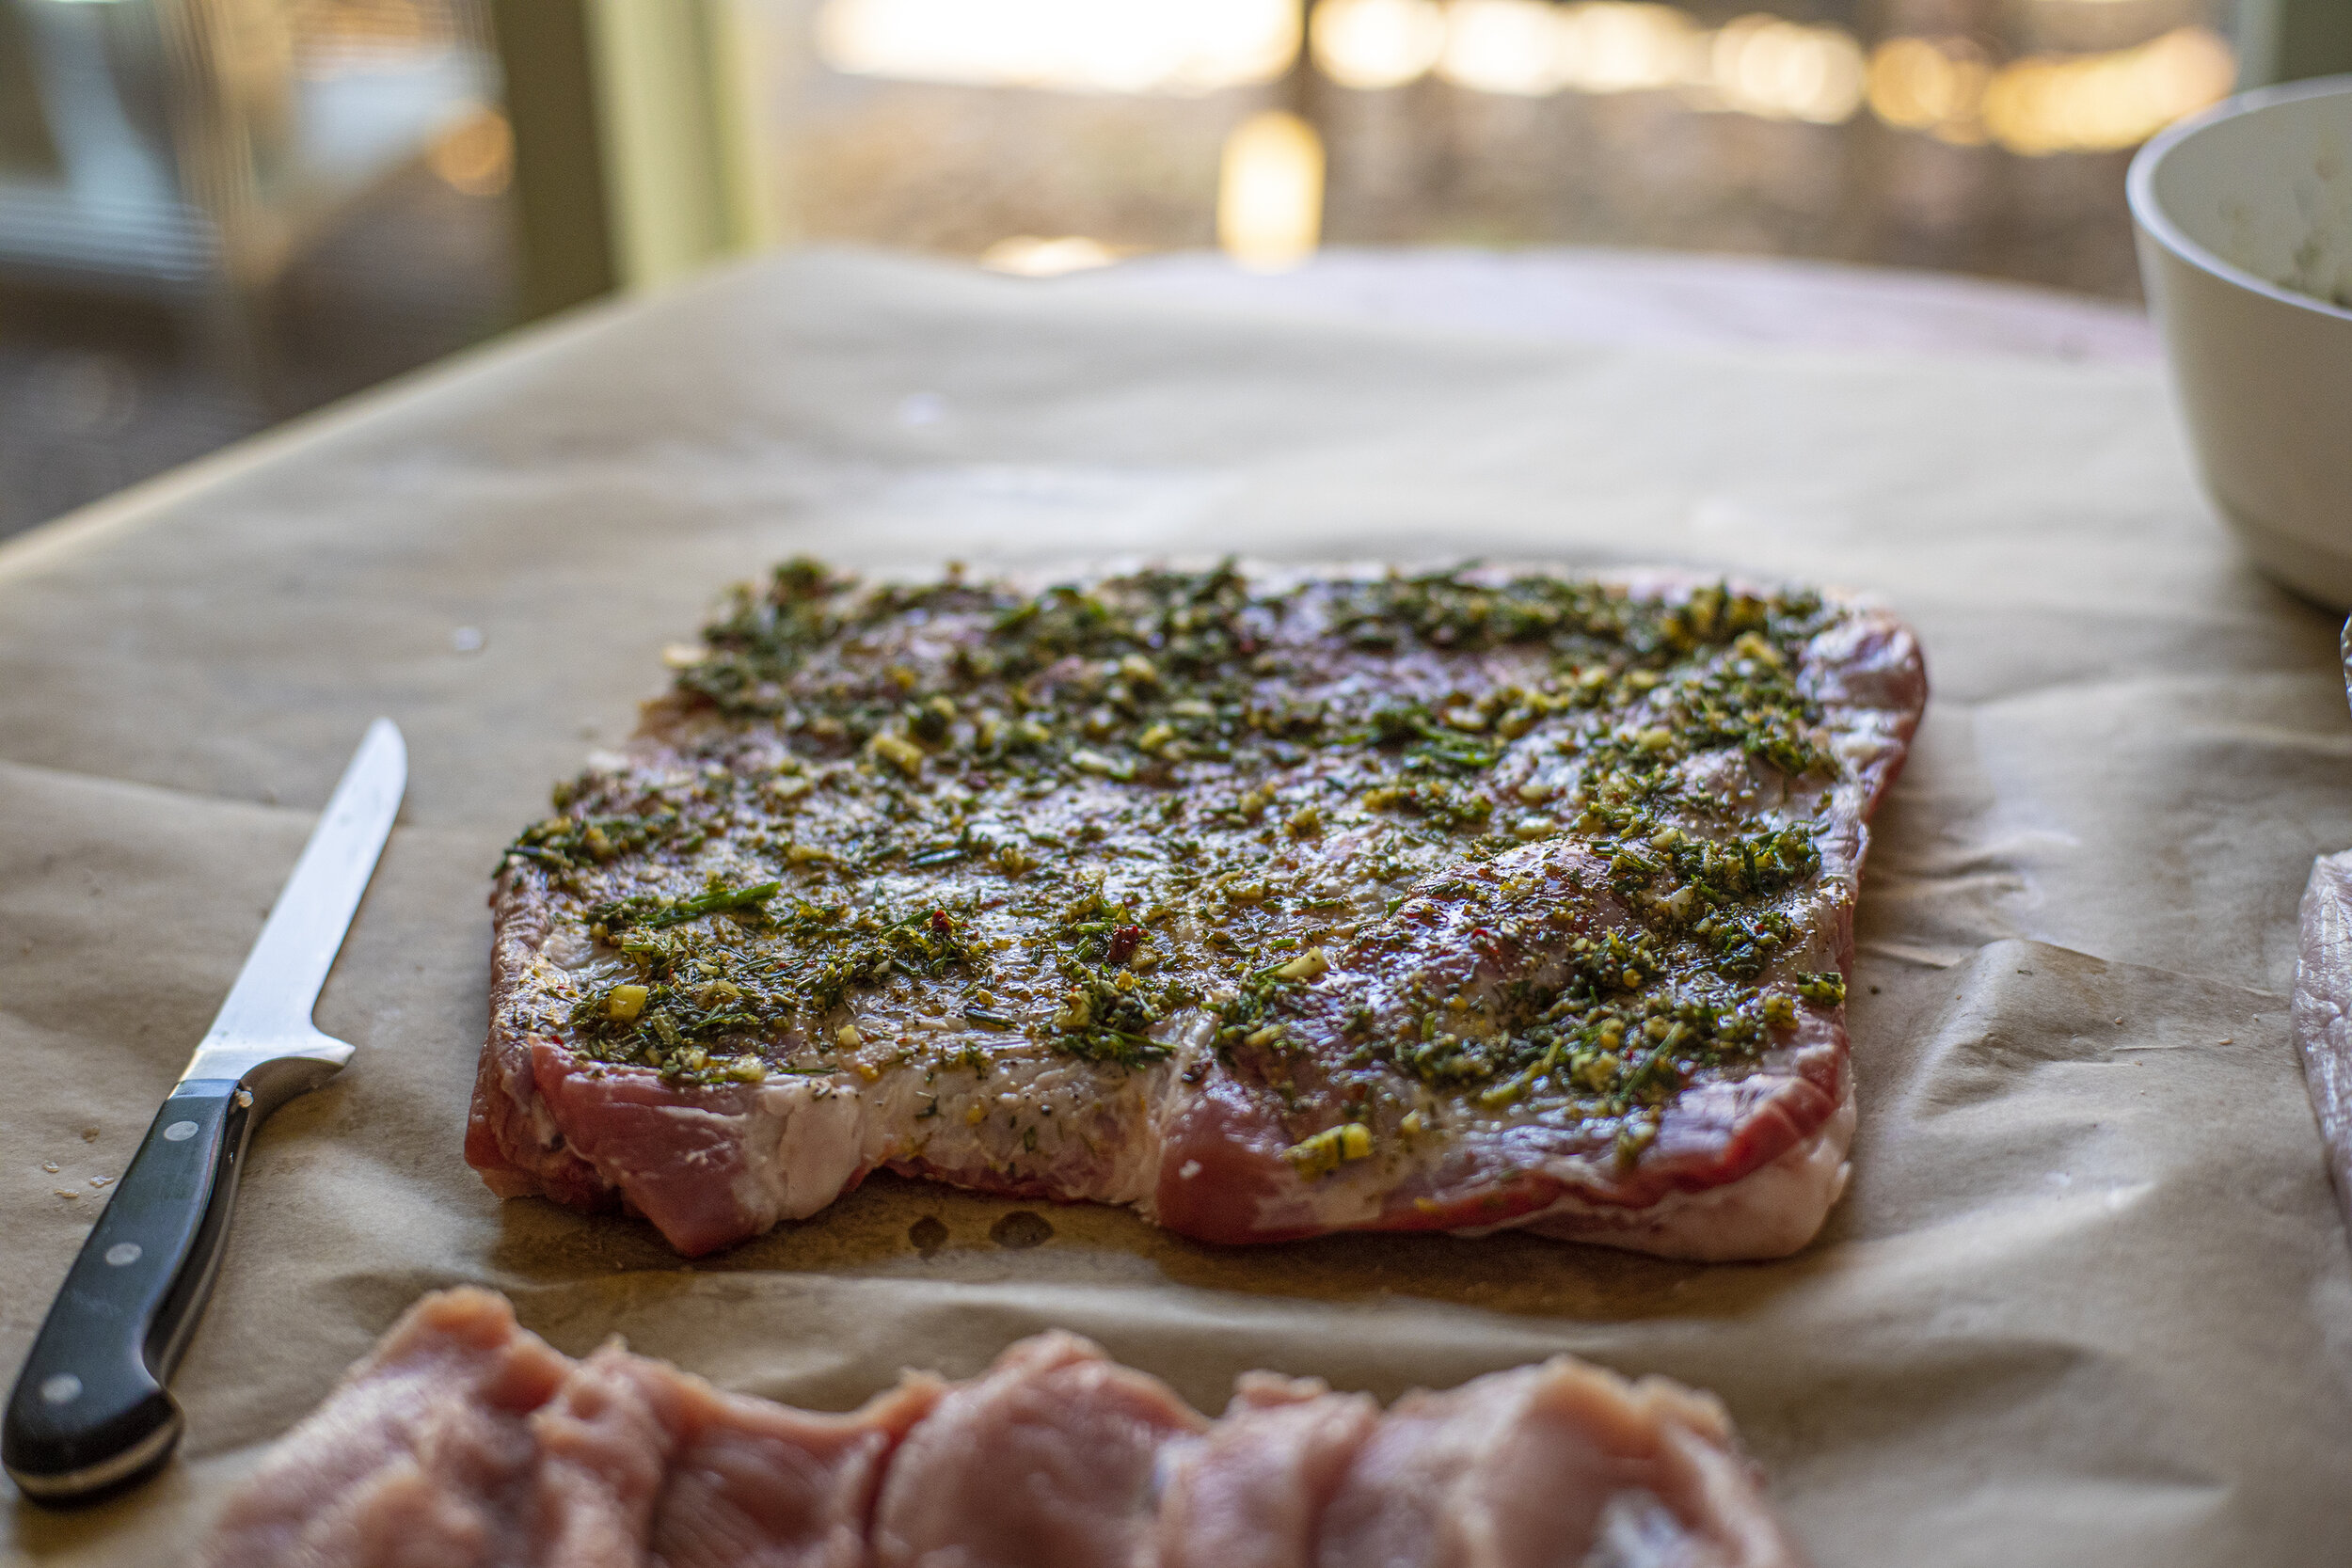
Finely dice fennel fronds, rosemary, sage, and garlic and mix together in a medium size mixing bowl. Add dried & crushed hot chili flakes to taste. Add zest of one lemon. Add 2 teaspoons of dried fennel seed powder, salt and pepper. Add oil oil so the entire mixture comes together like a thick paste. 

belly rub.jpg

Remove the skin from the belly and set aside for later. Next cut the loin to the exact size of the belly and butterfly it open to maximize the surface area of the meat. Set the loin piece aside and spread the aromatic filling all over the surface of the pork belly, fat side down. Lay in the butterflied loin piece and generously spread more of the filling all over the meat. Carefully roll up the belly and loin and position with fat side facing up. Rub more paste all over the top before laying on the piece of skin that was previously removed. 

trussed up.jpg

Using butcher's twine, you want to carefully truss the porchetta every few inches so that the whole piece is secure during cooking. Using a sharp boning knife, make small punctures all over the surface of the skin so that the fat renders out during cooking. Wrap porchetta and refrigerate for 6 hours to overnight. Allow to sit out at room temperature before putting it into the oven to allow the meat to relax, yielding a more tender piece of meat.

Roasting:

Set porchetta into a roasting pan with rack to keep the meat elevated during cooking. Cook for 40 minutes at 475F before lowering the temperature down to 300F for another 2 - 4 hours until the internal temperature reads 155F. The skin should puff up as it cooks and result in an airy, crispy texture. If skin still feels rubbery, use the broiler (with a very careful eye not to burn it) to finish off the skin before removing from the oven. Allow the meat to rest 30 minutes before slicing. 

Salsa Verde:

Using a food processor, blend together two bunches of parsley, garlic, a few spoonfuls of capers, 3 fillets of anchovies, juice of one lemon, a few splashes of white vinegar, and a few glugs of olive oil.

porchetta sliced.jpg

Porchetta Sandwich:

Slice porchetta in thin slices and set aside some of the crispy skin. Layer meat on a freshly baked sourdough sesame roll (recipe here) and top with salsa verde and freshly grated caciocavallo cheese (or provolone).  

sourdough rolls.jpg

Detroit Style Sfincione Pizza

I’ve been in a focaccia / pan pizza kind of mood recently and decided to give a go at a hybrid of a traditional Sicilian Sfincione and a classic Detroit pizza. It’s really the best of both worlds where the salty umami punch of the sfincione meets the crispy caramelized crust of the Detroit pizza. Short video about the process below.

detroit sfincione.jpg

The dough is an adaptation of my focaccia recipe (link here) where I have increased the hydration by 2%.

before bake.jpg

Ingredients:

2 large onions 

6 drained, peeled, crushed tomatoes from can

Grated parmigiano or fresh diced caciocavallo

Anchovy fillets mashed into small pieces to taste

Dried oregano to taste

Olive oil

Toasted breadcrumbs preferably coarse

Salt and pepper

Pizza dough

Directions:

Oil a rectangular pizza pan liberally. Line the edges of the pan with shredded mozzarella and spread the dough out with your fingers so that it covers the bottom evenly. Press into the dough to ensure you’re spreading it evenly across the pan. Add more shredded mozzarella to the top side of the dough along the edges. 

Cover with a cloth and allow it to rise for about 1 hour. In the meantime finely dice 2 yellow onions. Saute onions in olive oil on medium heat until golden. Mix in half a cup of breadcrumbs and dried oregano and toss until evenly mixed through. Allow to cool. 

Using a spoon or your fingers, sprinkle the mashed anchovies across the surface of the dough. Spoon on a thin layer of the crushed tomatoes so it covers the entire surface. Using a cheese grater, add a layer of caciocavallo evenly across the entire surface of the dough. On top of the grated cheese, spoon on the sauteed onions mixture and spread out evenly across the entire surface. Using a knife, cut thin strips of caciocavallo and line the top edge of the pan, on top of the shredded mozzarella, with even more cheese. 

Cover again and allow to rise for one more hour. Bake at 425 degrees for about 30 minutes, checking periodically. As it bakes the outer edge of cheese will form a wonderful crispy crust. 

crust.jpg

"The Rockaway" Frittata Sandwich

Over the past few years I’ve been collecting food memories from my parents with the hopes of preserving them before they disappeared. One particular story from when my mom was a girl growing up in Brooklyn recently stood out to me as something I needed to explore further. Video is below.

D42A5822.JPG

“The trip out to Rockaway Beach was always by train. We took the L to Myrtle Ave where we transferred to a train to Jamaica Station. There we transferred again and took another train over the causeway. The long rides were always fun, hopping around with our friends. I tagged along with my older sister Josephine who was ten years my senior. We would pack the leftover frittatas from the night before and would be the envy of all the friends with their plain old bologna sandwiches.”

old photos.jpg

Today a bacon, egg, and cheese on a round roll is one of the more ubiquitous breakfast sandwiches in the Northeast. Through the memory my mom shared, and the reimagined sandwich that followed I somehow arrived back at that classic combination - and dare I say made it even better. This version was a pepper, potato, scallion, bacon and cheese frittata served on a pillow of thick focaccia with flaky sea salt and will definitely be repeated.

The Fritatta:

All of the ingredients should be precooked before the introduction of the eggs. This will ensure everything is tender and perfectly cooked when you remove it from the oven.

If using potatoes, break them down into small pieces and boil for a few minutes. Drain them and let them air out for a few minutes while you work on something else. Once they’ve lost a lot of their moisture, I saute them in olive oil until crispy and set aside.

Mix together all of the cooked ingredients in your skillet and bring up to medium heat. Sprinkle in shredded cheese over the entire mixture. Pour in your mixed eggs so it covers the entire surface. You’ll need to use your best judgement depending on the size of your pan and the amount of ingredients you’re using. Sprinkle more cheese on the top of the entire surface. Bake in the oven at 375F for 20 minutes, or until fully cooked through in the center. You can finish it off by crisping it up under the broiler for another minute or so.

bottom.jpg

The focaccia recipe was an adaptation of the sesame sourdough rolls I have been making recently, with increased hydration. Recipe can be found here. You can really dress the sandwich up with anything but I like the combination of spicy aioli and baby arugula. Crumbled sausage also works really well as an alternative to the bacon.

bread slicing.jpg
fritatta edge.jpg
mom with sandwich.jpg

Sourdough Focaccia

This is my baseline focaccia recipe. From here, I will often tweak the flour blend to incorporate more whole wheat into the dough, but this works well using plain old all purpose flour. This is a 79% hydration dough which can be baked directly in an oiled pan, or directly on a pizza stone.

Feed your starter appoximately 5-6 hours before you’re ready to build your dough. This recipe is designed to do a bulk fermentation at room temperature overnight so I aim to start building the dough around 7pm. Mix together 420 g of water and 530 g of all purpose flour, cover and set to autolyse for up to six hours. Make sure to incorporate all the flour so there are no dry spots. I generally do this anywhere from 3-6pm in the afternoon. Add 15 g of salt and 90 g of active sourdough starter and start working into the dough with your hands or with a rubber spatula until more or less homogenous. Let rest/relax for 30 minutes. You’ll want to fold the dough at least two more times (with your hands) over the course of the next 1 - 2 hours to develop the gluten. If you have time to continue to repeat folds until you’re ready to go to bed, it will result in a superior structured crumb. By the end the dough should be very smooth and should not stick to your hands while folding. Cover and rest overnight at room temperature (approximately 10 hours). 

focaccia stack.jpg

In the morning transfer the dough to well oiled pan. Spread the dough out so it has a uniform thickness. Drizzle more olive oil on top of the dough. Use the tips of your fingers to press down into dough to create little pockets. Sprinkle with flake salt and herbs (if you like). Let proof in the pan (covered) for about another 2 hours. You should observe big gas bubbles forming, and the dough should be very soft and pliable.

Set oven to 450F. Bake for 20 - 25 minutes until golden brown and well risen. Remove from oven and allow to cool briefly.

focaccia dough.jpg

Shredded Short Rib Sandwich on Wood Fired Sourdough Roll

Growing up in a home of Sicilian immigrants my food experience was very much influenced by the traditions that my parents and grandparents brought with them to America. Rustic and at times unusual foods that were part of my daily life. There were also instances where the Italian and American influences came crashing together in delicious ways.

short rib sandwich.jpg

I have vivid memories of standing around the kitchen watching my Nonnas prepare red sauce and anxiously waiting for them to make me a sauce sandwich - which simply, is a big ladle full of hot sauce slathered on a piece of Wonder bread and topped off with another slice. The weight of the sauce would practically dissolve the flimsy pieces of bread but it was always one of the most satisfying bites of food that I can remember. It’s kind of the perfect representation of my entire food experience.

ribs in fire.jpg

This sandwich is my homage to them, a sauce sandwich made with a deep and decadent 5 hour meat sauce with shredded short ribs, topped with grated caciocavallo, basil, and served on a wood fired sourdough roll. This is serious business.

ribs in sauce.jpg
wood fired.jpg
crumb.jpg

Sourdough Sesame Rolls

I’ve been fine tuning this recipe for a few months and finally getting to a good place. It was a lot of trial and error, and ultimately deciding that I should remove all added fats (olive oil or butter) to let the fermentation happen unaltered. I also ratcheted up the autolyse time up to 6 hours which seemed to have a big effect on the airiness of the crumb and softness of the bread.

crumb.jpg

Mix together 400 g of water and 530 g of bread flour and set to autolyse for up to six hours. Add 20 g of salt and 90 g of active sourdough starter and start working into the dough with your hands or with a rubber spatula until more or less homogenous. Let rest for 45 minutes. You’ll want to fold the dough two more times (with your hands) over the course of the next 1 - 2 hours to develop the gluten. By the end the dough should be very smooth and should not stick to your hands while folding. Cover and rest overnight at room temperature. 

In the morning transfer the dough to a clean working surface dusted with flour. Divide the dough into 4 - 6 equal parts depending on the size and shape of the rolls you’re making. Shape each piece being careful not to degas the dough. Set the balls onto parchment paper and sprinkle each piece with plain sesame seeds or poppy seeds depending on your preference. Cover and let rise for 2 - 3 hours.

rolls.jpg

Set oven to 450F. Using a bread laim, score each dough ball. Bake for 30 minutes with a heat proof bowl of water in the oven to create ambient moisture. Remove rolls from oven and allow to cool before slicing. 

roll crumb.jpg

Wood Fired: Because of the difficulty of keeping consistency in a wood fired oven, I parbaked the rolls in a conventional oven for 20 minutes, and then moved them into the wood fire to finish them off. This reduces the risk of burning but gives the bread a nice rustic flavor and crust.

proffing.jpg

Traditional Fried Cardoon

The mysterious cardoon. In the same family as thistle and artichoke, it has been cultivated in the Mediterranean for centuries. It was one of those foods that I occasionally encountered growing up but never fully understood - food from the “old world” that became uncommon as immigrants became more Americanized overtime. Video about the process below.

fried cardoon.jpg

But this was the year that I finally decided to grow some myself. When you read about how to cultivate and prepare it, you ask yourself why you’re going through the trouble. The plant is covered in sharp spines and needs to be handled with gloves. The only edible part (when mature) is the most tender part of the stalk, but only after it is peeled, blanched, and cooked. It’s a lot of work but it also posed a new challenge.

cardoon bundle.jpg

I mostly remember it being breaded and fried so I decided to keep it classic and simple with the hopes that the artichoke-like flavor carried through. I’m not sure that cardoon will be taking up valuable real estate in my plot next season but it was a worthwhile experiment this year. 

stalks.jpg

Panelle Sandwich on Rustic Wood Fired Sourdough

Panelle is one of those iconic street foods that is ubiquitous in Palermo. Chickpea flour, seasoned with salt, pepper, olive oil, and parsley. Fried quickly until crispy and served with fresh squeezed lemon, sometimes in the form of a sandwich. It’s so simple and yet feels exotic. This version was served on top of a rustic wood fired sourdough bun baked in the Ooni Pro along with charred lemon. Video about the process below.

panelle sandwich 1.jpg
charred lemon.jpg

Lemons charred right in the coals of the oven.

rustic buns.jpg

The sourdough buns were wood fired at approximately 425F for 20 minutes. Temperature regulation remains a challenge in the wood fired oven. For more consistency a traditional convection oven works great.

Sicilian Cuccuzza "Snake Squash" Pizza

They are odd looking things that often grow upwards of four feet long, and every summer you can count on finding cucuzza in a Sicilian’s kitchen - their pale green forms flopped comically on the counter. In the garden they sprawl across anything they can grab onto, suffocating everything in their path. They are subject of a Sicilian proverb; Falla come vuoi, sempre cucuzza è which translates to “However you cook it, it’s still just a squash.” But when prepared simply with fresh ingredients, their mild flavor can be elevated. They usually find their way into pastas and light summer soups - but why not pizza?

cuccuzza pie.jpg

This growing season, life got in the way, and the cuccuzza crop was not very good. But I was able to harvest two petite squash from some pots on our partially shaded deck. I look forward to restarting our efforts next season and having a crop that we can all be proud of.

cuccuzza eith hand.jpg

Nashville Hot Chicken of the Woods

Experiments in the mushroom lab. This is a play on the classic Nashville Hot Chicken sandwich where I’ve replaced the chicken with wild Chicken of the Woods mushrooms. After finding a perfect early season Chicken of the Woods I spent several months thinking about this idea. Weeks went by without finding any more good specimens. I was always a few days too late. Finally I came across a small grouping of laetiporus sulphureus right when I was feeling most defeated. Video about the process below.

sandwich 2.jpg

It was prepared in the same way that you would use real chicken, battered in a mix of flour, salt, pepper, buttermilk, and homemade one-year vintage fermented hot sauce. Deep fried at 350F and slathered with rendered duck fat, paprika, garlic powder, cayenne, and brown sugar. Then it’s layered onto homemade sourdough buns and topped with butter pickles and red slaw. 

sourdough buns.jpg

The buns are a work in progress but getting closer to the softness and texture that I’m looking for.

pickles and slaw.jpg

The butter pickles and the coleslaw both used a homemade perry vinegar which is aromatic and on the mild side.

hot sauce mash.jpg

The hot sauce I used was from a 2018 batch of fermented chilies and garlic. After being milled it’s blended with 50% white vinegar and stored in the refrigerator. Each year I use a slightly different combination of peppers but this year I’m growing Cornito Rossos, Paper Lanterns, and Arapahos.

chicken spread.jpg
chicken on tree.jpg

Overall, it wasn’t a bad first attempt but it definitely needs some work. After getting a lot of feedback on the recipe it seems like the mushrooms should be water-sauteed briefly before they are battered and fried to reduce the amount of retained oil and to make the interior more tender. Definitely a suggestion that I will take into consideration next time around.

Slow Pizza : 120 Days Start to Finish

Firing this pizza in the @oonihq Pro oven only takes about 60 to 90 seconds. But this peak season pie, built around sweet golden cherry tomatoes, padron peppers, and basil took 120 days to make - from the planting of each seed, to the transfer outdoors, and to the ultimate harvest when the vegetables are in peak form. It’s a pie that only happens during a short window during the summer, and with the addition of soppressata - it’s one that is essential every year at the height of the summer season. Video about the process below.

garden pie.jpg
gardening triptic.jpg

Chanterelle and Pesto Pizza

Summer is in full effect. With a bounty of chanterelles the next obvious thing to do was pizza. This pie features fresh chanterelles, basil pesto, shredded mozzarella, and nastrutium flowers. I wanted to keep it limited to simple fresh ingredients and make the mushrooms really shine. The nasturtium flowers add a subtle sweet and peppery kick and I loved the way the mimic the shape and color of the chanterelles.

The crust is naturally leavened using a Ken Forkish (Flour Water Salt Yeast) recipe as the basis of the dough with some slight timing deviations. Wood fired in the Ooni pro in approximately 60 seconds. I made a short video about the forage and pizza making process. (Embedded below)

chant pesto pie 2.jpg

These were the best chanterelles that I’ve ever found - a large patch of Cantharellus Lateritius in western New Jersey. They were in perfect condition and we came home with a few bags full.

handful of chants.jpg
chants on counter.jpg

I highly recommend Flour Water Salt Yeast if you’re interested in making bread and pizza dough. There are recipes that use commercial yeasts and wild yeasts and all recipes are flexible and easy to adapt for real-world schedules.

chant pesto pie.jpg

Creamy Chanterelle Tagliatelle

After weeks of searching with limited results I finally found myself a proper patch of chanterelles. It was 100 F and muggy as s***, but I trekked out to check a spot I had a feeling about. After an hour of searching I caught a glimpse of the golden beacons on a steep hillside - cantharellus laterius, smooth chanterelles. It was enough to make a real meal and I wanted to make something simple that showcased the mushrooms.

creamy chant pasta.jpg
smooth chant.jpg

I decided to do a simple pasta dish, with an herb & cream sauce. After cleaning off the dirt I gently sauteed the mushrooms in butter, thyme, salt, and pepper. After about 5 -7 minutes I added in a generous pour of heavy cream and brought it to a light simmer for another 2 minutes. At this point the smell is incredible. To the pan I added the cooked tagliatelle, and tossed everything until the noodles were completed coated. After plating, I topped the dish with freshly grated parmesan and black pepper. 

chants on moss.jpg

This is a dish that can convert even the most discerning mushroom skeptics. See video below.

Grandma Style Pizza in Cast Iron Skillet

I’ve been fine tuning this wood fired cast-iron Grandma style pie and finally getting the hang of it. The line between Sicilian and Grandma style is thin, and generally defined by the thickness of the dough and how long it proofs in the pan. This version lives somewhere in the space in between, with a nice airy crumb but not overwhelmingly bready. Earlier iterations were a bit thinner, and in the future I may want to go back to a thinner crust. Video about the process below.

IMG_8951.jpg
IMG_8958.jpg
grandma in oven.jpg