Blood Orange & Pistachio Olive Oil Cake

Here’s a riff on my previous upside down blood orange olive oil cake which opts for a blood orange glaze instead of sliced fruit. It’s a little less fussy, but equally as impressive. The crushed pistachios are completely optional but make for a wonderful compliment to the citrus. Video of the process down below.

Ingredients

1 cup all purpose flour

½ cup whole wheat flour

1/2 cup cornmeal (coarse)

3/4 cup fine granulated sugar (caster) *regular white sugar works fine!

½ cup blood orange juice (freshly squeezed) + ¼ cup for glaze

2 tsp baking powder

1/4 tsp baking soda

1/4 tsp salt

3 eggs

1/2 plain yogurt (sour cream works well too)

1/2 cup olive oil

1 tbsp butter at room temperature

½ cup confectioner’s sugar (for glaze)

Chunky flake salt

1/4 cup crushed pistachios

Directions:

Set your oven for 350F.

Add the yogurt to the sugar and whisk together until incorporated. Add in the eggs and olive oil and continue to mix together. Add in all of the dry ingredients one by one and continue mixing. Finally whisk in the blood orange juice. 

Grease your baking pan liberally with butter and line with a sheet of parchment paper and add more butter to the top of the paper. Pour the batter into your pan. 

Bake for 30-35 minutes until done. If using a deeper rectangular pan, this may take 35-45 minutes. Use a toothpick to make sure it is fully cooked through. It should come out clean. Allow to cool for 15-20 minutes while you prepare your glaze. 

In a small bowl add the confectioner’s sugar. Slowly begin whisking in the remaining blood orange juice little by little until it has the consistency somewhere between maple syrup and icing. A little juice goes a long way. You should be able to drizzle/pour the glaze over the cooled cake and it should begin to firm up within a few minutes. Before it fully hardens, sprinkle the flake salt all over the surface. If adding crushed pistachios, now is the time to sprinkle on a layer across the top.

Brik with Wild Spring Greens & Morel Mushrooms

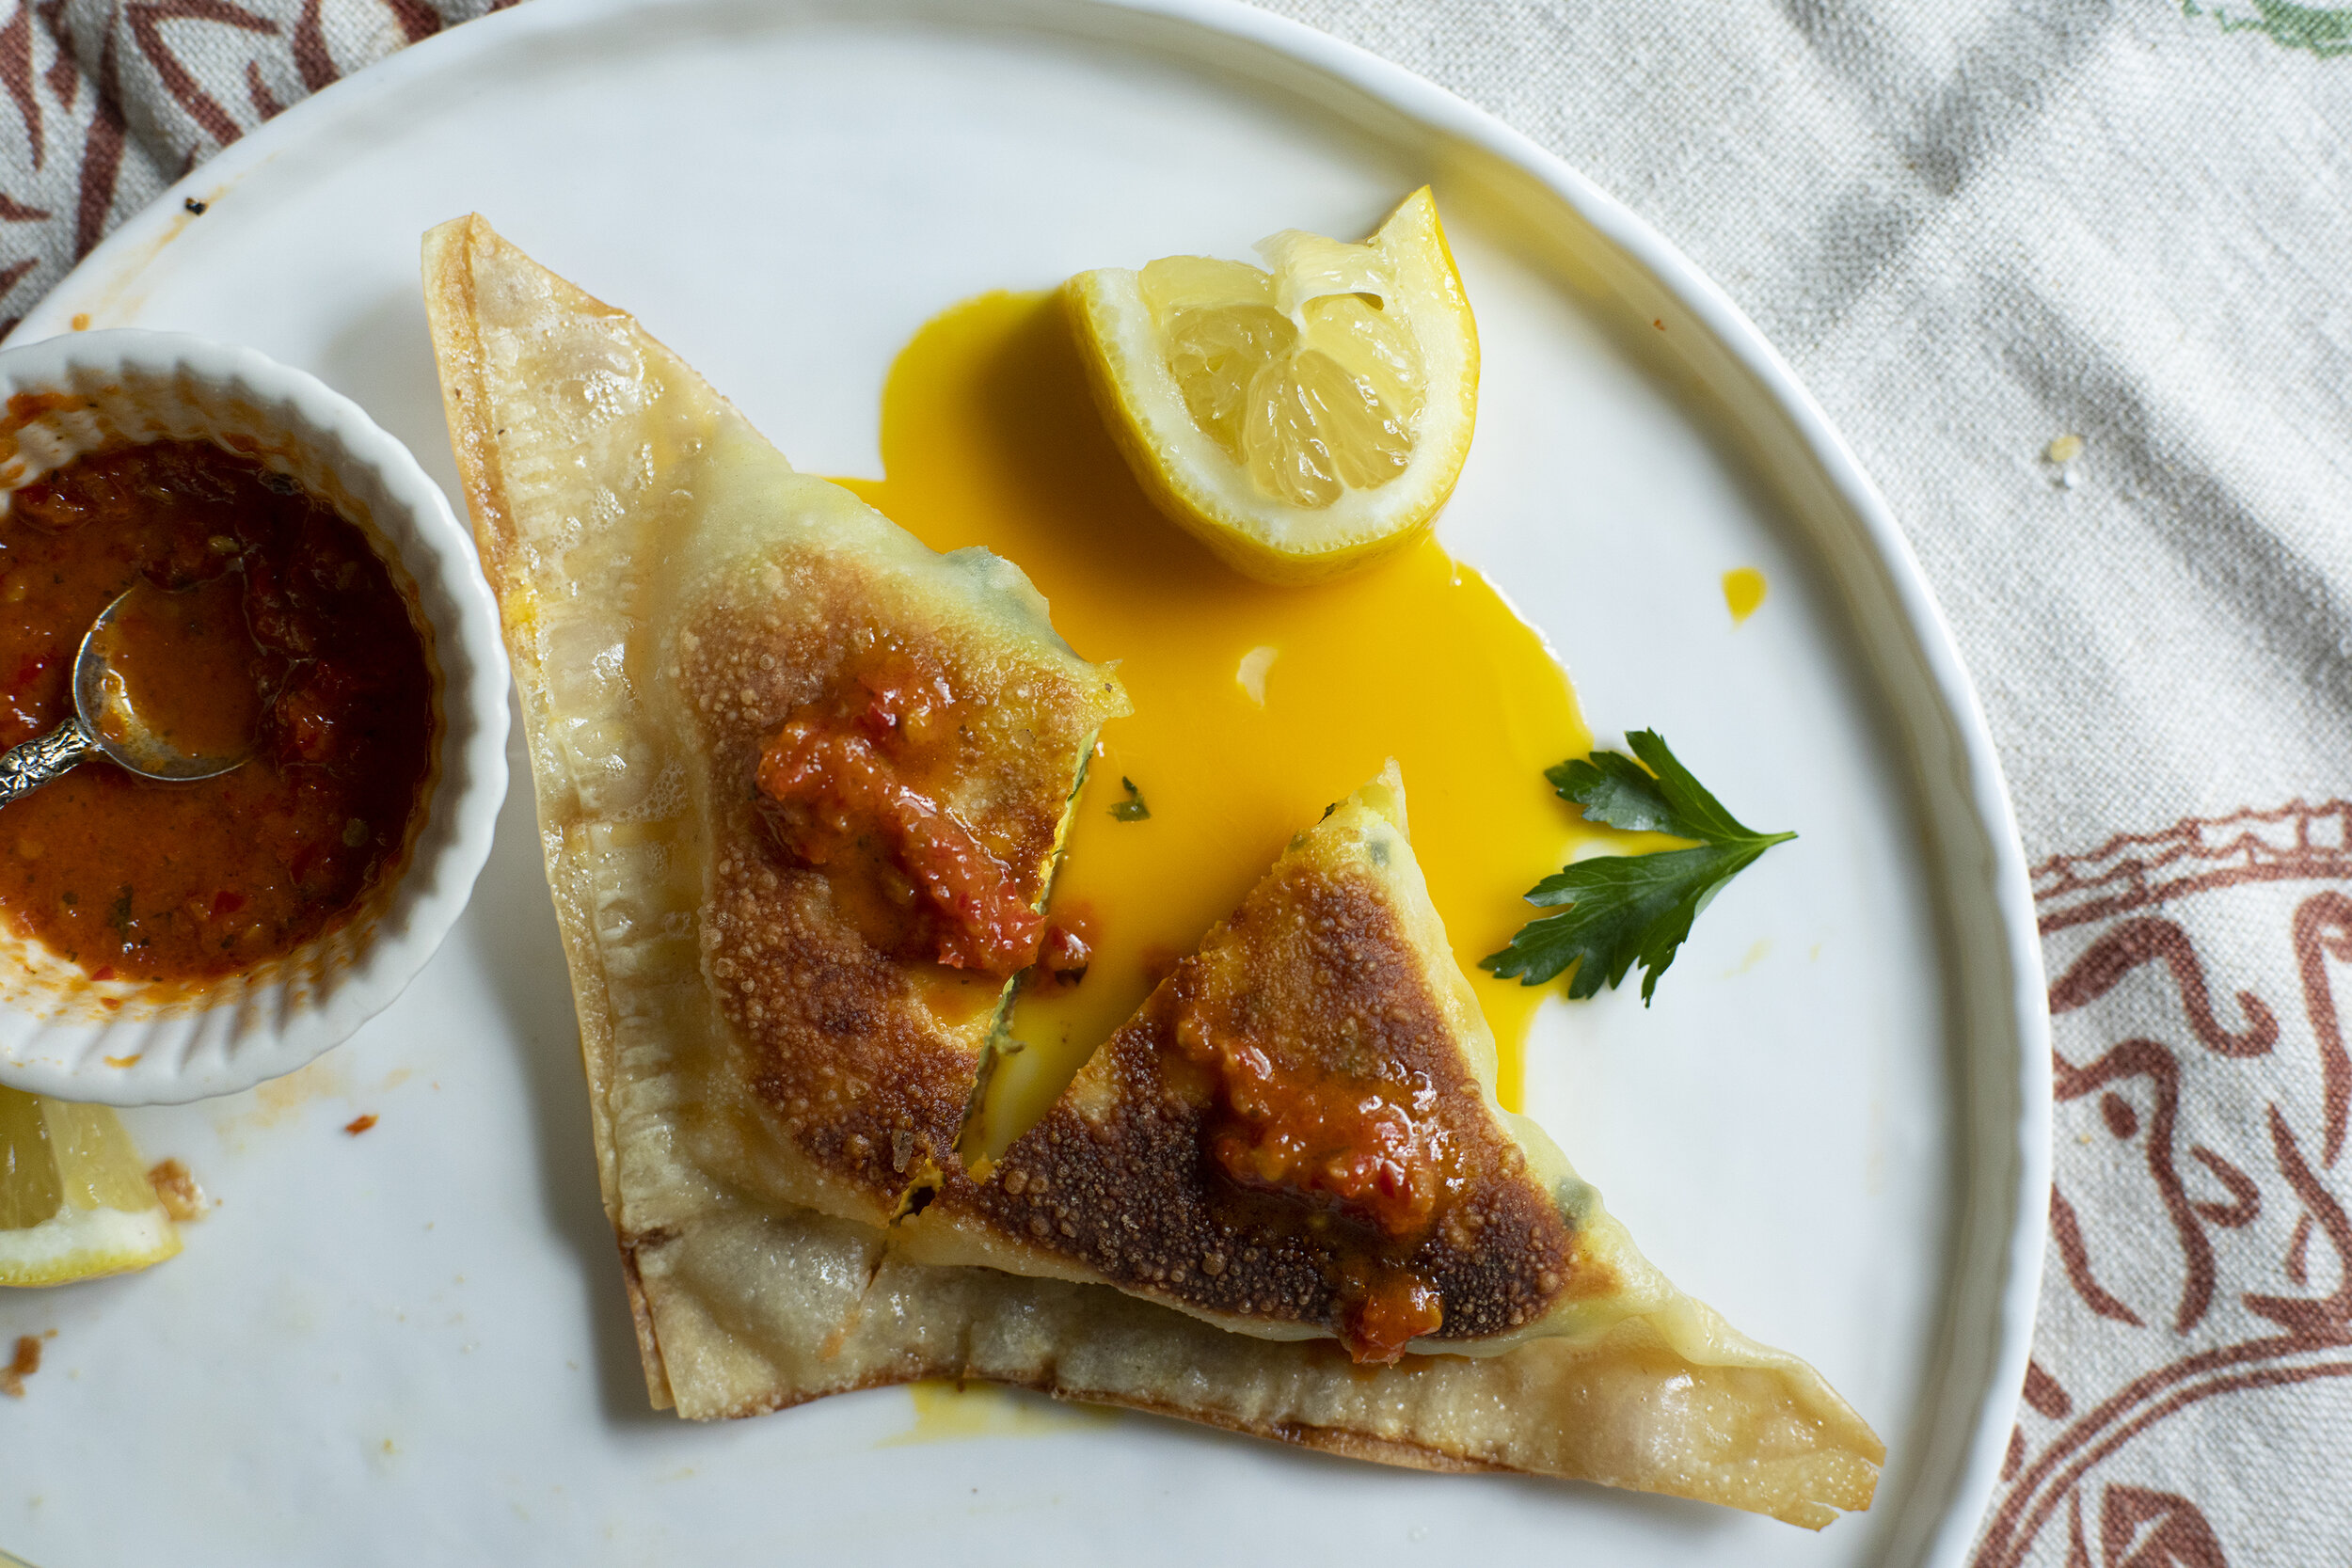
Brik is a popular north African street food with many different regional variations. The version I’ve come to love are commonplace in Tunis, where my dad spent the first 14 years of his life. It wasn’t until more recently that I truly realized how special they are. Tumeric spiced potatoes, capers, chopped onion, and a whole egg packed into a delicate pastry dough, fried until crispy, topped with some harissa or fermented bomba paste and a squeeze of lemon. They are deeply satisfying. Crunchy on the exterior and velvety on the inside.

The version here layers in some freshly foraged ramp leaves and morels - but any sort of fresh herbs or greens (think nettles, wintercress, spring onions, etc) would work really well in this format. The recipe here features a homemade pastry dough - mixed together like a crepe batter and painted onto a nonstick pan on a double boiler. If you don’t want to make a fuss, any store bought spring roll wrappers work really well too.

Recipe as follows and video of the whole process below.

brik 2.jpg

The Pastry Dough (Warqa)

Ingredients

100 g 00 Flour

150 g semola flour (or similar)

1 tbsp olive oil

1 tsp salt

450 g room temperature water

*makes about 10 8” circles

Directions

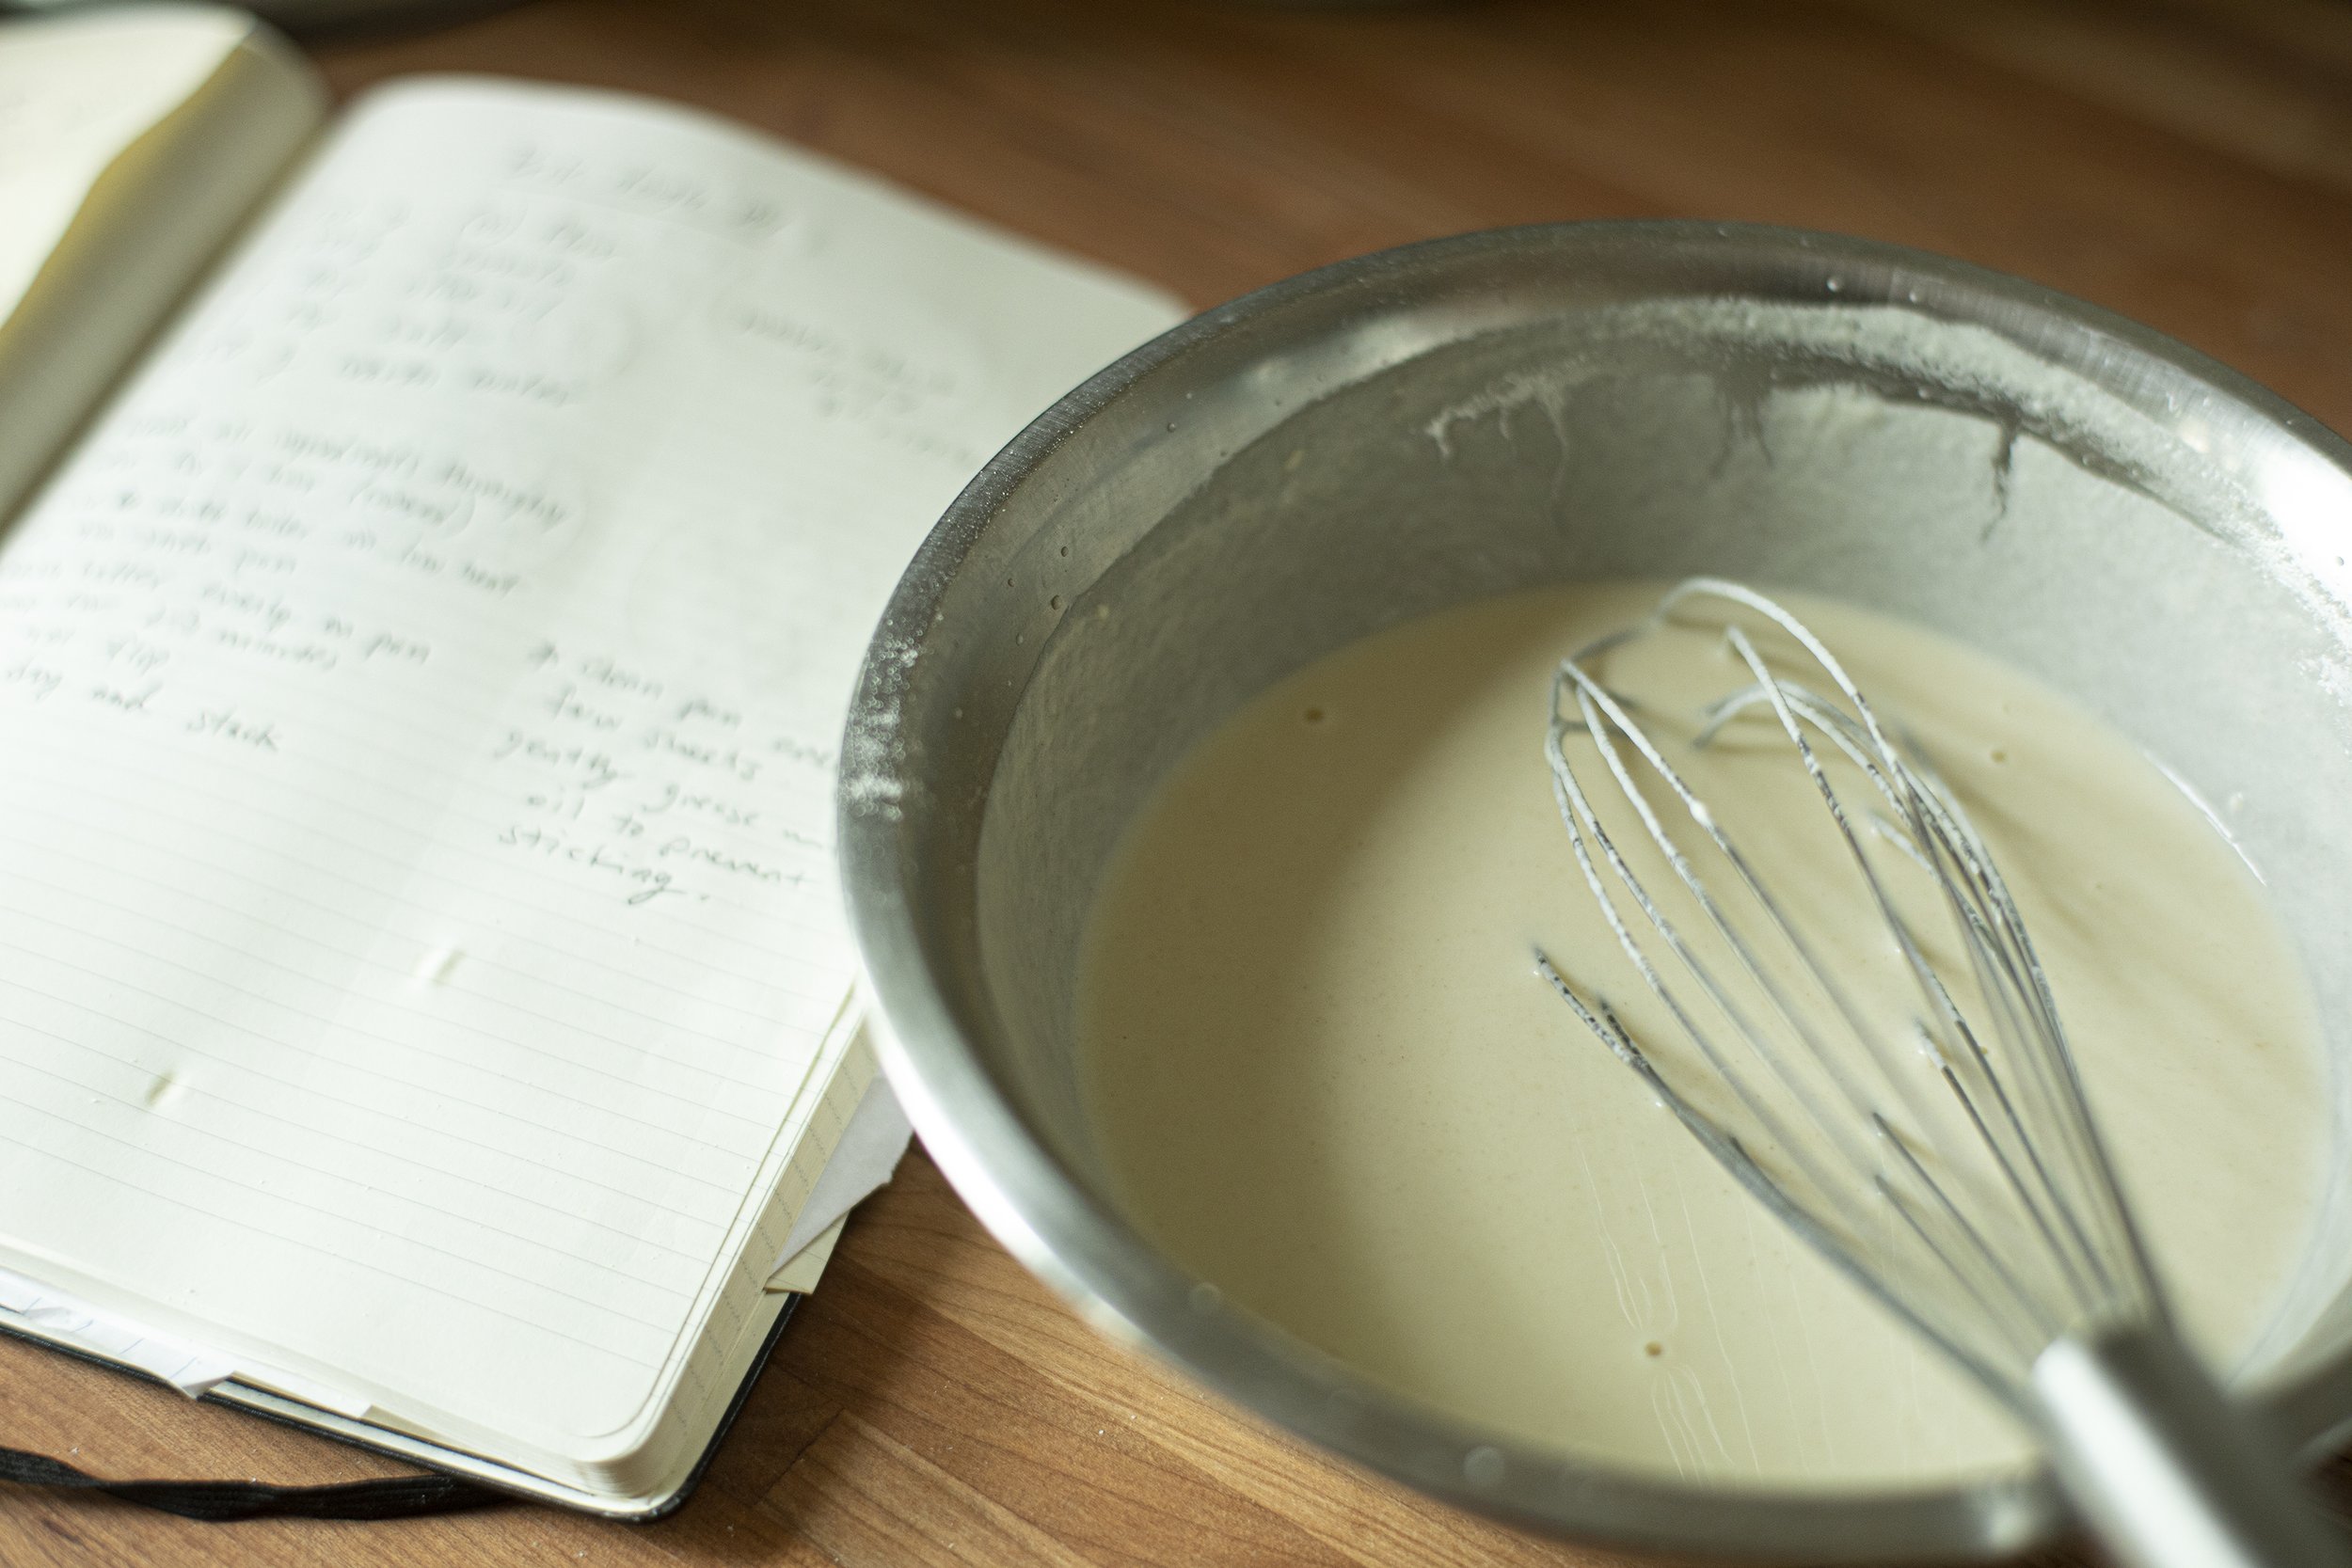
  1. Mix all ingredients together in a bowl and whisk together until there are no clumps. You can use a food processor for this step as well.

  2. Cover and allow to rest for 1 hour.

  3. Set a non stick pan over a pot of boiling water to create a double boiler.

  4. Lightly coat the surface with olive oil. This step is important and you’ll want to ensure the surface is clean and oiled before each time you make a sheet of dough.

  5. Using a brush, “paint” on a thin layer of the batter across the entire surface. Work quickly and make sure there are no holes as you go. The batter will quickly start to solidify on the hot pan. After about 3 - 4 minutes the dough should be ready. Use a spatula or utensil to peel the dough away from the edges of the pan, carefully remove the pastry dough and transfer to a clean work surface to air dry. Repeat the process until all the batter is gone.

  6. After air drying, they can be stacked and if done properly they will not stick to one another. Wrap in a clean towel and set aside until ready to cook.

The Brik

Ingredients

About 6 medium yellow potatoes (peeled)

1 tbsp tumeric powder

1 tsp salt

About 6 - 8 ramp leaves (or finely diced red onion)

8 oz of fresh morels (or similar mushroom)

2 tbsp chopped capers

1/4 cup good olive oil

Directions

  1. Bring a pot of water to a boil and boil the potatoes until fork tender (about 20 minutes).

  2. Drain and set aside to cool.

  3. In a medium skillet saute the diced morel mushrooms in some olive oil. They will reduce in size significantly as they cook. Season with salt and pepper to taste. Cook for about 10 minutes until they start to form a nice brown color. Add chopped ramp leaves and saute for a few minutes until the mixture is well incorporated and fragrant.

  4. Mix the ramps and morels with the potatoes and use a fork to smash it all together.

  5. Add the capers, tumeric, and olive oil, a little salt and pepper and continue mashing.

  6. The mixture should be slightly chunky and glistening with the olive oil. Here you can add some harissa to the mixture if you like it spicy.

  7. Bring a nonstick pan to medium heat and cover the bottom with olive oil.

  8. On a clean plate, lay down a sheet of the pastry dough. On one half of the dough spoon on the potato mixture and carefully create a well in the center large enough to crack an egg in the middle and leaving room along the edges to fold over.

  9. Brush on an egg wash along the edges, fold the circle in half, pressing the edges to seal and carefully slide the brik into the hot pan. Fry for about 3 minutes until crispy and golden brown. Using a spatula, carefully flip the brik over and fry the other side for another 3 minutes until golden brown.

  10. Transfer to a paper towel lined dish to absorb excess oil and allow to cool for a few minutes before eating.

  11. Serve with harissa, fermented bomba, and a squeeze of lemon.

brik 1.jpg

Pizza al Fumo

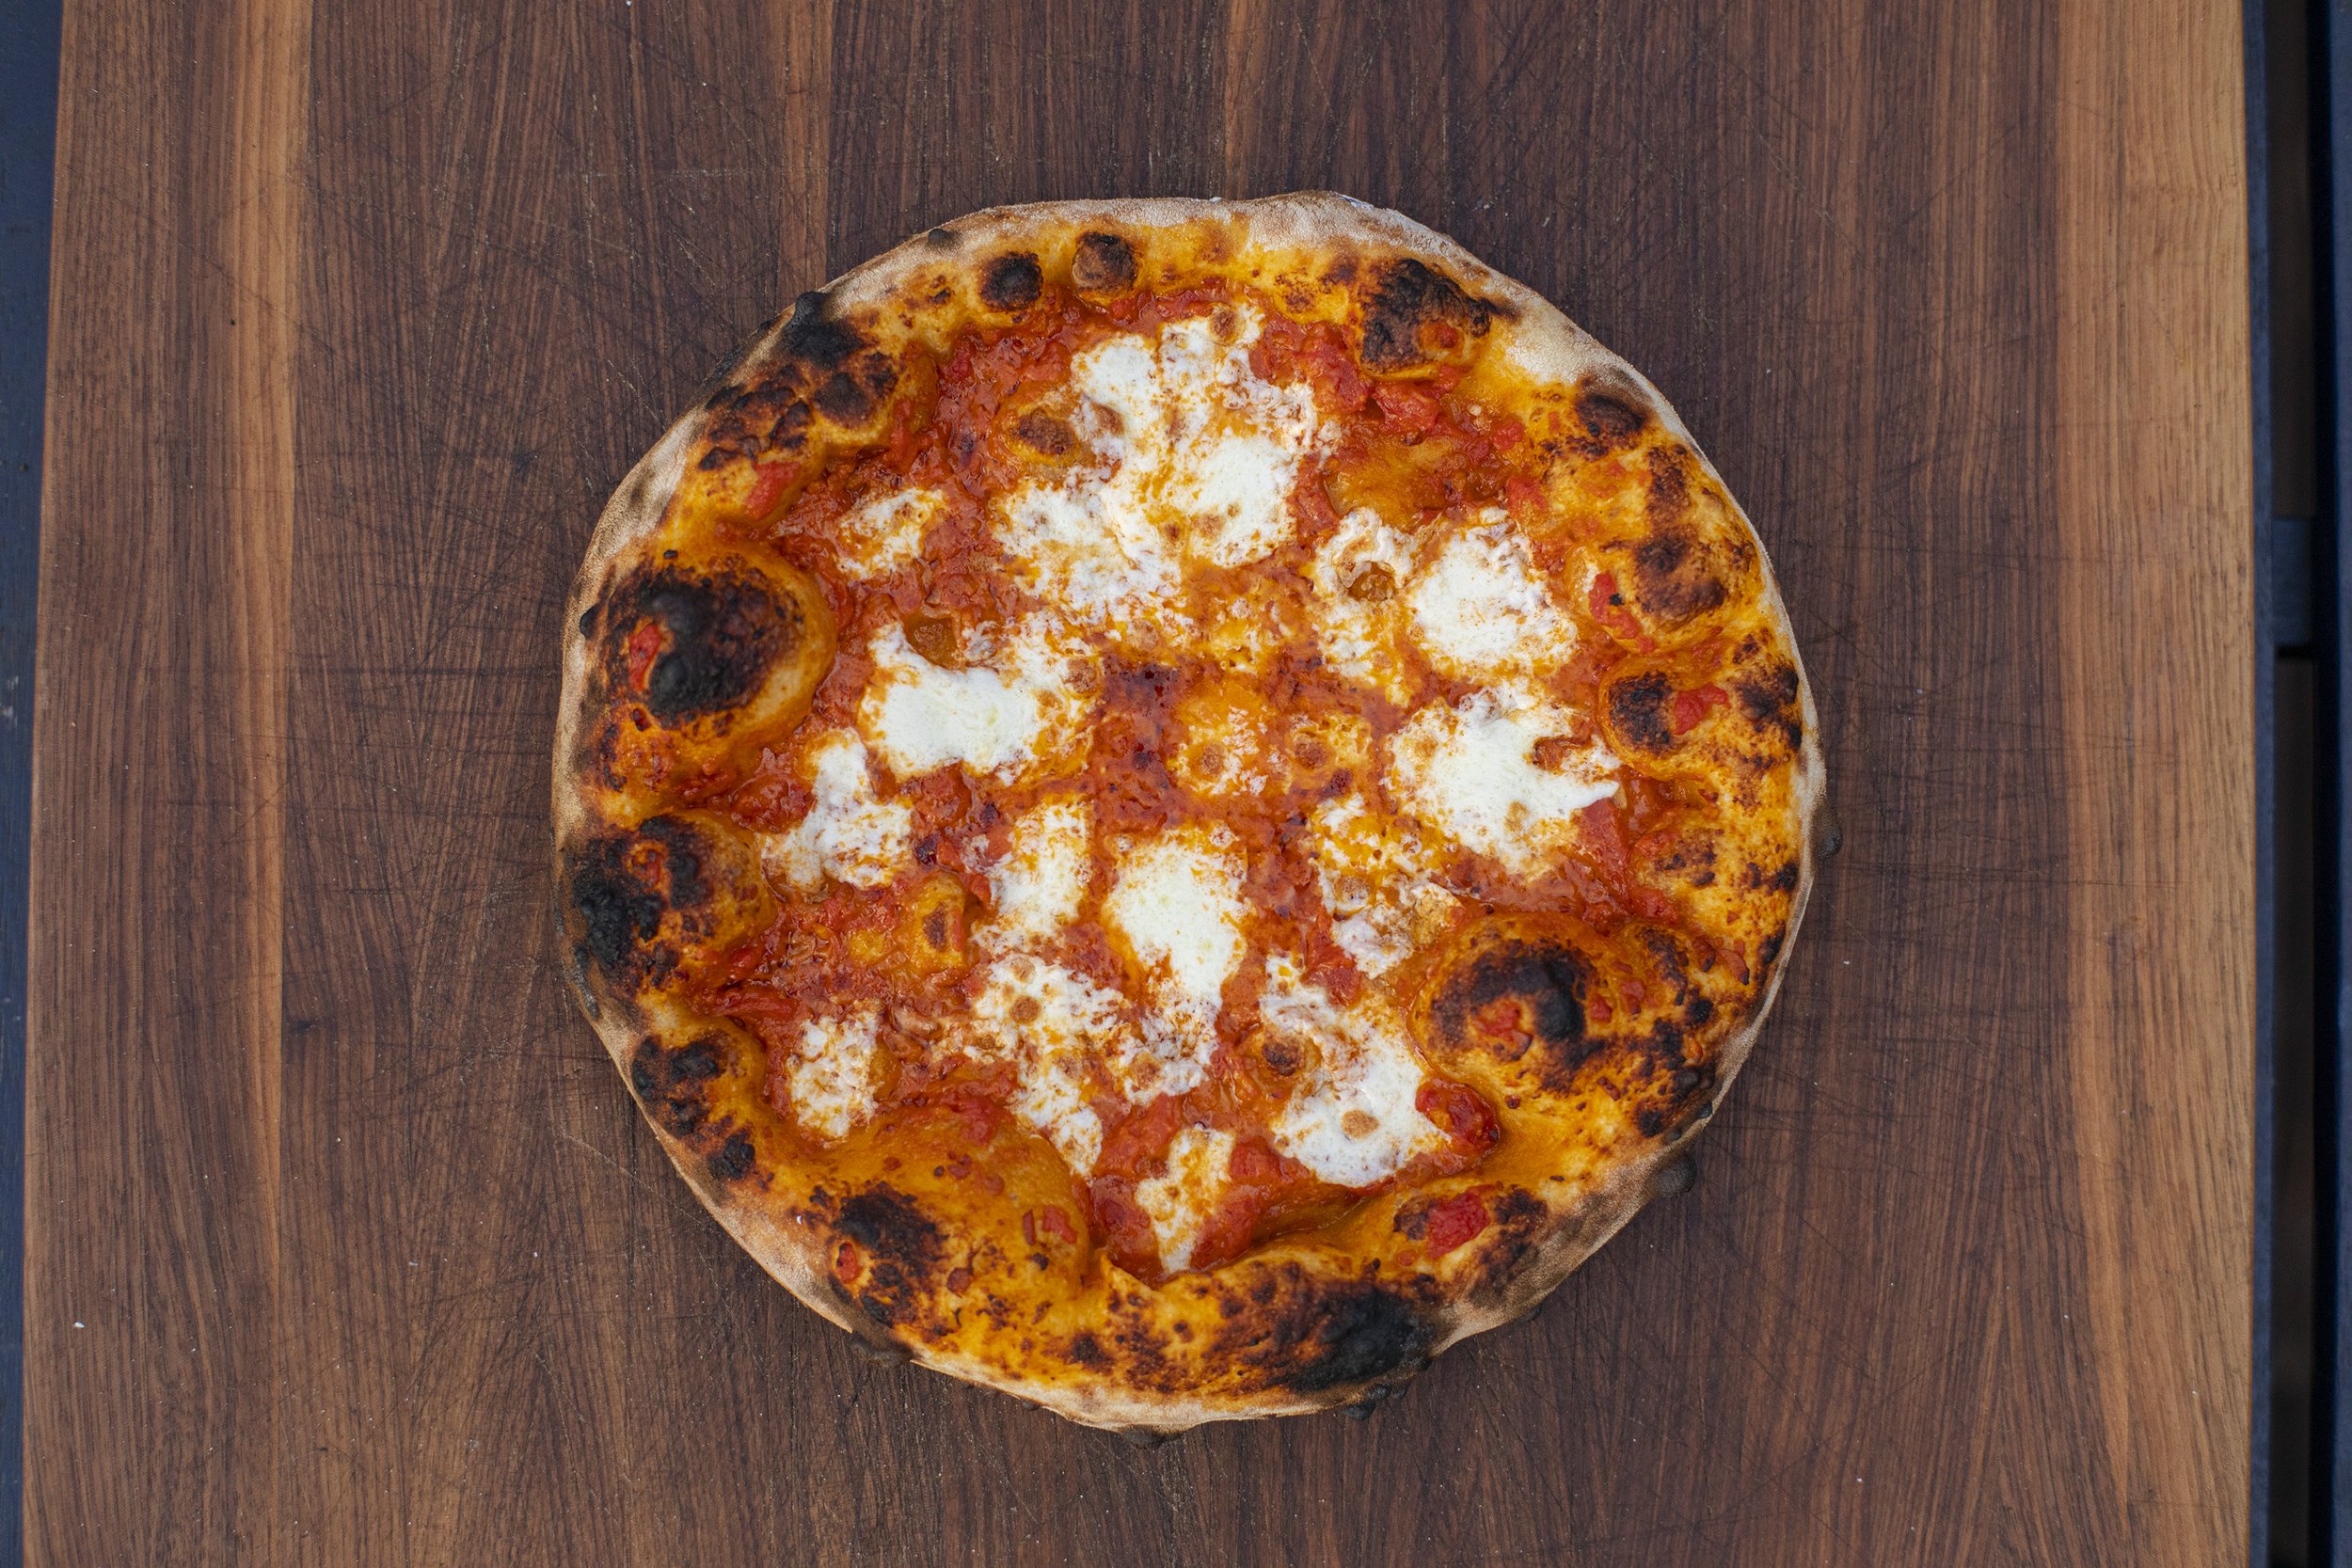
A pizza inspired by the Tuscan pasta dish from Cortona called Pasta al Fumo, which translates to "smoked pasta." The smoke flavor comes from the smoked bacon which is cooked down with rosemary and garlic in a tomato cream sauce. Some folks add vodka, but my preference is to omit it (politics aside). It's traditionally served with a type of eggless pasta called pici, sometimes penne, but I wanted to see how it translated into a pizza format. Spooned on top of a 00 + AP + Maiorca + semola rimacinata cuore dough, and topped with mozzarella ciliegine + grated pecorino and some good EVOO. This came out even better than I could have imagined.

The Sauce

Ingredients:

  • 2 tablespoons olive oil

  • 3 cloves garlic (finely minced)

  • 3 sprigs of rosemary

  • 1/2 cup of smoked bacon (or smoked pancetta) finely minced

  • high quality tomatoes (about 1 cup, crushed by hand)

  • 3 tablespoons tomato paste

  • 1/2 cup heavy cream

  • salt to taste

Directions:

  1. Bring a skillet to medium/low heat and add the olive oil.

  2. Saute the minced garlic, bacon, and rosemary for about 5 minutes until there is a nice color on the bacon and the fat begins to render down. Be mindful not to burn the garlic if the pan is too hot.

  3. Add the tomato paste and incorporate into the mixture.

  4. Add the crushed tomatoes and continue to simmer for another 5 minutes.

  5. Slowly add in the cream, stirring constantly. Simmer for another 5 minutes.

  6. Remove from the heat and remove the rosemary from the sauce. Set aside and allow to cool. Can be made up to 3 days in advance.

The Pizza

Ingredients:

  • Al fumo sauce

  • Good olive oil

  • Pecorino romano

  • Dough of your choice

Directions:

  1. I’m not including the entire dough recipe here yet although I may add it eventually. You can use whatever dough recipe you prefer. For this pizza I am using a combination of King Arthur all purpose flour, and some Sicilian Maiorca and Semola Rimacinata Cuore.

  2. Stretch your dough and prepare for the toppings.

  3. Spoon on a layer of the al fumo sauce evenly across the surface leaving the edges clear.

  4. Break apart the mozzarella with your fingers, tearing little roughly shaped pieces. Distribute evenly across the pizza, being mindful not to overload it. Leave plently of space for the cheese to melt together with the sauce.

  5. Grate on some Pecorino romano across the top and drizzle with a high quality olive oil

  6. Slide the pizza on your peel and launch directly into your oven.

  7. If baking at high temperatures in a wood fired oven, the pizza should be done in about 2 minutes.

  8. If baking indoors in a conventional oven, at 500F, this will take roughly 7-8 minutes.

Creamy Polenta with Caramelized Mushrooms and Shallots

This caramelized mushroom and shallots over creamy polenta is easy, quick, only uses two pans, and features shiitakes from the Foraged Feast, but any mushrooms would work well in this dish.

The mushrooms

Ingredients

8 oz shiitake mushrooms

Fresh sage leaves (about 10 whole leaves)

3-4 Shallots

2-3 cloves of garlic (thinly sliced)

Olive oil

2 tbsp butter

Splash of white wine (about 1/4 cup)

Salt & Pepper


Directions

1. Set your oven to 400F.

2. Thinly slice the mushrooms and shallots into slivers.

3. Spread them out evenly across a large well-oiled sheet pan.

4. Evenly distribute the sage leaves across the pan.

5. Drizzle with more olive oil, toss everything to lubricate, and then spread everything out evenly again in the pan.

6. Season with salt and pepper.

7. Bake at 400F for 15 mins.

8. Remove from the oven and add the butter, a splash of white wine if you have it, and the sliced garlic. Toss, and spread evenly again in the pan.

9. Bake for another 10 minutes until fragrant and nicely caramelized.

The Polenta

Ingredients

3 cups whole milk

3 cups stock

1 cup of grated Provolone Picante

4 tbsp butter

1 cup of cornmeal

salt to taste

Directions

1. Bring the milk and stock to a low boil in a heavy duty pot.

2. Slowly add the cornmeal and stir in gradually. Reduce the heat to a gentle simmer.

3. This recipe requires a bit of constant attention, as you'll want to continually stir the polenta so it doesn't clump up and stick to the bottom of the pot.

4. After about 25 minutes, add the cheese, butter, and salt. You can adjust with more liquid if you find it too thick.

5. After another 5 minutes, the polenta should be nice and creamy. It will firm up as it cools down.

6. Remove from the heat.


The final plate

1. Ladle a big spoonful of polenta into each bowl.

2. Top with the mushrooms and shallots. The sage will now be wonderfully crispy and can be used as an edible garnish on each plate.

3. Finish each plate with fresh cracked pepper and more grated cheese of your choice.

Wild Mushroom Lasagna with Black Trumpet Bescamel

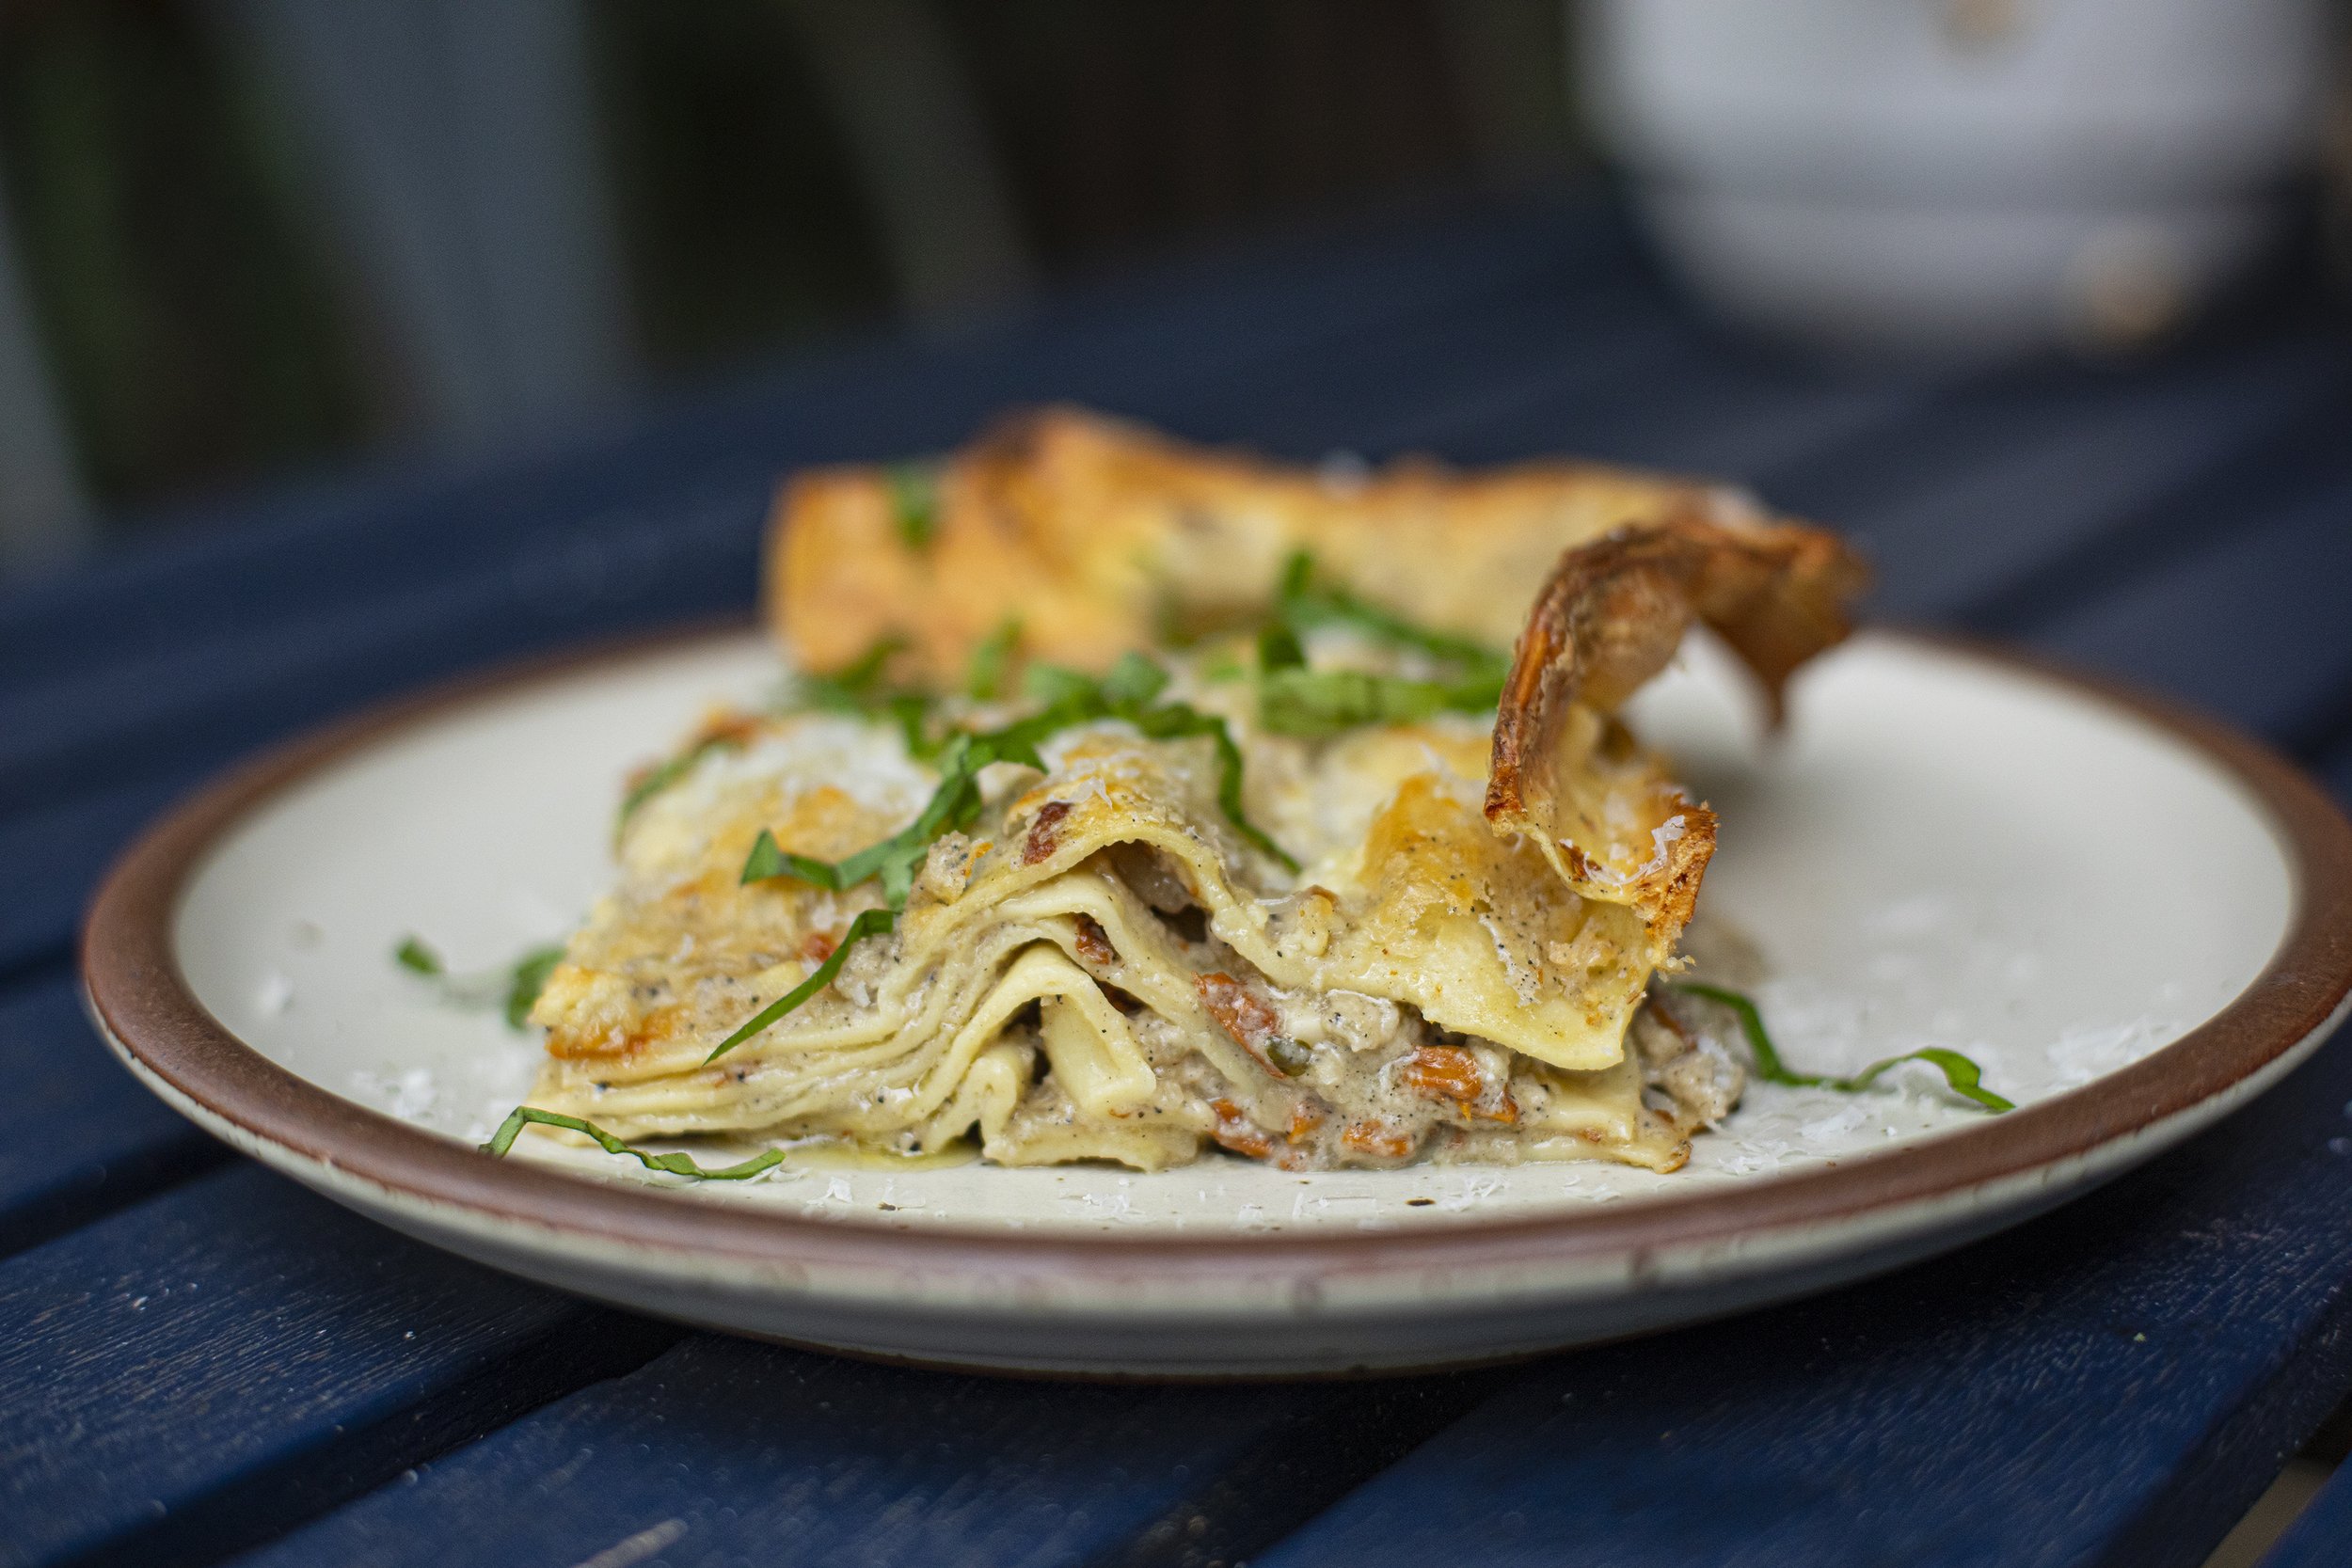
A wild summer mushroom lasagna with a black trumpet bechamel. The foundation of the recipe was heavily inspired by Evan Funke ‘s American Sfoglino which is a great book for anyone obsessed with pasta. This was decadent yet subtle - nothing beats a big fat corner of lasagna with crispy edges. Full recipe below along with a detailed video of the process.

The Pasta

Ingredients

454 g 00 Flour

258 g eggs (beaten before mixing)

*makes roughly 5 layers of 9 x 13 inch pasta. Four of those layers can be cut exactly to the size of your pan, and with the scraps you can assemble the 5th layer.

Directions

  1. Mix the flours and dump out the weighed amount onto a clean work surface.

  2. Use your hand to form a well (like a volcano) in the center of the flour.

  3. Carefully pour your eggs into the center and begin slowly mixing together with a fork. Gradually, carefully, work your way all around to incorporate the eggs with the flour, without breaking the outer wall. A bench scraper is a handy tool to have at this point if you have one.

  4. After about 5 - 10 minutes it will start coming together into a shaggy mass. Begin using your hands to knead the dough together. Work diligently for another 5 minutes until it is no longer shaggy.

  5. Use the edges of your hands, knuckles, to work the dough until it starts to form a smooth ball. Knead it, applying pressure, into the work surface. Fold it. Knead it again. After about ten minutes it should be smooth and ready to rest.

  6. Cut the dough into two and wrap each in plastic wrap. Set into the fridge for at least 30 minutes.

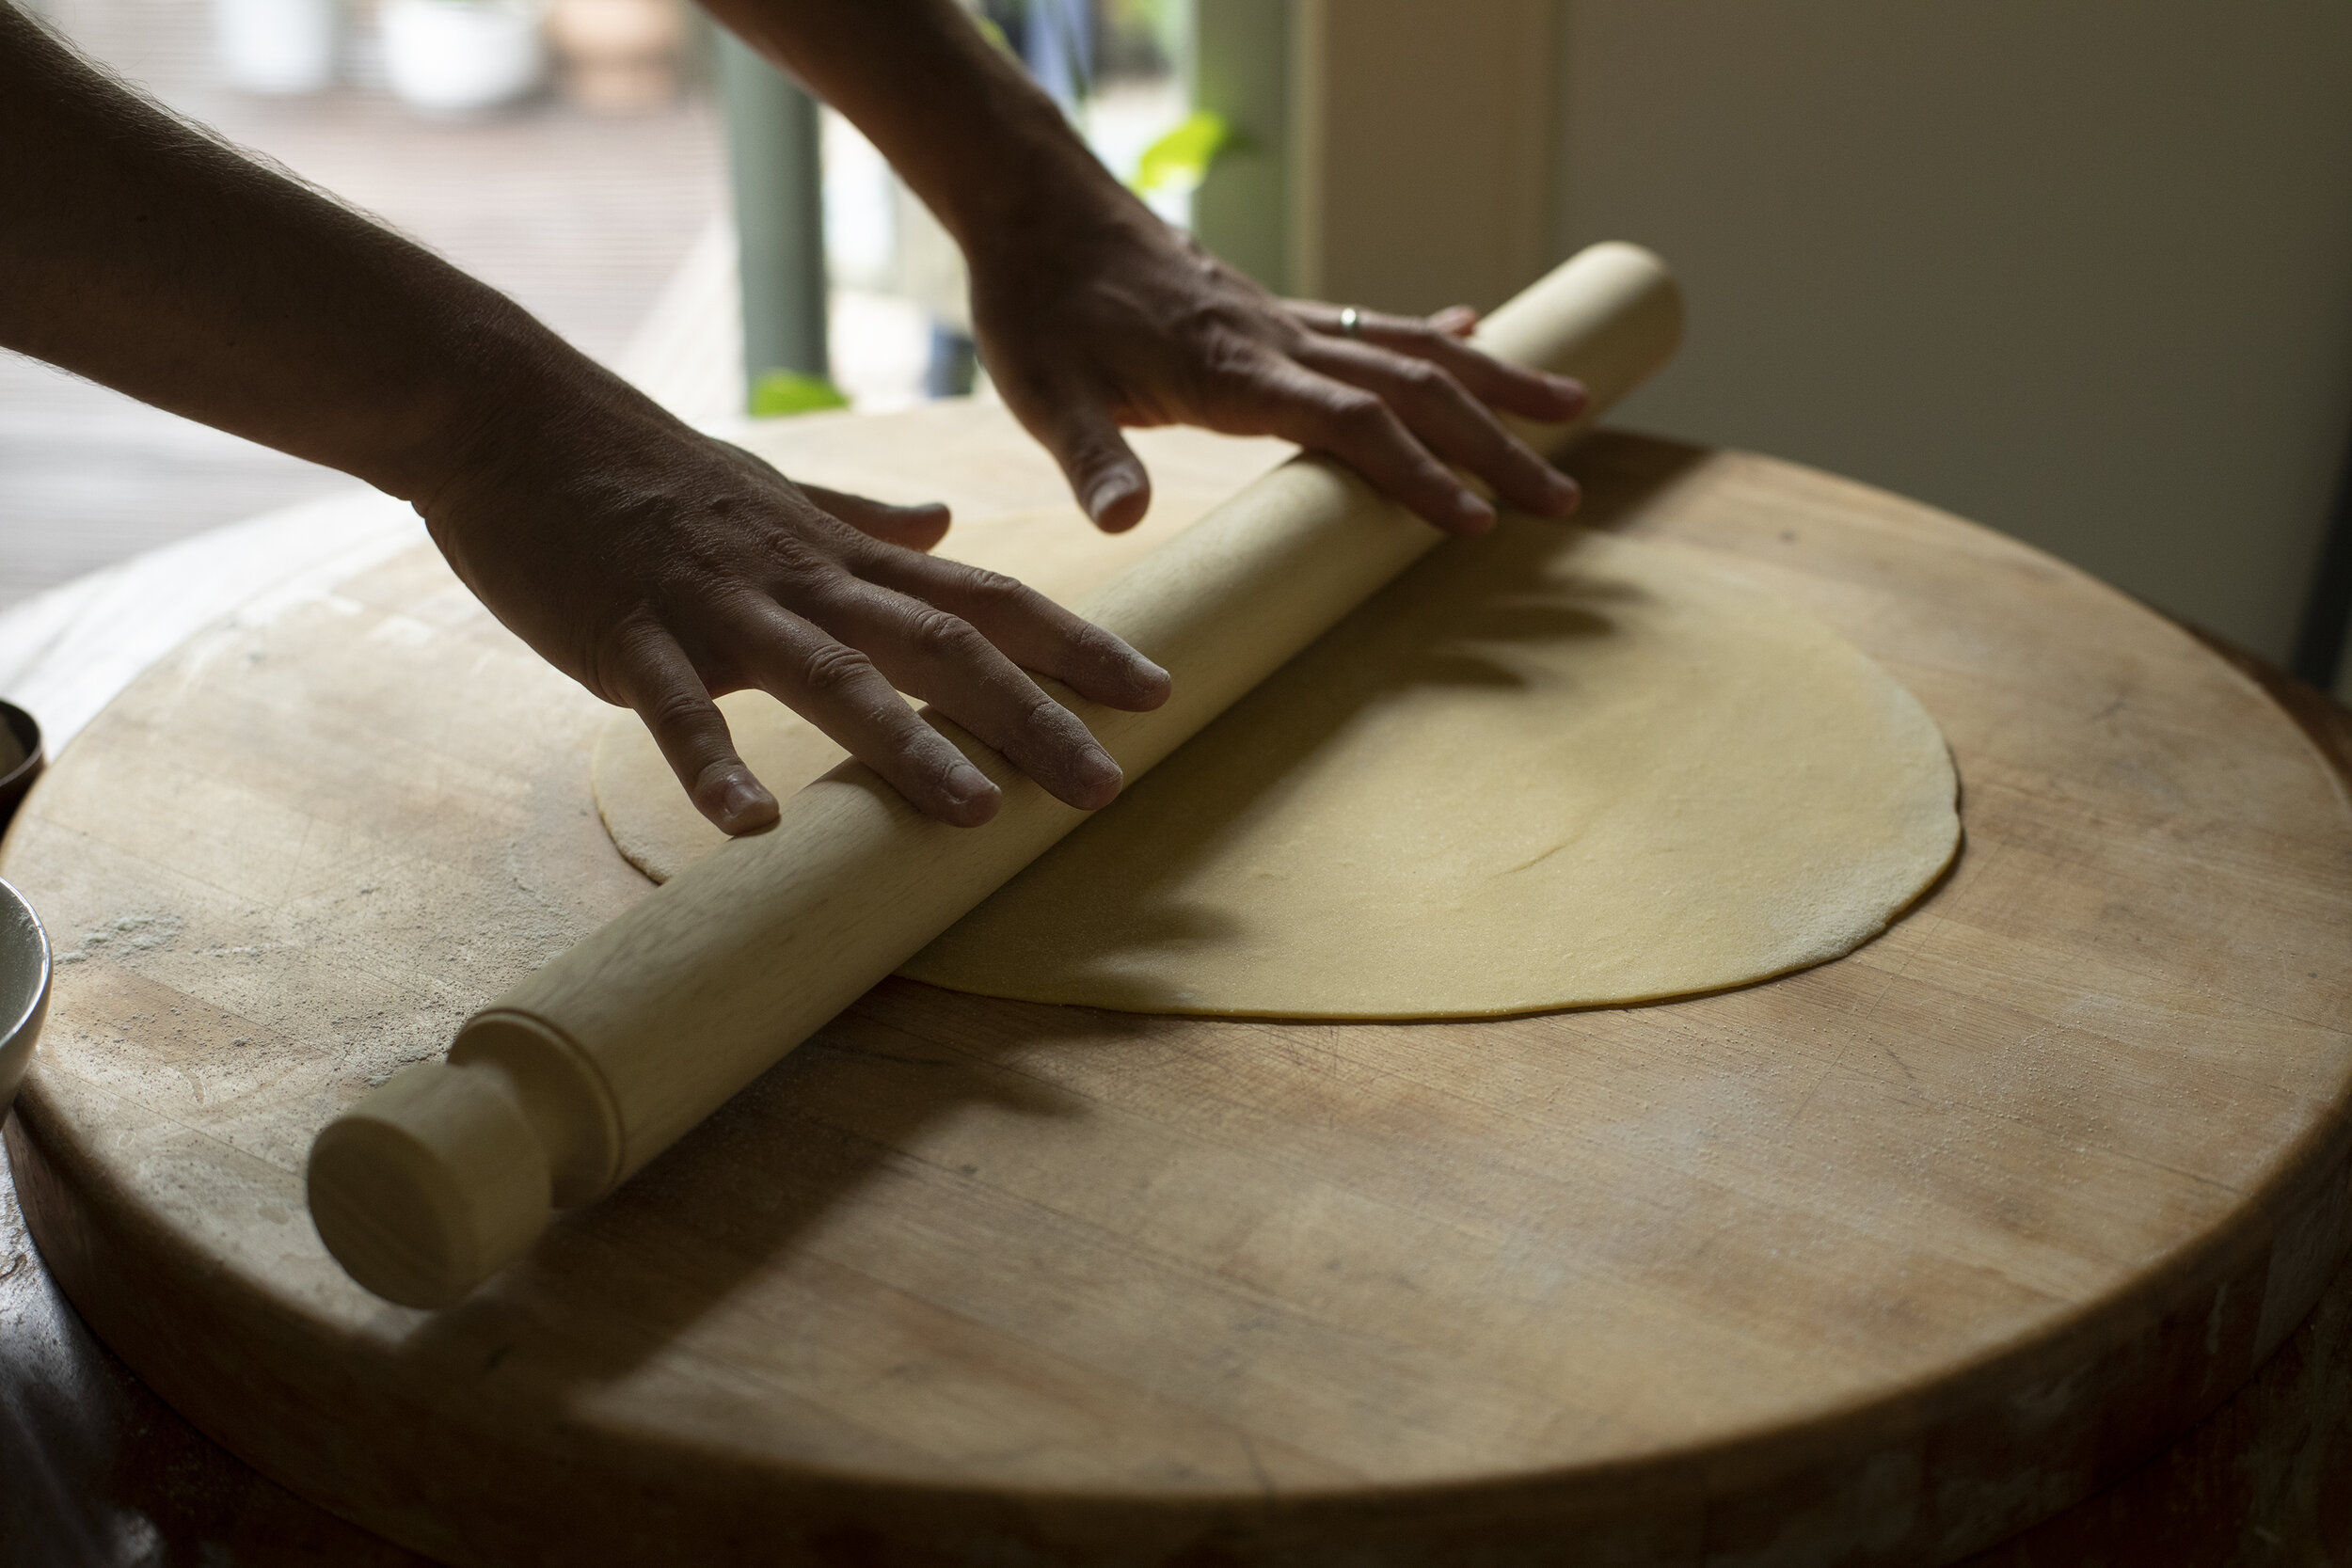
  7. The following steps revolve around using a mattarello (Italian rolling pin) - but you could also do this with a pasta machine. Remove one of the dough balls, unwrap, cut it in half (resulting in 1/4 the amount of the original dough ball. Wrap the other half while you roll your first sheet. Place the cut piece of pasta dough in the center of your work surface. Apply a light dusting of flour to both the surface and the top of the dough.

  8. Slowly apply downwards pressure with the rolling pin, starting from the center of the ball and moving outwards. Repeat, methodically, always working from the center outwards - creating the general shape of the pan you’ll be baking the lasagna in. The sfoglia (pasta dough) will gradually begin to flatten and create a large round sheet on your work surface. If you’re finding the dough sticky, use a tiny bit more flour. Periodically flip the dough over and work from the other side. This process requires a little elbow grease and about 10-15 minutes of your time. You’ll know you’re done when the dough stops pulling inwards on itself and the thickness is about 2-3 mm. It should be light and delicate but be able to retain it’s shape. Cut the sfoglia into 9 x 13 inch pieces, saving the scraps to assemble another layer of the lasagna. Allow the dough to air dry while you gather all the other ingredients - ready to assemble the layers into your baking tray.

  9. Blanch each sheet of pasta in boiling salted water for about 30 - 45 seconds each.

  10. Remove with a slotted spoon, drain excess water, and layer right into the baking pan.

The Mushrooms

Ingredients

2 lbs of fresh chanterelles

3 shallots (finely chopped)

4 cloves of garlic (finely chopped)

Fresh thyme

Olive oil

Salt and pepper

Directions

  1. Clean the mushrooms of any debris and slice into thin pieces. Set aside.

  2. Bring a skillet up to medium heat and saute the finely diced shallots in olive oil until translucent.

  3. Add the finely diced garlic and thyme and saute for another few minutes.

  4. Add the chanterelles and cook them down for about ten minutes until they significantly reduce in size and begin to brown.

  5. Season with salt and pepper and set aside to cool down.

The Black Trumpet Bescamel

Ingredients

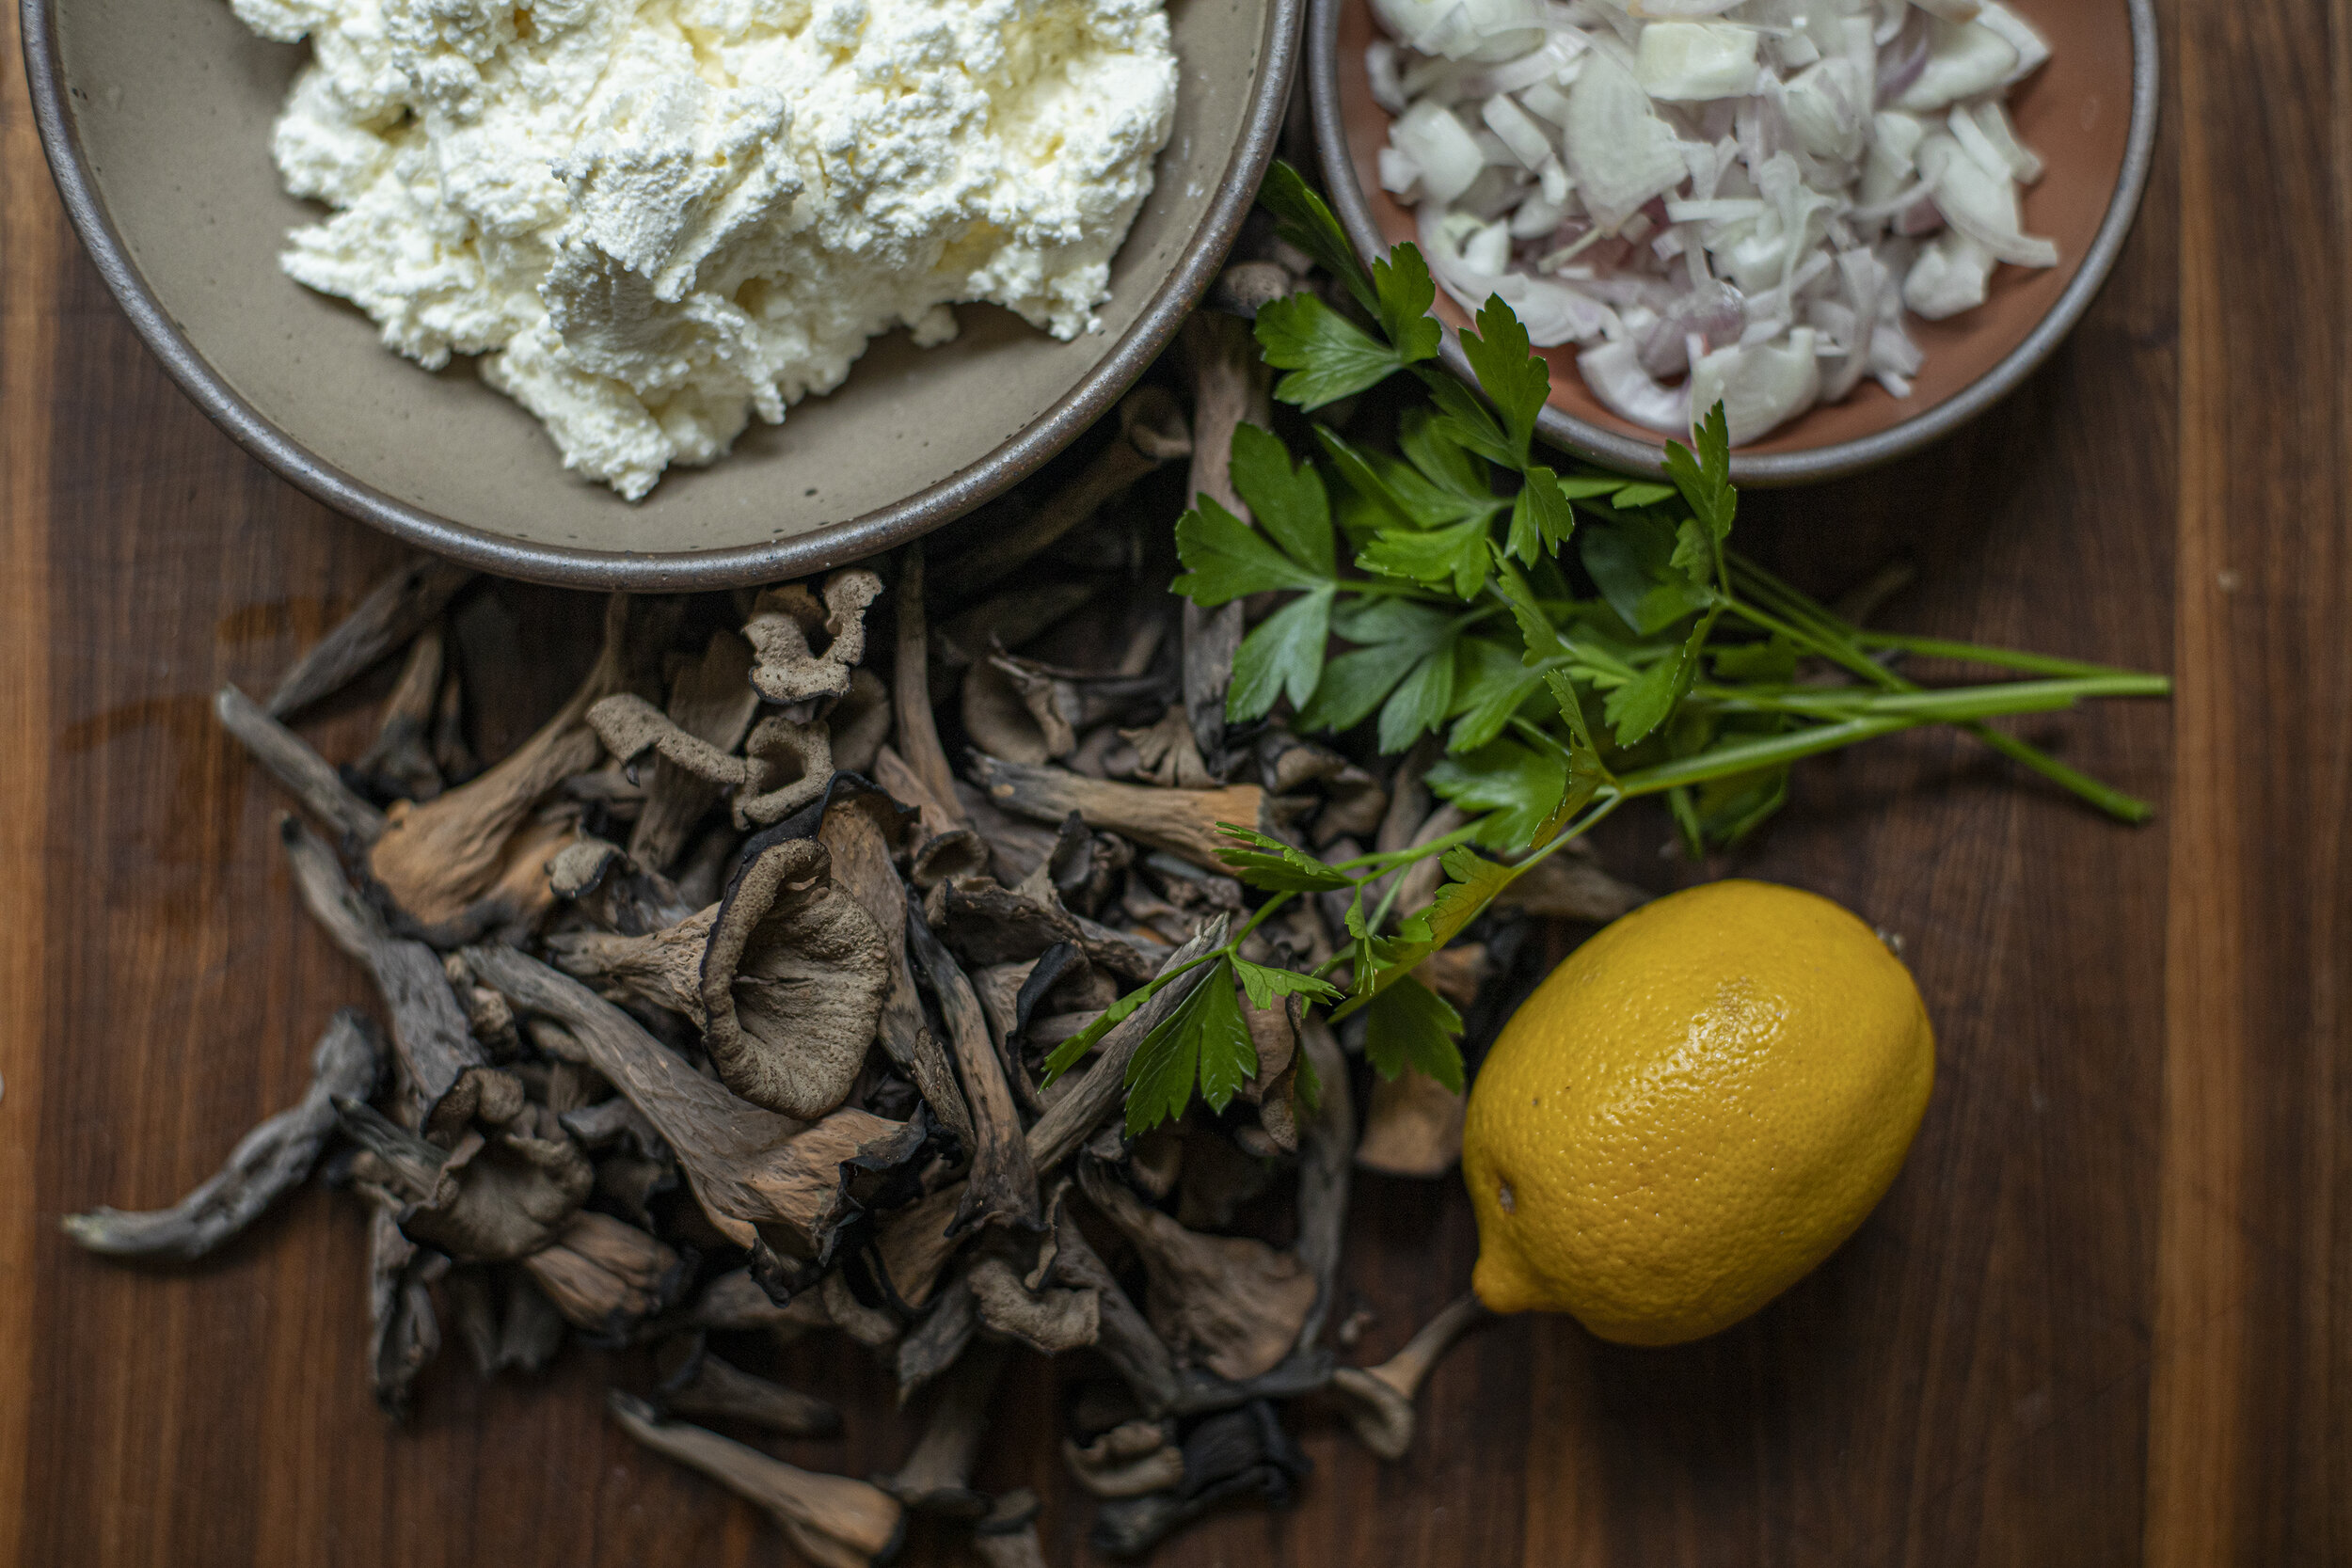
15 g dried black trumpets (blitz into a fine powder)

8 tbsp butter

1 cup 00 flour

5 cups or 236 grams of whole milk

A pinch of grated nutmeg

Salt

Directions

  1. Bring a heavy duty skillet up to medium heat.

  2. Melt the butter in the pan.

  3. Slowly add the flour into the butter and whisk constantly. The trick with bescamel is patience, being slow and steady to incorporate the ingredients gradually to avoid it being lumpy.

  4. Continue adding all the flour to the butter and the mixture will start to become crumbly and fragrant as it browns/toasts in the pan. Keep whisking the mixture for about 5 minutes before adding the milk in little by little - constantly whisking to incorporate. The milk will begin to loosen the crumbly mixture and after a few minutes of stirring it will appear silky. Add a little more milk if it feels too thick.

  5. Season with salt, and a pinch of grated nutmeg, and add the black trumpet powder.

  6. Continue to stir on low heat for another few minutes.

  7. Remove from the heat and allow to cool down before using it in the lasagna.

The Lasagna

Ingredients

The pasta sheets

The sauteed mushroom mixture

The black trumpet bescamel

Grated pecorino romano or parmesan

Fresh basil for garnish

Directions

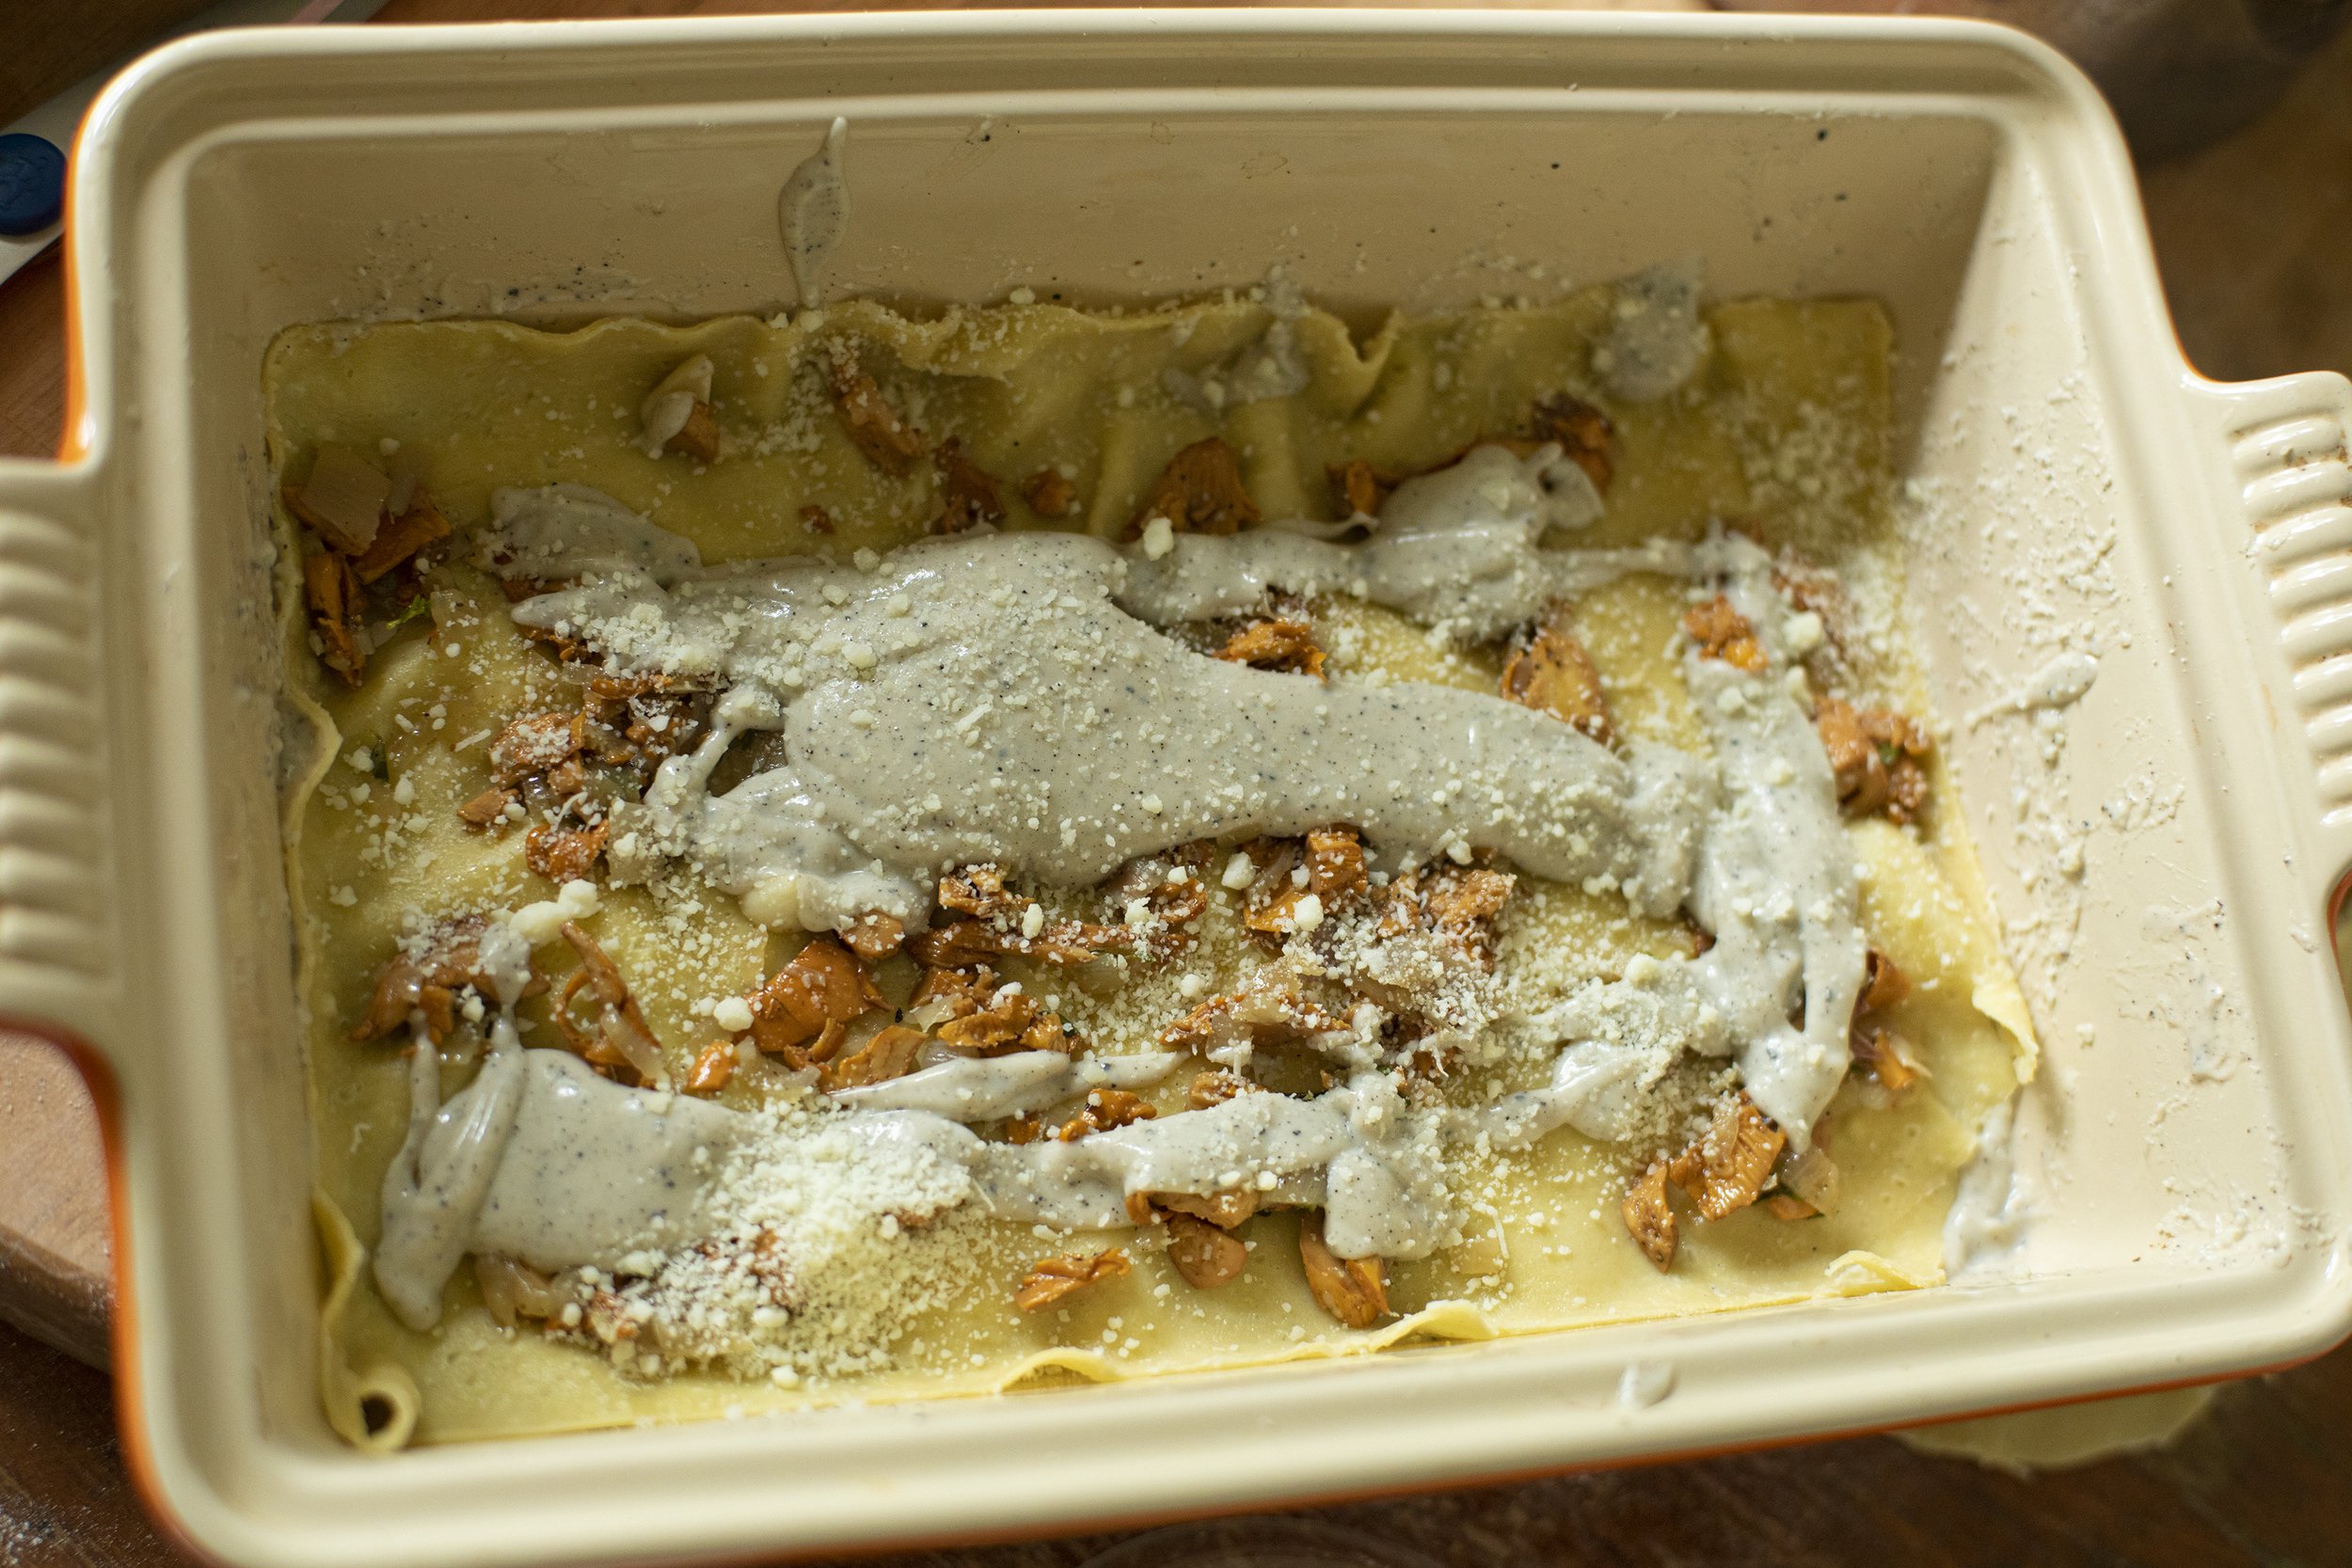
  1. On the bottom of your baking pan, spoon in a layer of bescamel and coat the pan evenly.

  2. Add your first sheet of blanched pasta dough.

  3. Add an even layer of the cooked mushrooms, spread evenly across the surface.

  4. Spoon on another layer of bescamel, followed by a generous sprinkling of grated cheese.

  5. Lay in another sheet of pasta and repeat the process until you have no more left. This recipe will yield about 5 sheets that are 9 x 13 inches. The thicker you make your pasta, the less surface area you’ll get. Be sure to save all your scraps of pasta as you cut them down to size - to reassemble them to create another layer of pasta.

  6. Bake (covered) for 30 minutes at 375F.

  7. Remove the cover, and bake for another 30 minutes uncovered.

  8. Remove from the oven and allow to cool down for at least ten minutes.

  9. The steaming pasta will start to settle and firm up as it cools.

  10. Cut into pieces and garnish with more freshly grated cheese and fresh basil.

Pici & Crab Sauce

Pici has been on my to-do list for a while. This style of pasta originates in the Tuscan region in Italy. It’s a thicker - rustic noodle that stands up well to ragus and heavier sauces. They're also one of the easier style pastas to make that require minimal tools or technical finessing. I opted for an eggless dough to keep it true to its roots. Flour & water- in this case a mix of 00 @mulinocaputo , tumminia flour from @molini_del_ponte_drago , and semolina. For the sauce I went pretty untraditional - a red sauce using @biancodinapolitomatoes tomatoes, white wine, chili flakes, butter, evoo, bay leaf, loads of garlic and a whole mess of blue crabs. Non traditional yes, but super decadent and well worth the effort. Video of the process is below.

pici plate 2.jpg

The Pasta

Ingredients:

156 g semolina

168 g 00 flour

68 g tumminia flour or similar (whole wheat)

190 g water

1 tbsp olive oil

*serves 4 - 5 people

pici flours.jpg

Directions:

1. Mix together the dry ingredients and form a mound in the center of your work surface. Use your fingertips to create a well in the center, like a volcano.

2. Slowly begin to pour water, little by little, into the center of the well.

3. Using a fork and bench knife, slowly begin working the flour into water, working methodically, from the center outwards, gradually incorporating more flour as you go.

4. Once the dough becomes shaggy, you can now use your hands to begin working it together with more pressure. If it feels too dry, add a little room temperature water. And if it feels too wet, add a little flour. Knead/work the dough for about ten minutes, which will result in a nice smooth, elastic ball of dough. Wrap the ball in plastic wrap (or cover with a wet towel).

5. Rest in the refrigerator for at least 30 minutes.

6. Unwrap the dough and cut off about 1/4. Wrap the portion that is on standby.

7. Lightly dust the work surface and press down to flatter the cut piece of dough.

8. Begin rolling out the dough with a rolling pin (mattarello). If you prefer to use a pasta roller for this, that will work also. Work methodically, going from the center outwards to the edges, creating a rectangular sheet (sfoglia) about the length of your hand. Sprinkle with more flour if the dough seems to be sticking to any surface. Roll it out to about a few millimeters thickness, flipping the pasta sheet over a few times to work from both sides.

9. Using a knife, working from the edge, slice ribbons of the dough about a centimeter wide.

10. One by one, take each cut piece, and gently begin rolling it in your fingertips. Start in the center, and with a rocking motion back and forth, roll the piece down into the palm of your hands, working outwards. The video below will help visualize the process.

rolling pici.jpg

11. Each piece of pici should be about a few millimeters in diameter - keep it mind it will swell when cooked.

12. Repeat the process with all the remaining dough, setting aside the finished pici into little nests. The nests of noodles should be sprinkled with some semolina as they air dry to prevent them from sticking. These can stay in the refrigerator for up to 24 hrs or cooked right away.

pici in hand.jpg
hand crushing tomatoes.jpg

The Sauce

The preparation of the crabs is by far the most labor intensive part of this recipe. If you want to save some steps, you could use lump crab meat added to the red sauce - but you will miss out on some of the flavor you get from the simmering crabs.

Ingredients:

12 live blue crabs

3 x 28oz cans of high quality whole peeled tomatoes crushed by hand (Bianco DiNapoli, Gusto Rosso, Cento)

1 yellow onion (peeled, cut in half)

4 cloves of garlic (minced)

1/2 cup white wine

1/2 tbsp red chili flakes

1/4 cup tomato paste

2 bay leaves

Extra virgin olive oil

Few tbsp butter

Salt and pepper to taste

crabs on counter.jpg

Directions:

  1. Cleaning the crabs (which is a two step process) is your biggest task. There are many Youtube tutorials that demonstrate exactly how to do it so I won’t go too deep on that here. I stunned them in ice until they were in torpor before I remove the top shell, split them in half, and removed the guts. There are also strong opinions from folks who think it’s a crime to take the guts out, but for this recipe I wanted to keep the sauce a bit “cleaner.” After they are scrubbed, gutted, and split - set them aside on a bed of ice while you move on to the next steps.

  2. Bring a large pot up to medium heat and pour in a few tbsp of olive oil.

  3. Add the split onion halves and simmer for a few minutes before adding the bay leaf, red chili flakes, and garlic. Stir continuously to prevent burning. Add the tomato paste and continue stirring for another minute or so. Season with salt and pepper to taste.

  4. Add the white wine and cook down for a few more minutes before adding the crabs - layering them on top of each other until they fill the pot. Stir together so they get coated in the juices on the bottom of the pan. Cover and allow to steam for about 5 minutes.

  5. Uncover and add the tomatoes so they cover all of the crabs. Stir carefully and bring back to a simmer. Simmer for about another 20 minutes until the crabs have turned bright red.

  6. Remove from the heat, and transfer the crabs to a large bowl to allow to cool so you can handle them. Add the butter to the remaining sauce and stir to incorporate. Set a large pot of water to boil.

  7. Once the crabs have cooled you’ll begin breaking the shells apart to separate the meat. You’ll need one small bowl for the meat and another for the empty shells. The back fin joints provide the most choice meat, but work as diligently as you can to collect as much as you can. I like to leave a few pieces in their shells to garnish each plate.

  8. Once you have a small bowl full of meat, you can fold it back into the sauce and stir to incorporate. Bring back to a low simmer as you cook the pasta.

  9. The fresh pasta will take 2-3 minutes to cook.

  10. Drain the pasta, and transfer it directly into a bowl with the hot crab sauce. Stir to coat every noodle.

  11. Plate each dish and top with a generous spoonful of more crab sauce and a few pieces of crab claws.

  12. Enjoy!

simmering crabs.jpg

Sun Gold Margherita

It’s that time of year again when we’re flush with sun golds. The occasion calls for making one of my favorite summer sauces from slow and low roasted sun gold tomatoes, garlic, basil and a generous bath of olive oil. After cooking for about an hour and a half, each tomato is peeled and pressed through a fine mesh strainer or food mill. The resulting sauce is so incredible on pizza or pasta and the oil that remains in the pan is a revelation- drizzled on some good bread, used in a salad dressing, or on whatever else you can think of. The skins can also be used to make a killer tomato paste/spread - pulverized with a mortar and pestle - and slathered onto some toast. Nothing gets wasted. The sauce is so perfect I wanted to keep this pizza super simple with sun gold sauce, mozzarella, basil, and grated pecorino Romano. Video of the process is below.

sungold pie.jpg

Ingredients:

Sun Gold cherry tomatoes (2 – 3 lbs)

Garlic (4 cloves smashed)

Grated pecorino Romano cheese

Extra Virgin Olive oil

Basil

Mozzarella

roasted sungolds.jpg

Sauce Instructions:

  1. The real heart of this pizza is the Sun Gold sauce. It’s so simple but as Frank Prisinzano would say – it’s insane. Set your oven to 275F.

  2. Fill a deep skillet with the tomatoes. Pour in a generous amount of olive oil. The tomatoes don’t need to be submerged, but you want a healthy layer on oil in the bottom of the pan. This oil, by the time you’re done, will be a transcendent addition to grilled veggies, salads, or anything else you can think of.

  3. Add the garlic and a generous amount of basil, toss together.

  4. Roast for about an hour and a half until the tomatoes are fragrant, soft, and the skin is starting to fall off.

  5. Remove from the oven and allow to cool a little before handling.

  6. The next part is the most labor intensive. You will now peel each individual tomato and squeeze out the meat into a bowl.

  7. Reserve the tomato skins which can be dehydrated and made into salt, or pulverized in a mortar and pestle to make a delicious tomato paste/spread.

  8. Use your fingers to mash the tomatoes and transfer to a wire mesh colander or a food mill and press to remove the seeds.

  9. What’s left is an amazing bright orange tomato sauce that works well for pizza and pasta dishes.

peeling tomatoes.jpg
straining sauce.jpg

The Dough:

For the pizza dough I have been very happy using a Ken Forkish recipe from Flour Water Salt Yeast for an overnight dough with levain. It’s one of the few recipes that I have decided not to mess with as it always yields great results. Recently I’ve been using Caputo Manitoba flour which has been delivering wonderful results.

The Assembly & Finishing:

  1. Stretch your dough working on a lightly floured work surface.

  2. Spoon on the Sun Gold sauce evenly and generously.

  3. Evenly spread out slices or torn chunks of mozzarella on the pizza.

  4. Hit it with a layer of freshly grated pecorino.

  5. Drizzle a little olive oil on top.

  6. Bake in the oven according to your specific temperature and style of oven. I use a wood fired oven and like to keep it around 750-800F and it cooks in about 2-3 minutes, constantly rotating the pie with a peel. If baking in a conventional oven, this will typically be at a lower temperature (550F) and it will take several more minutes.

  7. Remove from the oven and finish with some more freshly grated pecorino and fresh basil leaves.

  8. Slice and enjoy!


sungoldslice.jpg

Black Trumpet Ravioli with Sage Cream Sauce

Black trumpet ravioli filled with sautéed black trumpets & shallots, parsley, lemon zest, and fresh ricotta served with a creamy sage butter sauce and cracked black pepper. Simple and decadent, meant to showcase one of the most unique wild mushrooms available this time of year. The smell of fresh trumpets are hard to define; earthy, floral, almost intoxicating. I always enjoy thinking of new ways to cook with them. A short video of the process is below.

blacktrumpetravioli 1.jpg
filling1.jpg
filling2.jpg

The Filling

Ingredients:

Fresh black trumpet mushrooms (about 2 cups)

Ricotta (2 cups drained of excess liquid)

2-3 Shallots (finely minced)

Zest of 1 lemon

Parsley (handful)

Olive oil

Directions:

  1. Bring a skillet to medium heat and add a few tablespoons of olive oil.

  2. Add the shallots and saute for about 5 minutes until softened and golden, constantly stirring.

  3. Add the mushrooms and continue to cook down for another 5 minutes until well incorporated.

  4. Season with a little salt and pepper.

  5. Remove from the skillet and set aside to cool.

  6. In a food processor, add the mushroom/shallot mix and parsley and pulse a few times for a a few seconds. The result should be a mix that is finely chopped (NOT completely blitzed into a puree).

  7. Remove from the processor and mix together with the ricotta and lemon zest.

  8. Season with salt to taste.

  9. Cover and set aside (in refrigerator) until ready to fill the ravioli.

The Pasta

Ingredients

454 g 00 Flour

258 g eggs (beaten before mixing)

1 extra egg (beaten for sealing)

*Portioned for 5 - 6 people

Directions

  1. Dump the weighed flour onto a clean work surface.

  2. Use your hand to form a well (like a volcano) in the center of the flour.

  3. Carefully pour your eggs into the center and begin slowly mixing together with a fork. Gradually, carefully, work your way all around to incorporate the eggs with the flour, without breaking the outer wall.

  4. After about 5 - 10 minutes it will start coming together into a shaggy mass. Begin using your hands to knead the dough together. Work diligently for another 5 minutes until it is no longer shaggy.

  5. Use the edges of your hands, knuckles, to work the dough until it starts to form a smooth ball. Roll it, applying pressure, into the work surface. Fold it. Roll it again. After about ten minutes it should be a smooth, and ready to rest.

  6. Cut the dough into two and wrap each in plastic wrap. Set into the fridge for at least 30 minutes.

  7. The following steps revolve around using a pasta attachment on a Kitchenaid - but you could also do this by hand with a rolling pin. Remove one of the dough balls, unwrap, and cut off a portion of the dough. Lightly flour and cover the rest back with plastic. Press gently and form a rectangle.

  8. Pass the dough through the sheet pasta attachment at it’s widest setting. If it feels sticky, add a little more flour. Gradually tighten the settings of the pasta attachment, one click at a time, and pass the pasta sheet through until it is light and delicate. For ravioli, I normally go to the 6th setting.

  9. Cut off any irregular ends and you should be left with a long sheet of sfoglia that is about 5-6 inches thick.

  10. My method is best visualized in the video below - and this is only one way to do it. There are many other much more skilled pasta makers out there who likely would recommend doing it another way - but this was my approach. This method involves folding the sheet of dough over on to itself vs using two different sheets stacked on top of each other.

  11. Using a spoon and your finger tips, carefully place a dollop of filling about the size of the tip of your pinky - in one corner of the sfoglia. Leave about a half to 3/4 inch of space on either side to the edge. Continue placing the dollops of filling along one entire side of the rectangle.

  12. Brush on a light coating of egg wash around the filling and along the edge of the sfoglia.

  13. Carefully fold over the exposed half of the sfoglia onto the other half, covering the filling. Use your fingers to gently press down around the mounds of filling, pushing out any air pockets to the other edge. Work intentionally to eliminate any remaining air pockets.

  14. Using a scalloped pasta cutter - trim off the outer edges - but leaving the folded edge in tact.

  15. Now cut between each individual ravioli with the cutter until you have none left.

  16. Gently dust with semolina, and transfer to a pan with semolina sprinkled on the bottom to avoid sticking. Allow to air dry for about 10 minutes and transfer to the refrigerator until ready to cook.

  17. Repeat the process until you have no more dough or no more filling left.

fillingravioli.jpg
cut ravioli.jpg

The Sauce & Final Dish

Ingredients:

1 Cup heavy cream

3 tbsp butter

1/2 cup grated pecorino Romano

1 tbsp very finely minced sage

Pasta water as necessary

Directions:

  1. You should make the sauce right before you drop the ravioli into the boiling water. This step only takes a few minutes and you don’t want the sauce sitting around.

  2. Melt the butter in a skillet on medium heat.

  3. Add the finely minced sage and stir into the butter, cooking for a minute or two.

  4. Add the heavy cream and continue to stir so nothing sticks to the bottom of the pan.

  5. Add the grated pecorino Romano and continue to stir as the sauce begins to thicken.

  6. Add pasta water to adjust the consistency of the sauce, a few tablespoons at a time. This will also help make the sauce more silky.

  7. Add the ravioli to salted boiling water. The fresh pasta will only take about 3-4 minutes to cook. Continue simmering your sauce.

  8. Remove the sauce from the heat and add the cooked/drained ravioli directly to the pan. Using a large spoon, stir together, completely coating all of the ravioli with sauce.

  9. Plate each serving and finish with a sprinkle of more freshly grated pecorino and fresh cracked black pepper.

blacktrumpetravioli 2.jpg
trumpets1.jpg

Farfalle with Scape + Basil Pesto with Sautéed Chanterelles

Farfalle with a creamy basil + scape + toasted pine nuts + pecorino pesto topped with sautéed chanterelles foraged earlier in the morning. Pasta dough blended 75% 0 Manitoba flour from @mulinocaputo and 25% Semola Rimancinata Cuore from @molini_del_ponte_drago @gustiamo . Pretty killer combination using the best of what’s in season right now. Recipe as follows and a short video of the process below.

farfalle pesto chanterelles 1.jpg
chants in hand 2021.jpg
chants on table.jpg
making pasta dough.jpg

The Farfalle

Ingredients

300 g 00 Flour

150 g Semola Rimancinata Cuore

250 g eggs (beaten before mixing)

*Portioned for 5 - 6 people

Directions

  1. Mix the flours and dump out the weighed amount onto a clean work surface.

  2. Use your hand to form a well (like a volcano) in the center of the flour.

  3. Carefully pour your eggs into the center and begin slowly mixing together with a fork. Gradually, carefully, work your way all around to incorporate the eggs with the flour, without breaking the outer wall. A bench scraper is a handy tool to have at this point if you have one.

  4. After about 5 - 10 minutes it will start coming together into a shaggy mass. Begin using your hands to knead the dough together. Work diligently for another 5 minutes until it is no longer shaggy.

  5. Use the edges of your hands, knuckles, to work the dough until it starts to form a smooth ball. Knead it, applying pressure, into the work surface. Fold it. Knead it again. After about ten minutes it should be smooth and ready to rest.

  6. Cut the dough into two and wrap each in plastic wrap. Set into the fridge for at least 30 minutes.

  7. The following steps revolve around using a mattarello (Italian rolling pin) - but you could also do this with a pasta machine. Remove one of the dough balls, unwrap, and place in the center of your work surface. Apply a light dusting of flour to both the surface and the top of the dough.

  8. Slowly apply downwards pressure with the rolling pin, starting from the center of the ball and moving outwards. Repeat, methodically, always working from the center outwards. The sfoglia (pasta dough) will gradually begin to flatten and create a large round sheet on your work surface. If you’re finding the dough sticky, use a tiny bit more flour. Periodically flip the dough over and work from the other side. This process requires a little elbow grease and about 10-15 minutes of your time. You’ll know you’re done when the dough stops pulling inwards on itself and the thickness is about 2-3 mm. It should be light and delicate but be able to retain it’s shape. Allow the dough to air dry for about 5 minutes. Dust with a very light sprinkling of semolina.

  9. For the next part of the process I highly recommend watching the video below. Using a pasta cutter, cut the sfoglia into rectangles about 1 inch wide by 2.5 inches long (or approximate a pinky length). Traditionally you’ll use a serrated cutter but you’ll notice in the video that I forgot in my haste so my farfalle has smooth edges. Use three fingers, one placed in the center and two on the outer central edges of the narrower side. Gently, firmly pinch from the outside in and slowly lift the center finger and press the edges together. Lift and place to the side to allow to air dry for another 30 mins to an hour. Repeat until you have finished all the rectangles and save the outer scraps for maltagliati. Take out the other dough ball and repeat the whole process.

  10. The fresh pasta will cook in about 3-4 minutes in you boiling salted water.

rolling dough.jpg
pinching butterflies.jpg
farfale on table.jpg
bowl of pesto.jpg

The Pesto

Ingredients

Large bunch of basil

3-4 garlic scapes

Half a cup of pecorino Romano

3/4 cup of good olive oil

Pinch of salt

1/2 cup of toasted pine nuts

Directions

I kept this very simple and just used a food processor - combined all the ingredients and blended in about 30 seconds. The true way to do pesto is to use a mortar and pestle if you have the time and energy. I had a full day of foraging and making pasta and decided the pesto needed to be easy. With the addition of the pecorino this pesto is super creamy and decadent.

farfalle pesto chanterelles 2.jpg

The final dish

  1. Before cooking the pasta, clean and slice your chanterelles into a manageable size. I sauteed mine in olive oil with a little fresh thyme, salt and pepper until they were well browned and significantly reduced in size - which took about 8-10 minutes. You want to make sure your mushrooms are well cooked. Set aside.

  2. After draining the cooked pasta (always reserve extra pasta water in case you need to thin out the sauce/pesto), immediately toss the pasta with the pesto and stir so they are completely coated. Mix in your wild mushrooms and toss together.

  3. Serve into individual bowls and finish with some freshly grated pecorino Romano.

  4. Enjoy.

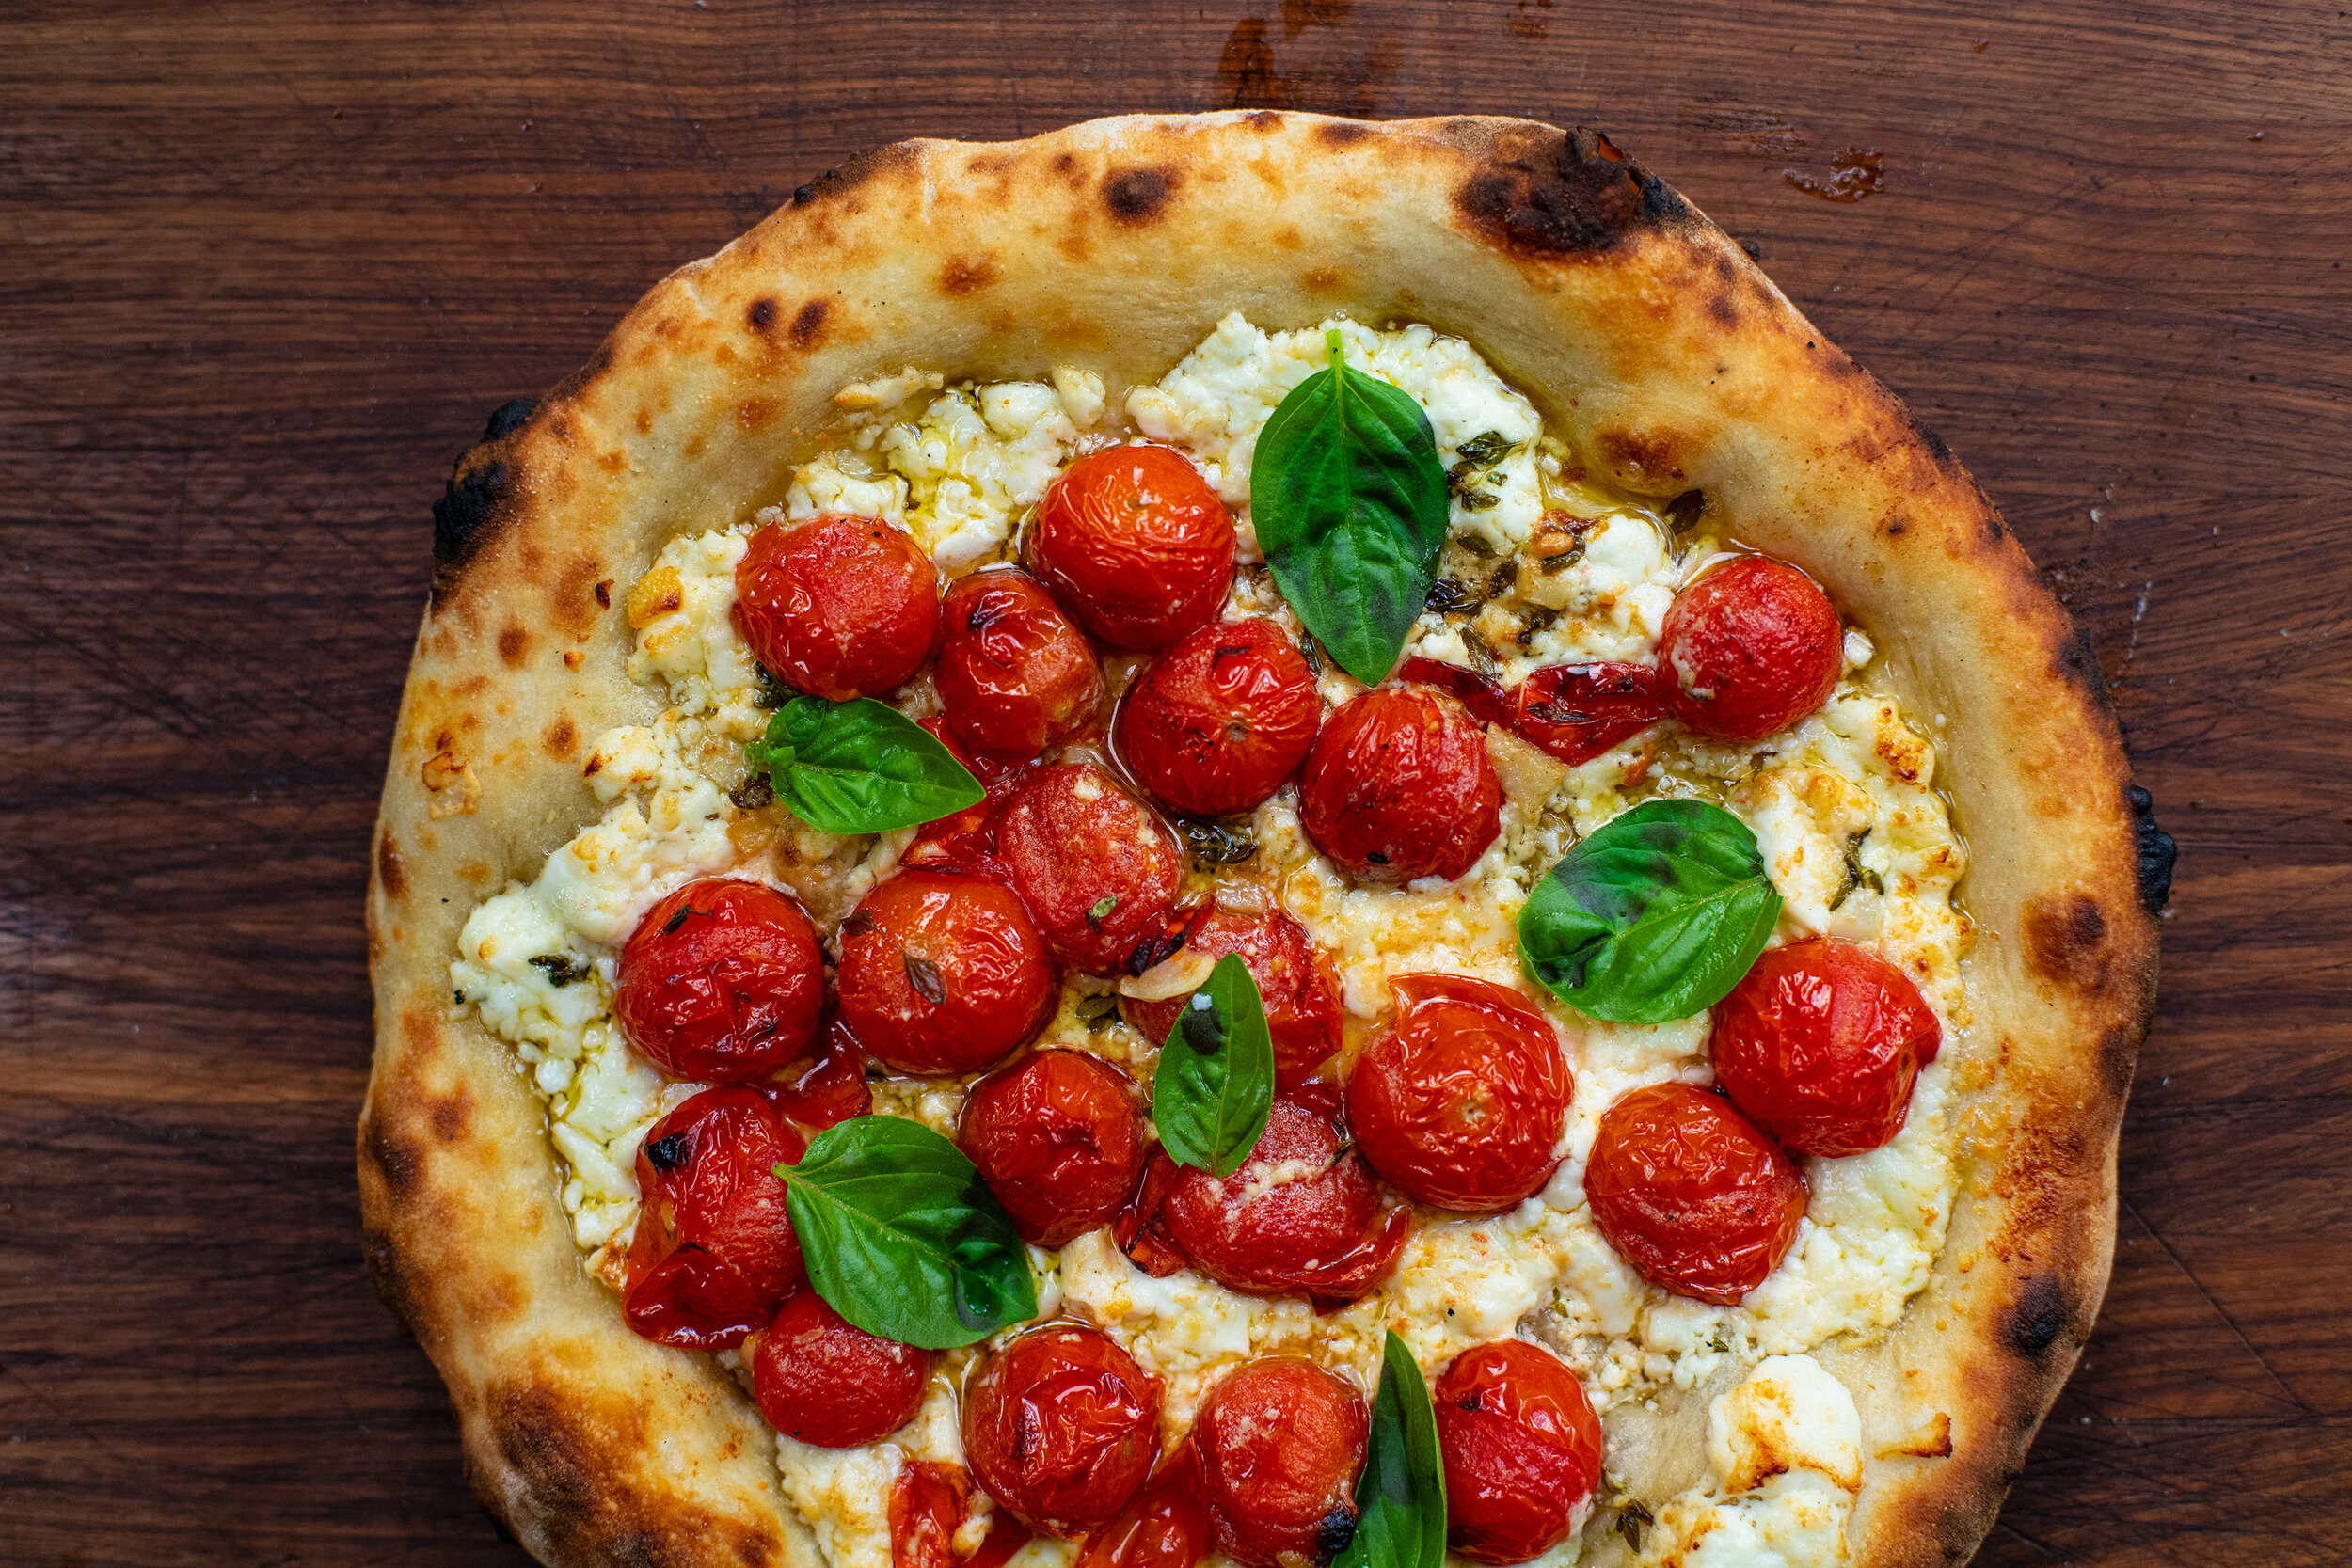
The Tiktok Baked Feta Craze as a Pizza

Here’s a little riff on the insanely popular baked feta pasta trend that went around this past year. It’s perfect for those amazingly sweet summer cherry tomatoes that are just around the corner. This was baked in an Ooni Pro using wood as the fuel source. Part of the appeal with the baked feta craze was how easy it was. Throw it all in a pan, bake it, and mix it with the pasta. The pizza version requires a little more finessing but at the end of the day, it’s still remarkably simple. Video of the process below.

baked feta whole pie.jpg

Ingredients:

Ripe cherry tomatoes

A block of feta cheese

Thyme

2-3 cloves of garlic, sliced

Basil for garnish

High quality olive oil

Salt to taste (the feta is already very salty, so this might not be necessary)

Your dough of choice (I’m using a naturally leavened 67% hydration overnight dough)

dough balls.jpg
ingredients in skillet 2.jpg

Directions:

  1. In a heavy duty skillet (I like to use cast iron), arrange your tomatoes, feta cheese, garlic, herbs, and a generous pour of olive oil over the entire surface.

  2. Heat your oven. I’m using a wood fired Ooni pro that I bring up to about 600F. If using a conventional oven, set it to 450F.

  3. Bake the tomatoes and feta until the tomatoes begin to blister and their juices start to bubble out. The feta will begin to soften and slump down in the skillet. At higher temperatures (600F) this takes approximately 10 minutes. At a lower temperature this part may take about 20 minutes. If using a wood fire, be careful that the cheese does not become burnt on the top - adjust the fire accordingly.

  4. Remove from the heat and set aside to cool down a little.

  5. Shape your pizza dough and drizzle a light coating of olive oil in the middle.

  6. Using a peel, slide the dough into your oven. My Ooni Pro was set to about 750F when the dough goes in. Bake for about 2 minutes, carefully rotating the dough with a turning peel so it gets evenly baked on all sides. The key here is that you only want to go half-way so you’ll remove it before you start to see blisters on the cornicione. If using a conventional oven at a lower setting (500F), this might take about 5 minutes.

  7. Remove the dough and set onto a work surface. Spoon on a layer of the softened feta followed by spoonfuls of the blistered tomatoes. Finish it off with a spoonful of the amazing juice in the bottom of the pan. Return to the oven and cook until finished (another 1-2 minutes) when you have a perfected leoparded crust.

  8. Garnish with some fresh basil and allow to cool. The cherry tomatoes retain their heat for a long time and you’ll be sorry if you take a bite too quickly. For me, the best part of this pizza is dunking the crust in the leftover juices in the pan - it’s pure heaven.

baking cheese.jpg
baked feta pizza 1.jpg

Wild Spring Quiche with Morels and Ramps

This quiche has been on my mind for a while and the stars finally aligned - morels (sautéed in duck fat), ramps, fontina, and some sweet/mild Chimayo chili flakes that I just brought back from New Mexico, all cradled in a flaky pie crust. It was better than I even expected and works as breakfast, lunch, or dinner. Video of the whole process below.

Whatever it is, the way you tell your story online can make all the difference.

Whatever it is, the way you tell your story online can make all the difference.

Ingredients

6 eggs

3/4 cup heavy cream

1 cup finely diced fontina cheese

1/2 cup fresh ramp leaves (sliced into strips)

1 cup fresh morels (or other mushroom of choice) thinly sliced

1 tbsp dry chili flakes (I’m using a mild Chimayo chili for this but modify according to how spicy you like)

Duck fat (or butter)

Whatever it is, the way you tell your story online can make all the difference.

Whatever it is, the way you tell your story online can make all the difference.

Whatever it is, the way you tell your story online can make all the difference.

Whatever it is, the way you tell your story online can make all the difference.

Whatever it is, the way you tell your story online can make all the difference.

Whatever it is, the way you tell your story online can make all the difference.

Directions

  1. Set the oven to 375F.

  2. Chop/dice your fresh mushrooms and ramp leaves.

  3. Bring a medium sized pan to medium heat.

  4. Drop in about two tablespoons of duck fat or butter.

  5. Saute the morels for about 5 minutes.

  6. Add the dried chili flakes and continue to simmer on medium/low for a few more minutes.

  7. Add the ramp slivers and turn the heat off. It will smell fragrant and amazing. Allow to come to room temperature.

  8. In a bowl, whisk together the eggs and heavy cream.

  9. Add the finely diced fontina (grated works here too) into the egg mixture.

  10. Add the mushroom & ramps mixture and mix well. The oil from the chili flakes will mix with the eggs and make a wonderful orange color.

  11. Season with salt and pepper.

  12. Pour the egg mixture into your prepared/parbaked pie crust. (see below for more details about how I made it, but feel free to use whatever pie dough recipe you prefer. The recipe I am using requires you to pre-bake the crust for 20 minutes before you add the filling.)

  13. Bake at 375F for about 40 minutes until the eggs are set and the crust is a golden brown.

  14. Remove from the oven and allow to cool for about ten minutes before eating.

  15. Enjoy.
The Pie Crust

I’m using a Smitten Kitchen recipe for my pie dough which uses the following ingredients.

Ingredients

8 tbsp butter

1 cup of all purpose flour

1/3 tsp sea salt

1/4 cup cold water

1/2 tbsp granulated sugar

I followed her recipe and was very satisfied with the results - a recipe with very similar proportions as many other pie dough recipes you’ll find online.

Whatever it is, the way you tell your story online can make all the difference.

Whatever it is, the way you tell your story online can make all the difference.

Whatever it is, the way you tell your story online can make all the difference.

Whatever it is, the way you tell your story online can make all the difference.

Stinging Nettle & Ramp Leaf Oil Pizza

Always a thrill stumbling into new areas- creeks lush with watercress and nettles and unfamiliar hillsides with healthy populations of ramps. It was still a little early for morels but I came home with plenty. We fired up a bunch of pizzas but I was most excited about this nettle, ramp leaf oil, sausage, and lemon zest pie. It was a good day. Video of the process below.

nettle pizza 1.jpg

Ingredients:

Fresh stinging nettle tips (handle with care)

Fresh ramps (leaves only) *please leave bulbs in the ground

Shredded mozzarella

Crumbled sausage (sauteed in advance)

Lemon (to zest)

Good olive oil

Pecorino Romano

Pizza dough

The Nettles

  1. Bring a large pot of water to a boil.

  2. Prepare a large ice bath in a bowl.

  3. Using tongs, drop your stinging nettle into a pot of boiling water for 1 minute. Blanching will immediately nullify the stinging power of the nettle and you’ll then be able to handle it without concern.

  4. Transfers the blanched nettle to the ice bath to shock them.

  5. Drain, and squeeze out as much water as you can. Allow to air dry to remove even more water.

  6. Drizzle with olive oil and set aside.

The Ramp Oil

  1. Clean your ramp leaves in a cold bowl of water to remove any bits of dirt.

  2. Trim the stems off completely leaving only the leaves behind.

  3. Lay in the ramp leaves into your food processor (or blender) and add in good quality olive oil. You’ll have to use your best judgement on the amount depending on how many ramps you’re using. The consistency should be thinner than pesto.

  4. Add a little dash of salt, and blitz for about a minute.

  5. Transfer the puree into a fine mesh sieve and use a rubber spatula to press the oil down into a bowl. What’s left behind is a fragrant mash of ramp leaves with some traces of oil. This can be saved / frozen / and incorporated into countless other dishes. For now, you’re focusing on just the extracted oil that comes out of the sieve.

  6. Transfer the oil into a container, ideally a squeeze bottle with cap. It’s ready to go. Store in the refrigerator.

The Dough

For the pizza dough I have been very happy using a Ken Forkish recipe from Flour Water Salt Yeast for an overnight dough (67% hydration) with levain. It’s one of the few recipes that I have decided not to mess with as it always yields great results.

The Assembly & Finishing

  1. Stretch your dough and drizzle first with a little bit of olive oil.

  2. Layer on your shredded mozzarella cheese.

  3. Now evenly distribute the blanched nettles (in olive oil).

  4. Spread out the cooked sausage crumble evenly.

  5. Grate fresh Pecorino Romano over the top of the pie.

  6. Bake your pizza. I use a wood fired Ooni Pro but use whatever works for you.

  7. Drizzle on a generous amount of ramp oil.

  8. Add fresh lemon zest.

  9. Enjoy!

nettle and feather.jpg
ramp patch.jpg
pie in oven.jpg

Wild Violet Donuts

I've been waiting for the right moment to do these wild violet sourdoughnuts. Viola sororia, known as the common blue violet, is pretty much everywhere you look right now, from the backyard to the deep woods. The flowers and leaves of this ephemeral native flower are edible and delicious. When the petals are infused with hot water it creates a vibrant hue that ranges from blue to violet. The infusion is pH sensitive and will react differently depending on how acidic or alkali the water is and can be manipulated with a drop or two of lemon juice. I made a glaze with the violet infusion which has a nice subtle floral taste and I topped them off with granulated violet sugar to give it a little texture. These were delicate, delicious and the process is incredibly fun. Video of the whole process below.

violet donuts on plate.jpg
violets.jpg
violets in hand.jpg

The Violet Syrup

Ingredients:

1:1:1 ratio of …

Wild violet flowers (stems removed)

Water (distilled)*

White granulated sugar

*The violet infusion is reactive to pH levels of the water. When using distilled water, the infusion will be a bright blue color. This can be manipulated by adding a few drops of lemon juice, which turns the infusion a vibrant purple/pink. But once you add the lemon, it will begin to overpower the subtle flavor of the violets.

Directions:

  1. Bring the water to a near boil.

  2. Mix together the hot water and violet flowers in a glass jar, stir, and allow to steep for 24 hrs. The color will gradually deepen.

  3. Strain the flowers out using a fine mesh after 24 hrs.

  4. Bring the infused mixture to a very low simmer and add an equal portion of white granulated sugar. Simmer on low for about ten minutes until the syrup begins to thicken. You may notice a color shift at this stage with the introduction of the sugar.

  5. Allow to cool and store in the refrigerator until use. Will last for several months.

violet syrup.jpg
violet sugar.jpg

The Violet Sugar

Ingredients:

1:1 ratio of…

White granulated sugar

Wild violet flowers (stems removed)

Directions:

  1. In a food processor blend together the sugar and flowers until it turns into a nice even purple sugar.

  2. Because of the moisture in the flowers, it is best to use this sugar fresh or within a few days. Over time it will lose it’s vibrant color and will lump together in a way that becomes difficult to sprinkle.

dough punch out.jpg

Ingredients

230 g Manitoba 0 Flour (or similar)

25 g Whole Wheat Tumminia Flour (or similar)

40 g water

40 g sugar

50 g butter (cubed)

90 g eggs (approx 2 medium sized)

5 g salt

110 g active sourdough starter

1 tsp vanilla

Approx gallon neutral oil

*makes approximately 6 - 8 donuts depending on size

The recipe is spread out over three days and in my opinion is well worth the wait. The natural leavening always yields a tastier end result. I normally start my process around 12pm on day 1 which results in fresh donuts for breakfast two days later.

The Dough

Directions:

  1. 12 pm Day 1 - In a stand mixer, combine all your ingredients and mix for about 10 minutes.

  2. This is very similar to a brioche dough, so at first it will feel quite sticky to the touch, even after ten minutes of mixing.

  3. Transfer the dough to a bowl and cover.

  4. Over the next 5-6 hours you’ll want to fold the dough with your hands 4 times. Let the dough relax for at least 30 minutes in between each fold. By the fourth fold the dough will feel a lot less sticky and will be smoother to the touch. Avoid the urge to add flour if you find it is too sticky.

  5. 6pm Day 1 - Transfer the covered bowl to the refrigerator and forget about it for 24 hrs.

  6. 6pm Day 2 - Remove dough from the refrigerator and allow to relax for about 30 minutes. Do one more round of folding and set out at room temperature overnight.

  7. 7am Day 3 - Gently flour your work surface and dump out the dough.

  8. Bring your neutral oil up to 350F.

  9. Use your hands to spread it out evenly. Use a rolling pin to gently roll out the dough to approximately 3/4 inch thickness. Do not press down too hard as you want to keep rise to the dough.

  10. Using a circular cookie cutter approx 4” in diameter, punch out as many donuts as possible. Save the scraps for maltagliate - ugly leftover shapes of dough that shouldn’t go to waste!

  11. Use another circular punch about 1/2” in diameter to punch out the holes in the center of each donut. Gently use your fingers to stretch it out ever so slightly.

  12. Drop each circular dough into the oil and fry for about 3 minutes each side until golden brown.

  13. Remove from the oil and set onto a rack or paper towels to dry off and cool slightly.

The Finished Donut

Ingredients:

1 cup Confectioner’s sugar

Wild violet syrup

Wild violet sugar

Flowers for garnish

Directions:

  1. Prepare the violet glaze by mixing together about a cup of confectioner’s sugar with 1/4 cup of the wild violet syrup. Adjust accordingly so that the glaze is nice and thick, so it sticks to the donuts. Add more syrup if too thich, and add more confectioner sugar if too thin. *In a subsequent version of this I added blended flowers to the glaze which gave it nice flecks of purple color.

  2. Once the donuts have cooled sufficiently, dip each one in the bowl of glaze and set onto a tray.

  3. Sprinkle the violet sugar on top while the glaze is still wet so it sticks and binds together as the glaze hardens over the next few minutes.

  4. Add a few wild violet flowers for garnish.

  5. Enjoy.
violet crumb.jpg

Wild Wintercress Corzetti

Spring heralds the time to harvest one of my favorite wild greens - wintercress (Barbarea vulgaris) - an herbaceous biennial plant in the mustard family. The rosettes that form prior to going to flower are remarkably similar to broccoli rabe. The bitterness you might experience eating it raw is easily eliminated with a quick blanch and shock in ice water. You can then treat them as you would any other greens - sauteed with some good olive oil and garlic.

I wanted to make a pasta that was built around the spring wintercress harvest and got fixated on corzetti - a coin shaped pasta that originates in Northern Italy. Each medallion of pasta is imprinted with a decorative stamp that in many cases has been carved by artisans who have spent their lives uniquely focused on this singular pursuit. What began as a mark of nobility has evolved into an art form. Instead of paying big bucks to have one shipped over from Italy, the tinkerer in me was intrigued by the idea of making one myself. I got my hands on some cherry wood, some basic carving knives, and had myself a go at it. In the process I found myself totally captivated by the meditative enjoyment of carving. The resultant stamp is perhaps a bit rough around the edges but at the end of the day it works.

The final dish is pretty simple. Corzetti with wintercress, anchovies, garlic, chili flakes, good olive oil, a little butter, toasted breadcrumbs and shaved pecorino Romano. Video of the process below.

finished corzetti plate.jpg

The Dough

Ingredients

200 g Semola Rimacinata Cuore flour (or similar)

200 g 00 Manitoba Flour (or similar)

1 tbsp dry White wine

4 eggs

Pinch of salt

*Served 4-5 people

Directions

  1. Mix together the dry ingredients and form a mound in the center of your work surface. Use your fingertips to create a well in the center, like a volcano.

  2. Whisk together the eggs and white wine, and pour into the center of the well.

  3. Using a fork and bench knife, slowly begin working the flour into the eggs, working methodically, from the center outwards, gradually incorporating more flour as you go.

  4. Once the dough becomes shaggy, you can now use your hands to begin working it together with more pressure. If it feels too dry, add a little room temperature water. And if it feels too wet, add a little flour. Knead/work the dough for about ten minutes, which will result in a nice smooth, elastic ball of dough. Cut the ball in half and wrap each ball in plastic wrap.

  5. Rest in the refrigerator for at least 30 minutes.

  6. Unwrap the dough and divide into two. Wrap the portion that is on standby.

  7. Gently dust your work surface and begin rolling out the dough with a rolling pin (mattarello). If you prefer to use a pasta roller for this, that will work also. Work methodically, going from the center outwards to the edges, creating a large round sheet (sfoglia). Sprinkle with more flour if the dough seems to be sticking to any surface. Roll it out to about 2mm thickness, flipping the pasta sheet over a few times to work from both sides. Allow the sfoglia to air dry for a few minutes.

  8. Using a circular cookie cutter (or corzetti stamp), punch out as many circles as you can. Save the scraps for maltagliati. I like to use a diameter of about 2” wide for the corzetti. They’ll naturally shrink a little after you punch them out.

  9. Whether you’re using a Italian made corzetti stamp, or a homemade version (like I did), gently press down with pressure onto each cut circle with the stamp. After a few you’ll start to get a sense of how hard you need to press down. You want the stamp design to really pop, so make sure you’re using enough pressure. A thing to note here is that you may want to throw some semolina down on the work surface to avoid the pasta sticking to the board. The combination of air drying in the previous step (for a few minutes) and the semolina helps to avoid sticking.

  10. Transfer the pasta “coins” to a container and cover with a clean towel. Refrigerate until ready to cook.

The Pasta

Ingredients

Wintercress (large bunch)

Anchovies (smashed into paste)

3-4 cloves of garlic (finely minced)

Red chili flakes

Good olive oil

3-4 tbsp butter

Parmesan cheese

Breadcrumbs

Directions

  1. Blanch wintercress in boiling water for about 1 minute. Transfer to an ice bath to cool immediately. Drain of all excess water. Set aside.

  2. Bring a large pot of water to a boil.

  3. In a medium skillet, toast breadcrumbs in butter (or olive oil) until golden brown. Set aside.

  4. Add a generous pour of olive oil to skillet and bring to low heat. Add the garlic, anchovy paste, and chili flakes and saute for a few minutes until soft and fragrant. Add about 2-3 tbsp of butter, the blanched wintercress and continue sauteing for another minute or so. Season with salt and pepper to taste.

  5. Salt your pot of boiling water and cook the fresh pasta for about 4 minutes until cooked. Reserve about a cup of pasta water before fully draining.

  6. Drain the pasta and transfer to the skillet with the greens and anchovies. Toss to coat all of the noodles. Add a little pasta water if needed.

  7. Plate each portion and finish with a generous sprinkle of bread crumbs and shaved pecorino or parmesan cheese.

  8. Enjoy.

bundle in hand.jpg
blanching wintercress.jpg
dough balls.jpg
punching circles.jpg
rolling sfoglia.jpg
stamping coins.jpg
corzetti drying.jpg
corzetti stamp.jpg
making stamp.jpg

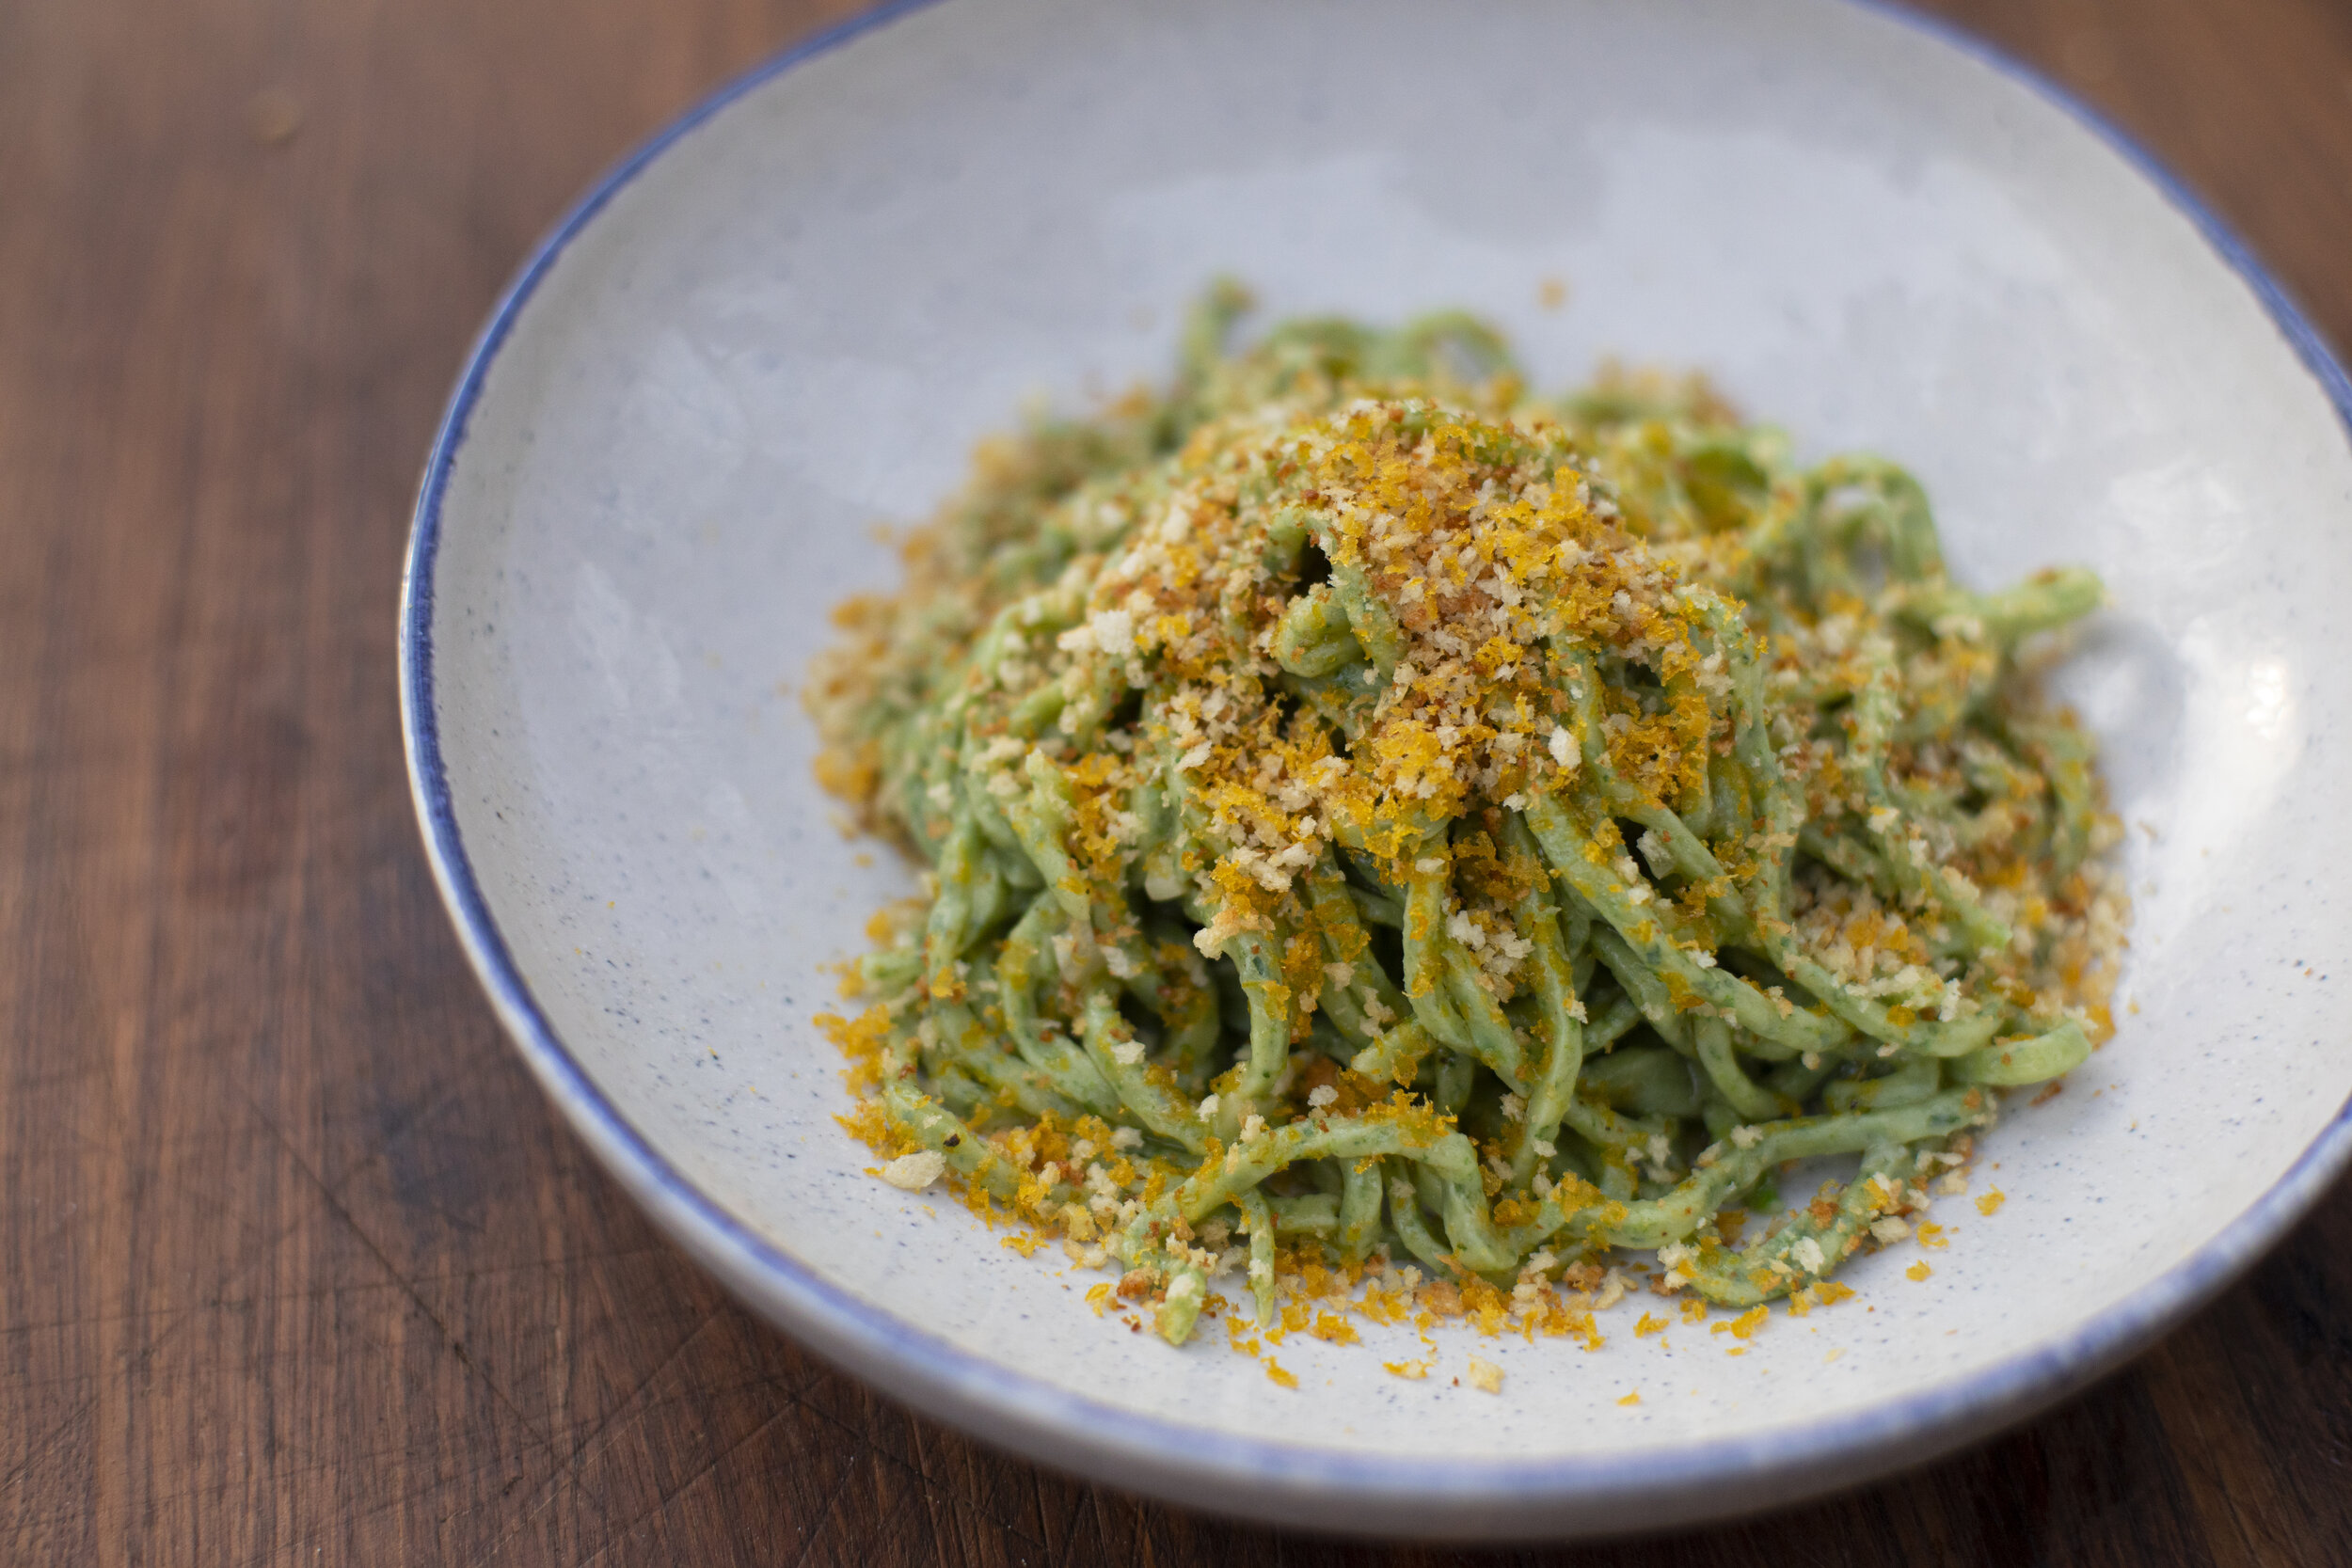
Nettle Spaghetti alla Chitarra con Bottarga

I’ve been patiently waiting for the stinging nettle to be just the right size, thinking about all the details of this dish throughout the winter. In the end it’s all about simplicity and timing- a bright nettle pasta balanced by the umami of the mullet botarga. A creamy sauce that blends together shaved bottarga, spring allium infused olive oil, with a touch of pasta water thrown together with crunchy toasted breadcrumbs. This was one of the top pasta dishes in recent memory for me. The Sicilian rimancinata is from @molini_del_ponte_drago which I sourced from @gustiamo along with the bottarga. The pantry just got a major upgrade. Video of the whole process below.

finished nettle spaghetti.jpg
nettle in hand.jpg
fieldgarlic.jpg

The Pasta Dough

Ingredients

400 g semola rimacinata cuore (or similar)

3 eggs

100 g blanched stinging nettle, pressed to remove most water

Directions

  1. Using tongs, drop your stinging nettle into a pot of boiling water for 1 minute. Blanching will immediately nullify the stinging power of the nettle and you’ll then be able to handle it without concern. *One thing I’d change in retrospect would be to remove the thicker stems and just use the most tender tips of the plant. I didn’t take care to remove the larger stems and the fibers became slightly problematic at a later stage when it’s time to cut the pasta.

  2. Transfer the nettle to an ice bath which will lock in the beautiful color.

  3. Remove after a few minutes and squeeze out excess water. Set aside. You can freeze whatever is extra.

  4. Using a food processor, blend together the nettle and eggs until it is a frothy green liquid.

  5. On a clean work surface make a mound of flour and create a well in the center.

  6. Pour the nettle/egg mixture and begin combining together with a fork or bench knife and then use your hands. This flour is a bit more course than all purpose or 00, so it might seem a bit crumbly at first. But keep working it, as you would with other flour, and it all comes together nicely. If it feels too dry, add a little cold water as necessary. Work the dough methodically for about ten minutes until you have a smooth, homogeneous ball.

  7. Wrap in plastic wrap and refrigerate for 30 mins.

  8. Unwrap the dough and divide into two. Wrap the portion that is on standby.

  9. Gently dust your work surface and begin rolling out the dough with a rolling pin (mattarello). If you prefer to use a pasta roller for this, that will work also. Work methodically, going from the center outwards to the edges, creating a large round sheet (sfoglia). Sprinkle with more flour if the dough seems to be sticking to any surface. Roll it out to about 2mm thickness, flipping the pasta sheet over a few times to work from both sides. Allow the sfoglia to air dry for a few minutes while you prepare your chitarra.

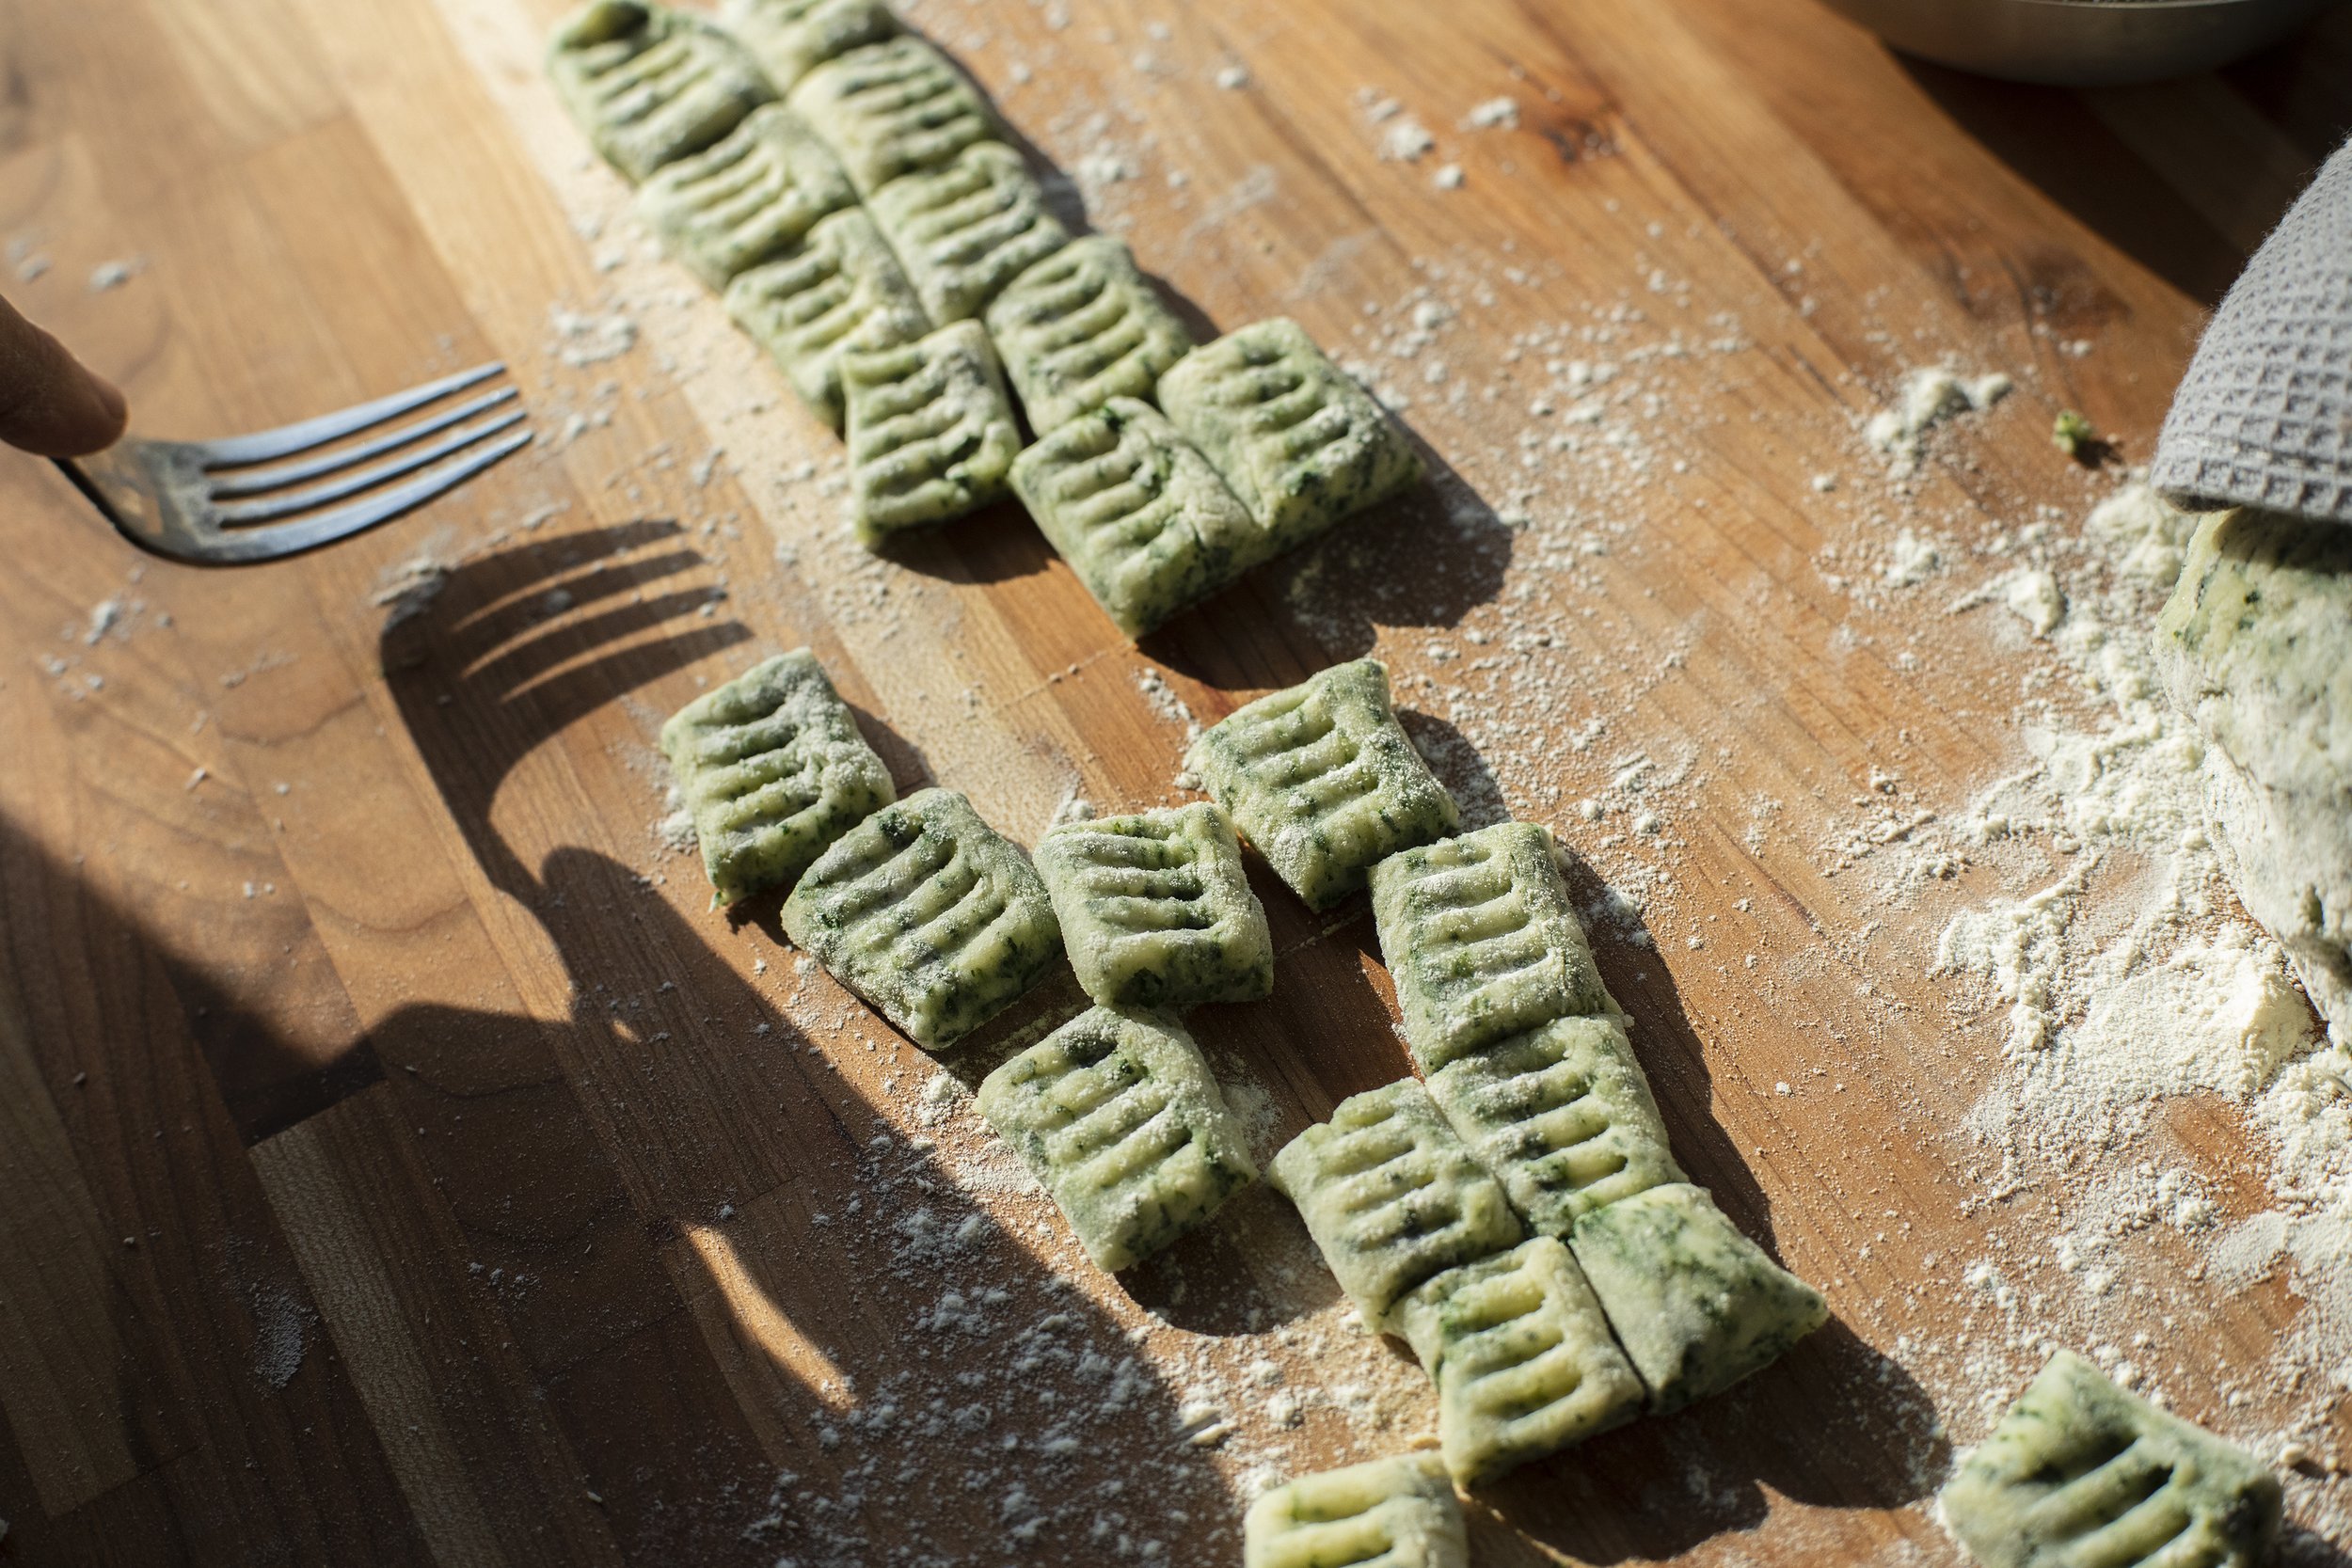
  10. I’m using a chitarra which is a beautiful pasta making tool I recently purchased. You can use any pasta maker with a spaghetti attachment if you don’t own a chitarra. The resulting noodle is square shaped and a bit thicker than traditional spaghetti - very similar to tonnarelli. Call it what you want, it is delicious.

  11. Cut sections of the sfoglia so that they fit precisely onto the chitarra strings. Gently use the rolling pin to apply pressure downwards, gradually pressing the pasta through the strings. Remove, dust with some semolina, and repeat until all of your dough is finished. Cover with a towel until ready to cook or into the refrigerator if saving for the next day.

blanching nettle.jpg
blanched nettle.jpg
flour mound.jpg
nettle dough ball.jpg
mound of spaghetti.jpg
passing through chitarra.jpg

The Pasta con Bottarga

Ingredients

Mullet or tuna bottarga

Extra virgin olive oil

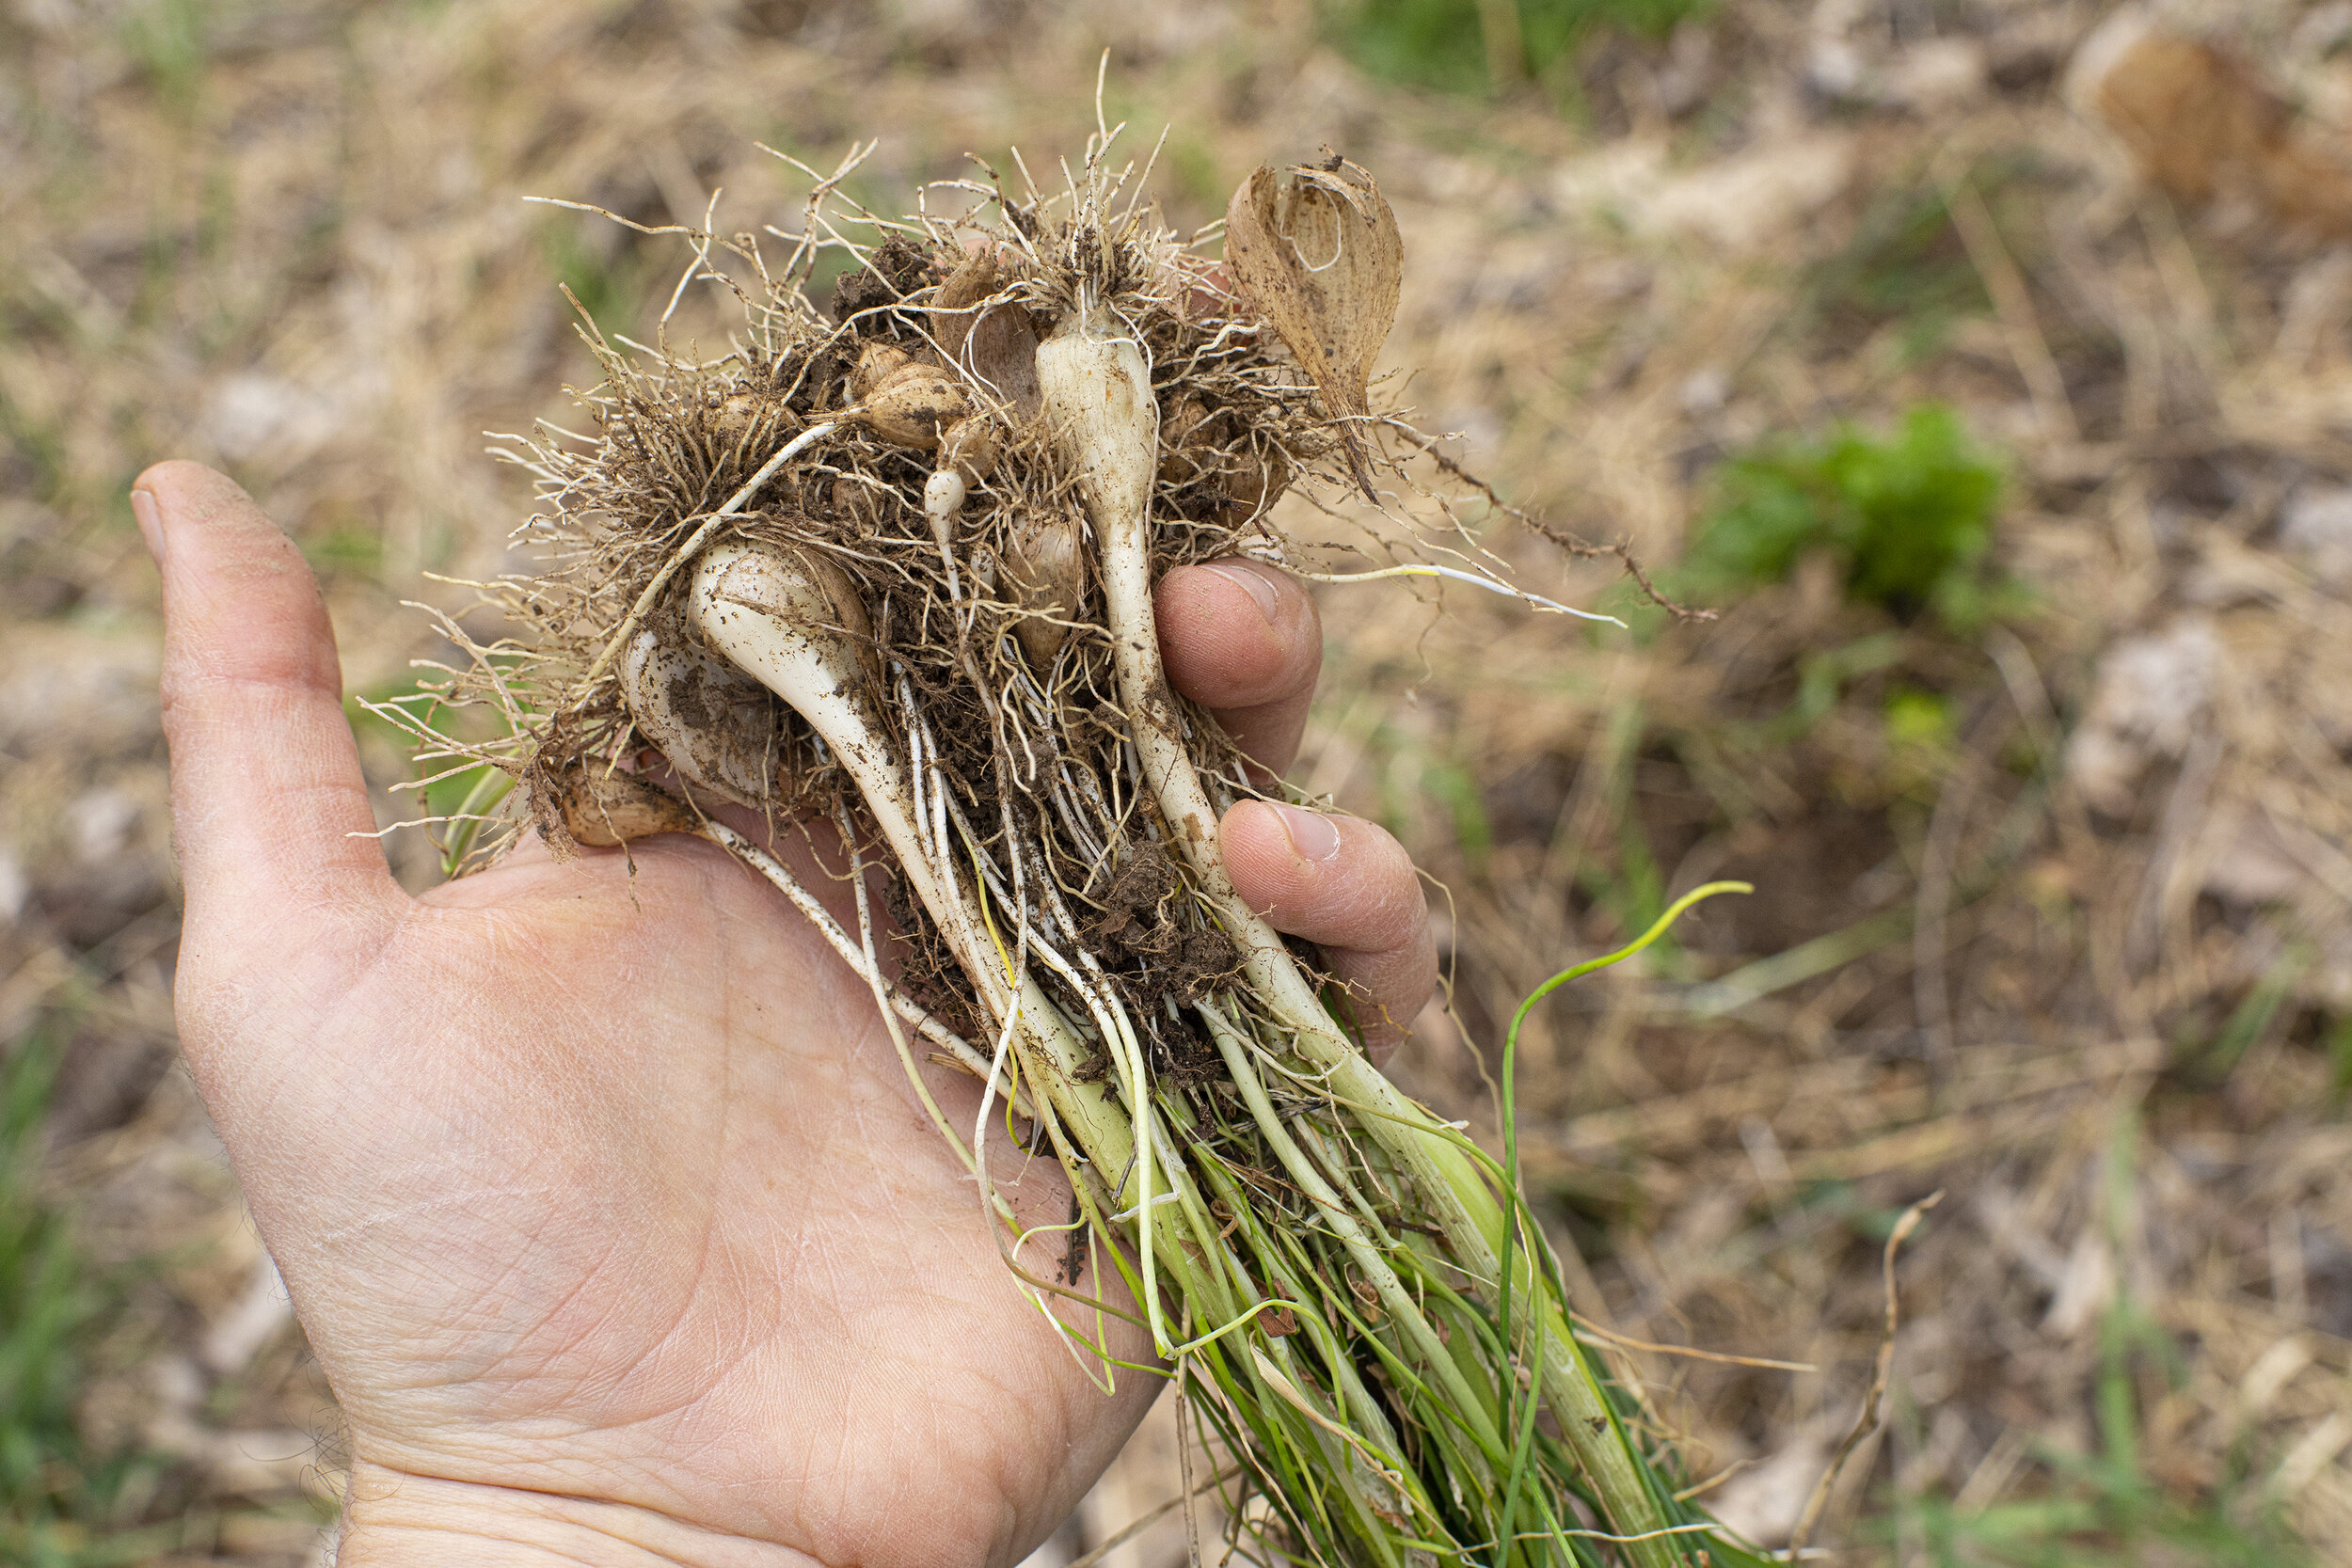
Finely diced garlic (or in this case wild spring alliums)

Breadcrumbs (approx 1/2 cup)

Salt / Pepper

Directions

  1. Add about 1/4 cup of good olive oil to a pan and bring to medium heat.

  2. Saute the garlic/alliums for a few minutes until translucent.

  3. Remove from the heat and pour into a small bowl to cool off.

  4. Meanwhile, in the same pan you used for the garlic, toast about 1/2 cup of breadcrumbs until golden brown.

  5. Shave a few teaspoons of bottarga directly into the oil and stir to infuse all the flavors. Adjust the amount of bottarga depending on how "powerful you want that flavor to be. Set aside.

  6. Bring a large pot of water to boil and season with salt.

  7. Cook the pasta for about 3 minutes and drain - making sure to reserve about a cup of the pasta water.

  8. Toss the pasta with oil/bottarga mixture, and adjust with the reserved pasta water.

  9. Plate each serving and top with more grated bottarga and a generous sprinkle of breadcrumbs which are essential to cap off the dish.

  10. Enjoy.

bottarga oil.jpg

Candy Cap Caramel Donuts

An experiment. When I first started reading about candy caps I was immediately intrigued. People always describe them in such vivid detail, emitting a perfume that smells overwhelmingly like maple syrup. A smell that saturates the room for hours. It’s one of the few mushrooms that lends itself to sweets and non-savory applications. While they don’t grow on the East Coast I was fortunate to get my hands on some from @theforagedfeast . I cycled through various ideas about what to make, read through all of @foragerchef ‘s lovely candy cap recipes and eventually circled back to something closer to home - donuts. The initial reaction might be WTF, or mushrooms don’t belong in donuts, but I assure you that these are not your average mushrooms. There might be some mental threshold that needs to be crossed for the mushroom skeptics out there, but on taste alone these are pretty special. I used a small percentage of dried candy cap powder for the dough which was naturally leavened over two days, deep fried, glazed and drizzled with a decadent salted candy cap caramel sauce. They might not end up on the menu of my hypothetical donut shop that I've been dreaming up, but they were a worthy experiment to work with some unexpected wild ingredients and produce something sweet and delicious with an incredible texture. Video of the whole process below.

finished candy cap donuts.jpg

Ingredients:

230 g Manitoba 0 Flour (or similar)

25 g Whole Wheat Tumminia Flour

12 g dried candy cap powder

50 g water

40 g sugar

50 g butter (cubed)

90 g eggs (approx 2 medium sized)

5 g salt

110 g active sourdough starter

1 tsp vanilla

1 gallon neutral oil

*makes approximately 6 - 8 donuts depending on size

The recipe is spread out over three days and in my opinion is well worth the wait. The natural leavening always yields a tastier end result. I normally start my process around 12pm on day 1 which results in fresh donuts for breakfast two days later.

candy caps in hand.jpg
dough hook.jpg
punching out.jpg
frying.jpg

The Dough

Directions:

  1. 12 pm Day 1 - In a stand mixer, combine all your ingredients and mix for about 10 minutes.

  2. This is very similar to a brioche dough, so at first it will feel quite sticky to the touch, even after ten minutes of mixing.

  3. Transfer the dough to a bowl and cover.

  4. Over the next 5-6 hours you’ll want to fold the dough with your hands 4 times. Let the dough relax for at least 30 minutes in between each fold. By the fourth fold the dough will feel a lot less sticky and will be smoother to the touch. Avoid the urge to add flour if you find it is too sticky.

  5. 6pm Day 1 - Transfer the covered bowl to the refrigerator and forget about it for 24 hrs.

  6. 6pm Day 2 - Remove dough from the refrigerator and allow to relax for about 30 minutes. Do one more round of folding and set out at room temperature overnight.

  7. 7am Day 3 - Gently flour your work surface and dump out the dough.

  8. Bring your neutral oil up to 350F.

  9. Use your hands to spread it out evenly. Use a rolling pin to gently roll out the dough to approximately 3/4 inch thickness. Do not press down too hard as you want to keep some rise to the dough.

  10. Using a circular cookie cutter approx 4” in diameter, punch out as many donuts as possible. Save the scraps for maltagliate - ugly leftover shapes of dough that shouldn’t go to waste!

  11. Use another circular punch about 1/2” in diameter to punch out the holes in the center of each donut. Gently use your fingers to stretch it out ever so slightly.

  12. Drop each circular dough into the oil and fry for about 3 minutes each side until golden brown.

  13. Remove from the oil and set onto a rack or paper towels to dry off and cool slightly.

drizzling spoon.jpg
donut with bite.jpg

The Candy Cap Caramel

This recipe is based on a recipe from Sally McKenney.

Ingredients:

1 cup (200g) granulated sugar

6 Tablespoons (90g) unsalted, room temperature cut up into 6 pieces

1/2 cup (120ml) heavy cream, at room temperature

2 teaspoons big chunky flake salt

20g dried candy cap powder

Directions:

  1. Bring a medium sized saucepan to medium heat and add the granulated sugar. Using a rubber spatula or whisk, stir constantly for a few minutes until the sugar eventually melts into a thick brown liquid. Continue to stir and lower the flame to a low simmer.

  2. Once there are no more lumps, add the butter and continue stirring to combine. Whisk/stir vigorously so the sugar and butter combines without looking clumpy. This will take a few minutes.

  3. Add the candy cap powder and continue stirring for another minute.

  4. Very slowly pour in the heavy cream and continue stirring. It will begin to bubble as it simmers. Allow it to simmer like this for about 1 minute.

  5. Remove from the heat and as it cools add in the flake salt.

  6. Allow it to completely cool before using.

  7. It will keep in the fridge for about 1 month.

The Final Donut

The donuts are then dipped in a plain glaze and drizzled with the candy cap caramel. Best enjoyed while still slightly warm.