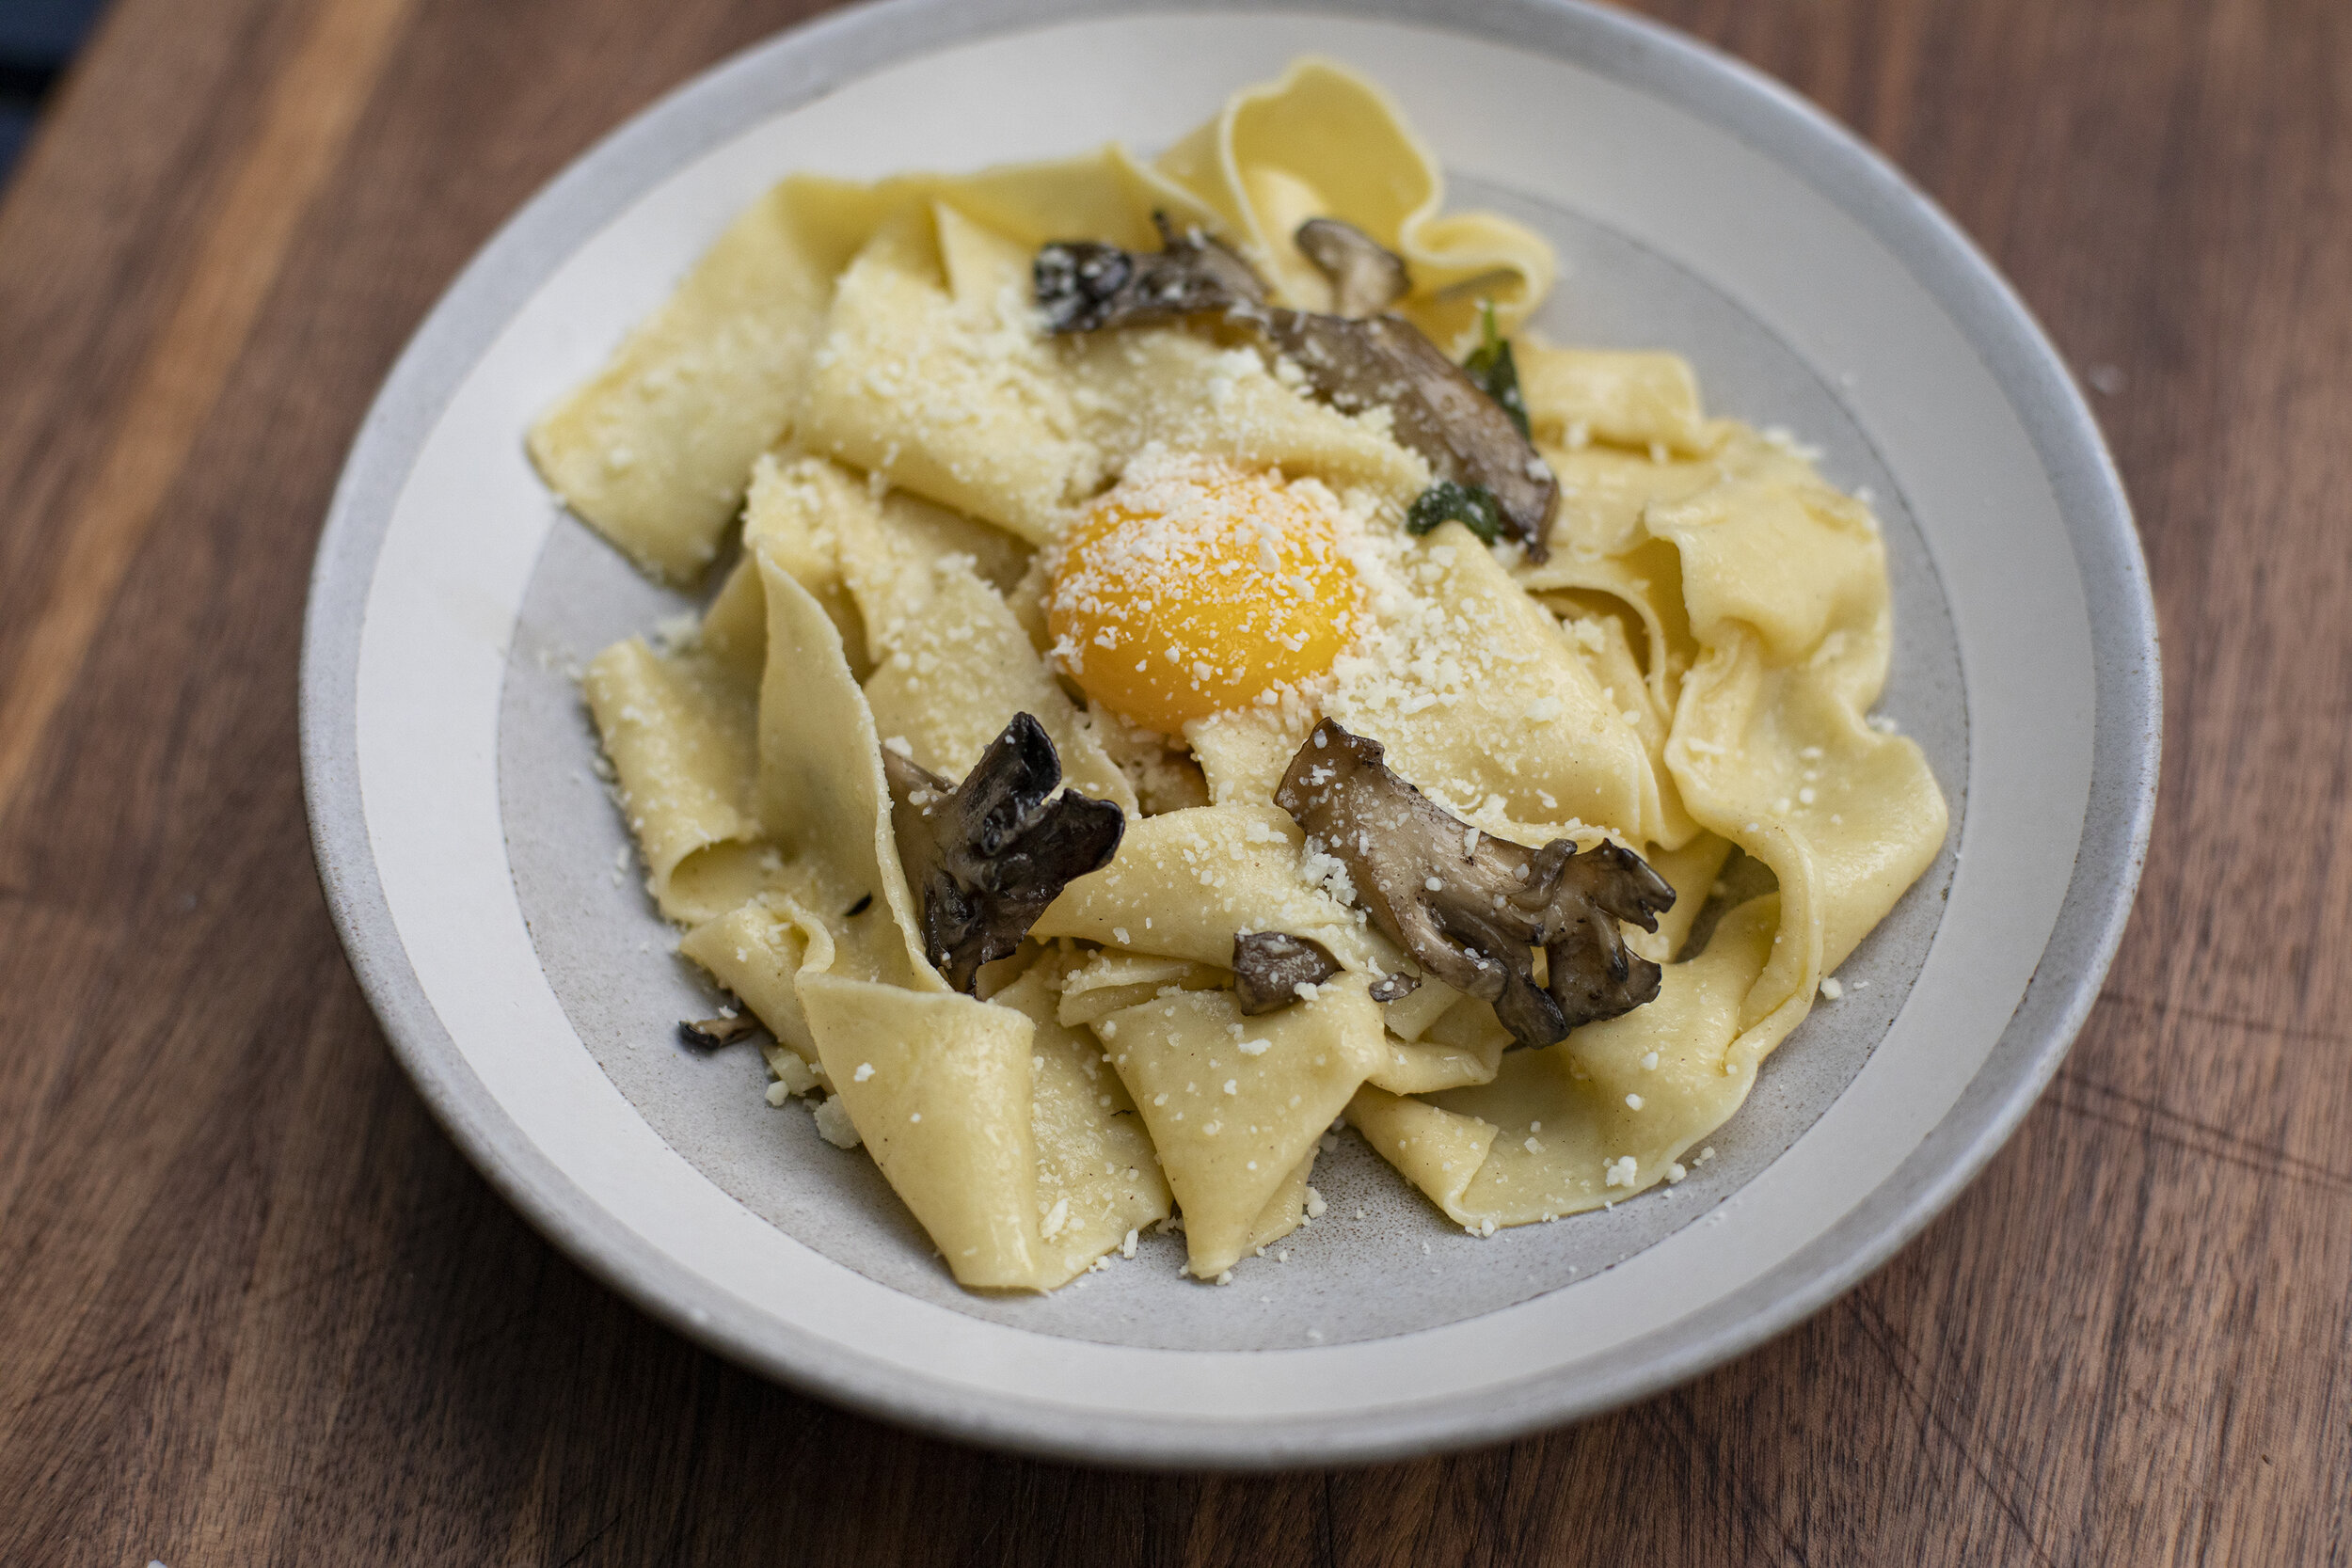
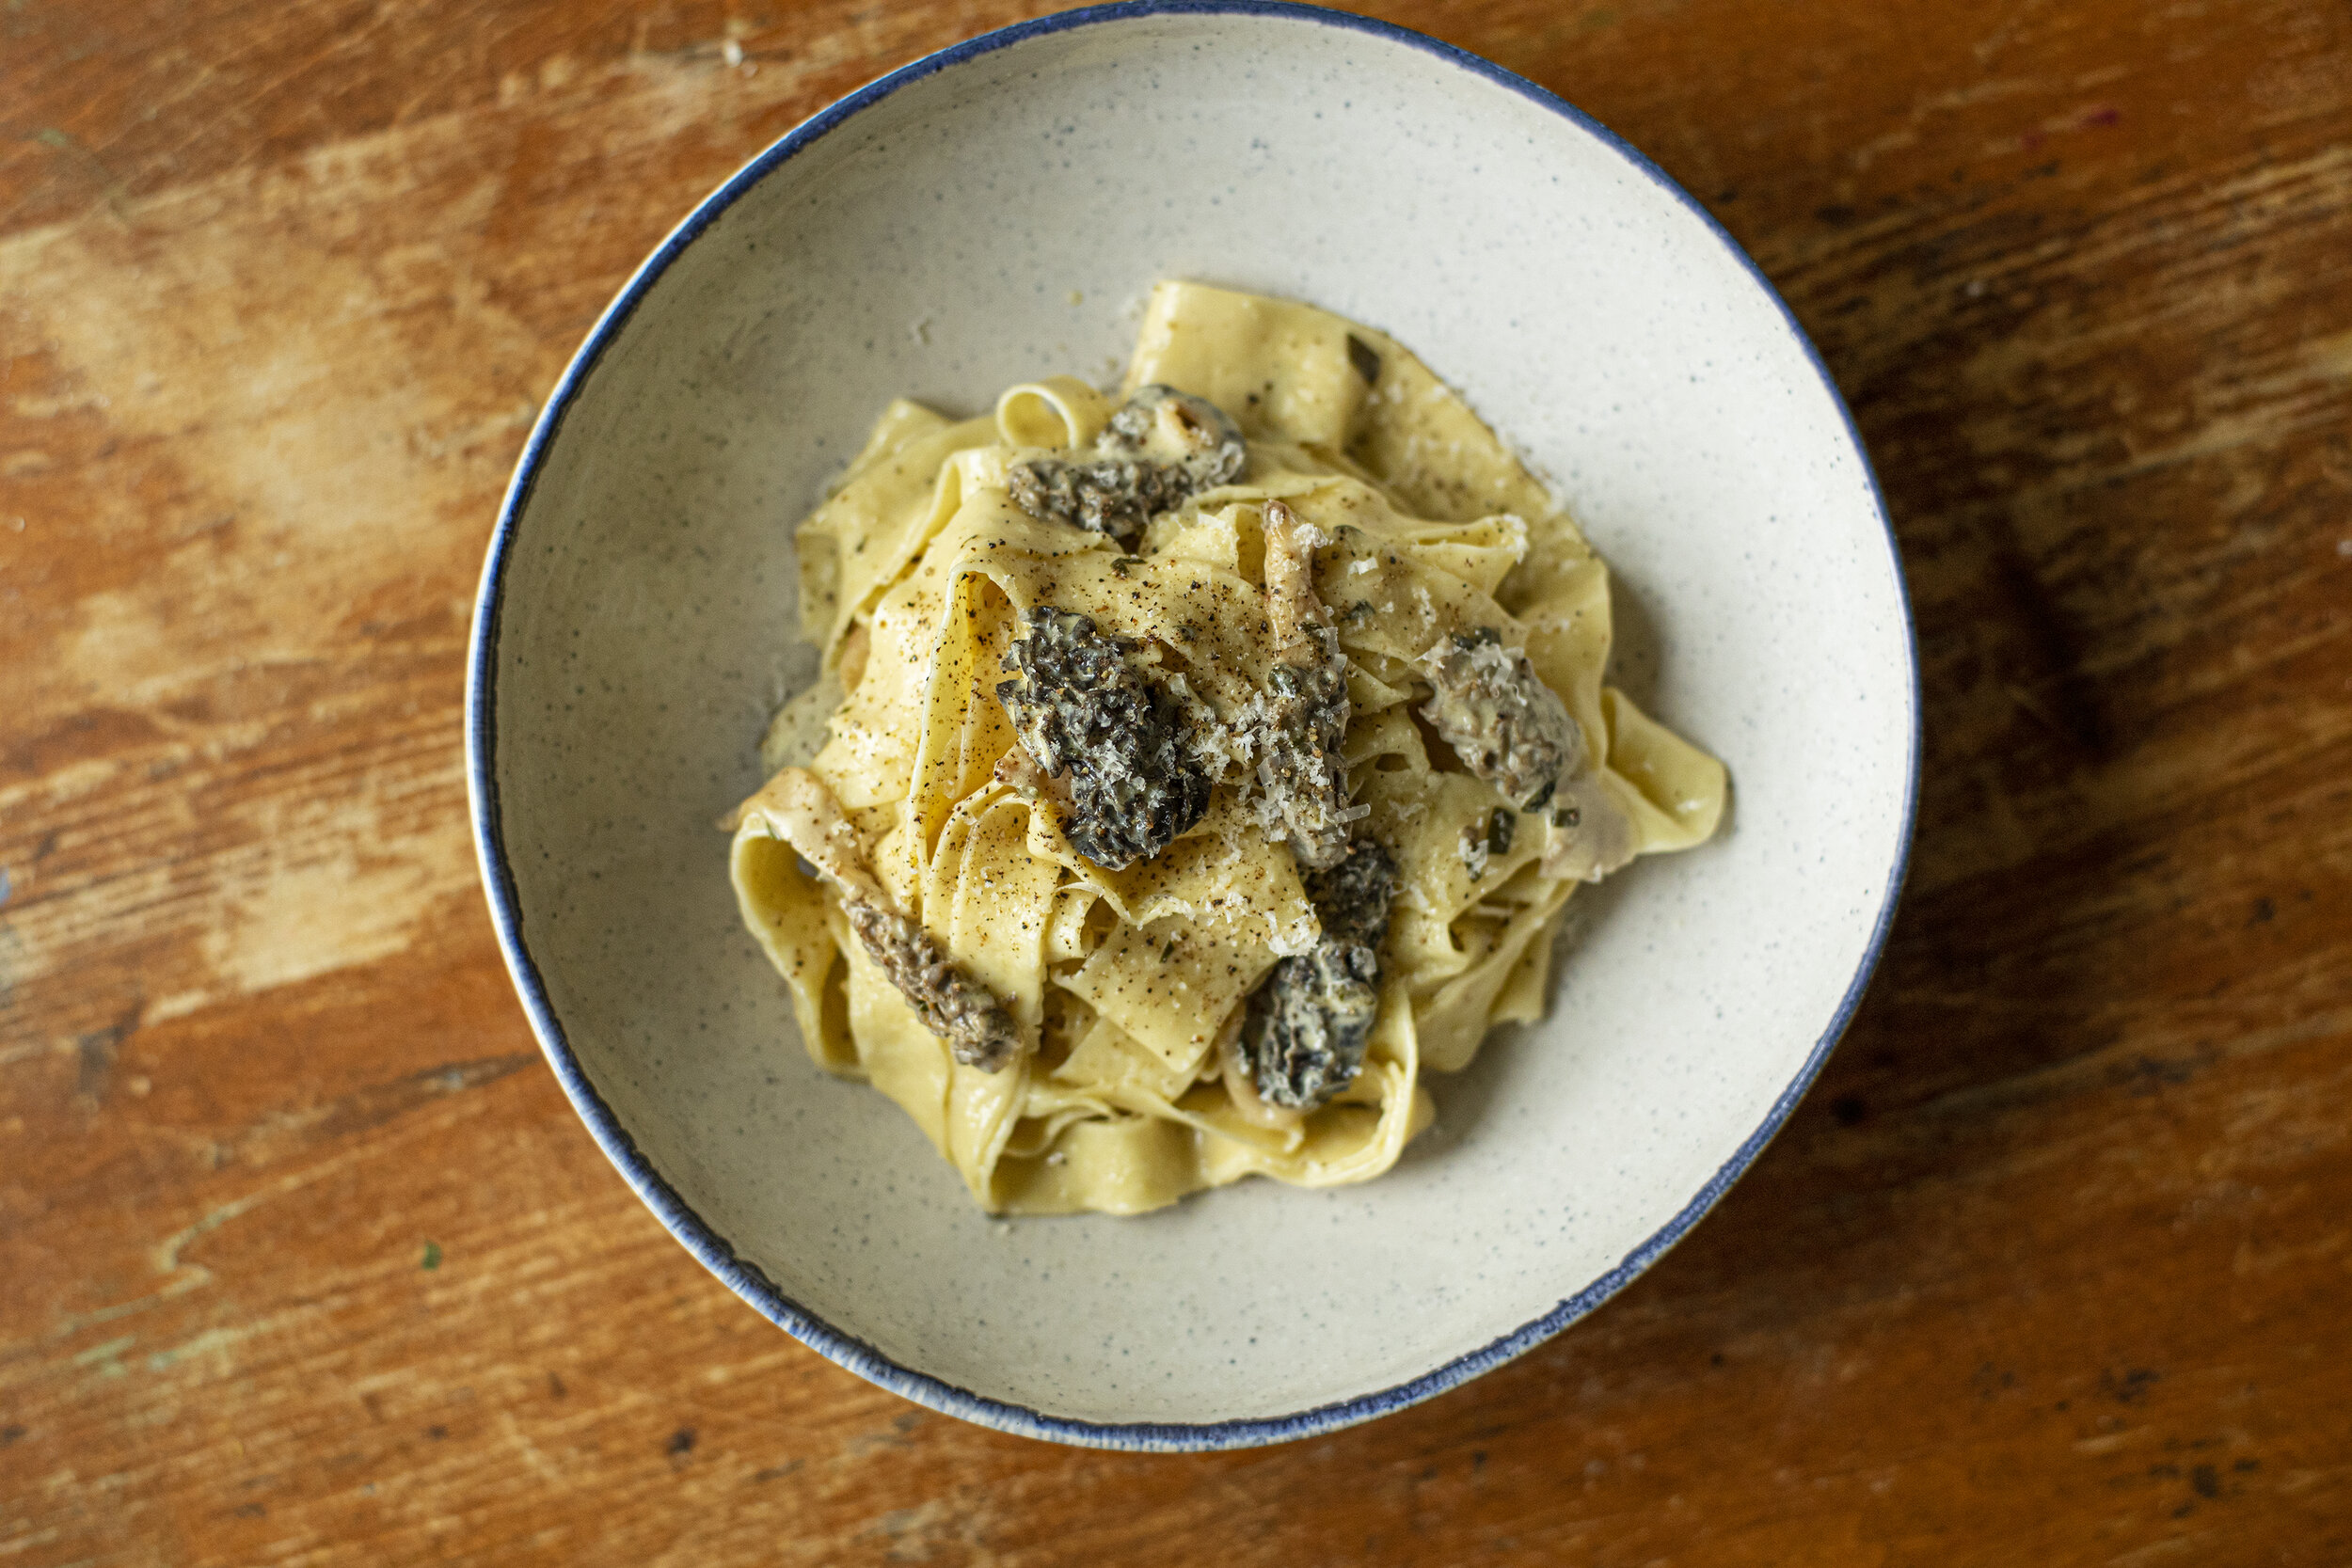
Black Trumpet Ravioli with Sage Cream Sauce

Black trumpet ravioli filled with sautéed black trumpets & shallots, parsley, lemon zest, and fresh ricotta served with a creamy sage butter sauce and cracked black pepper. Simple and decadent, meant to showcase one of the most unique wild mushrooms available this time of year. The smell of fresh trumpets are hard to define; earthy, floral, almost intoxicating. I always enjoy thinking of new ways to cook with them. A short video of the process is below.
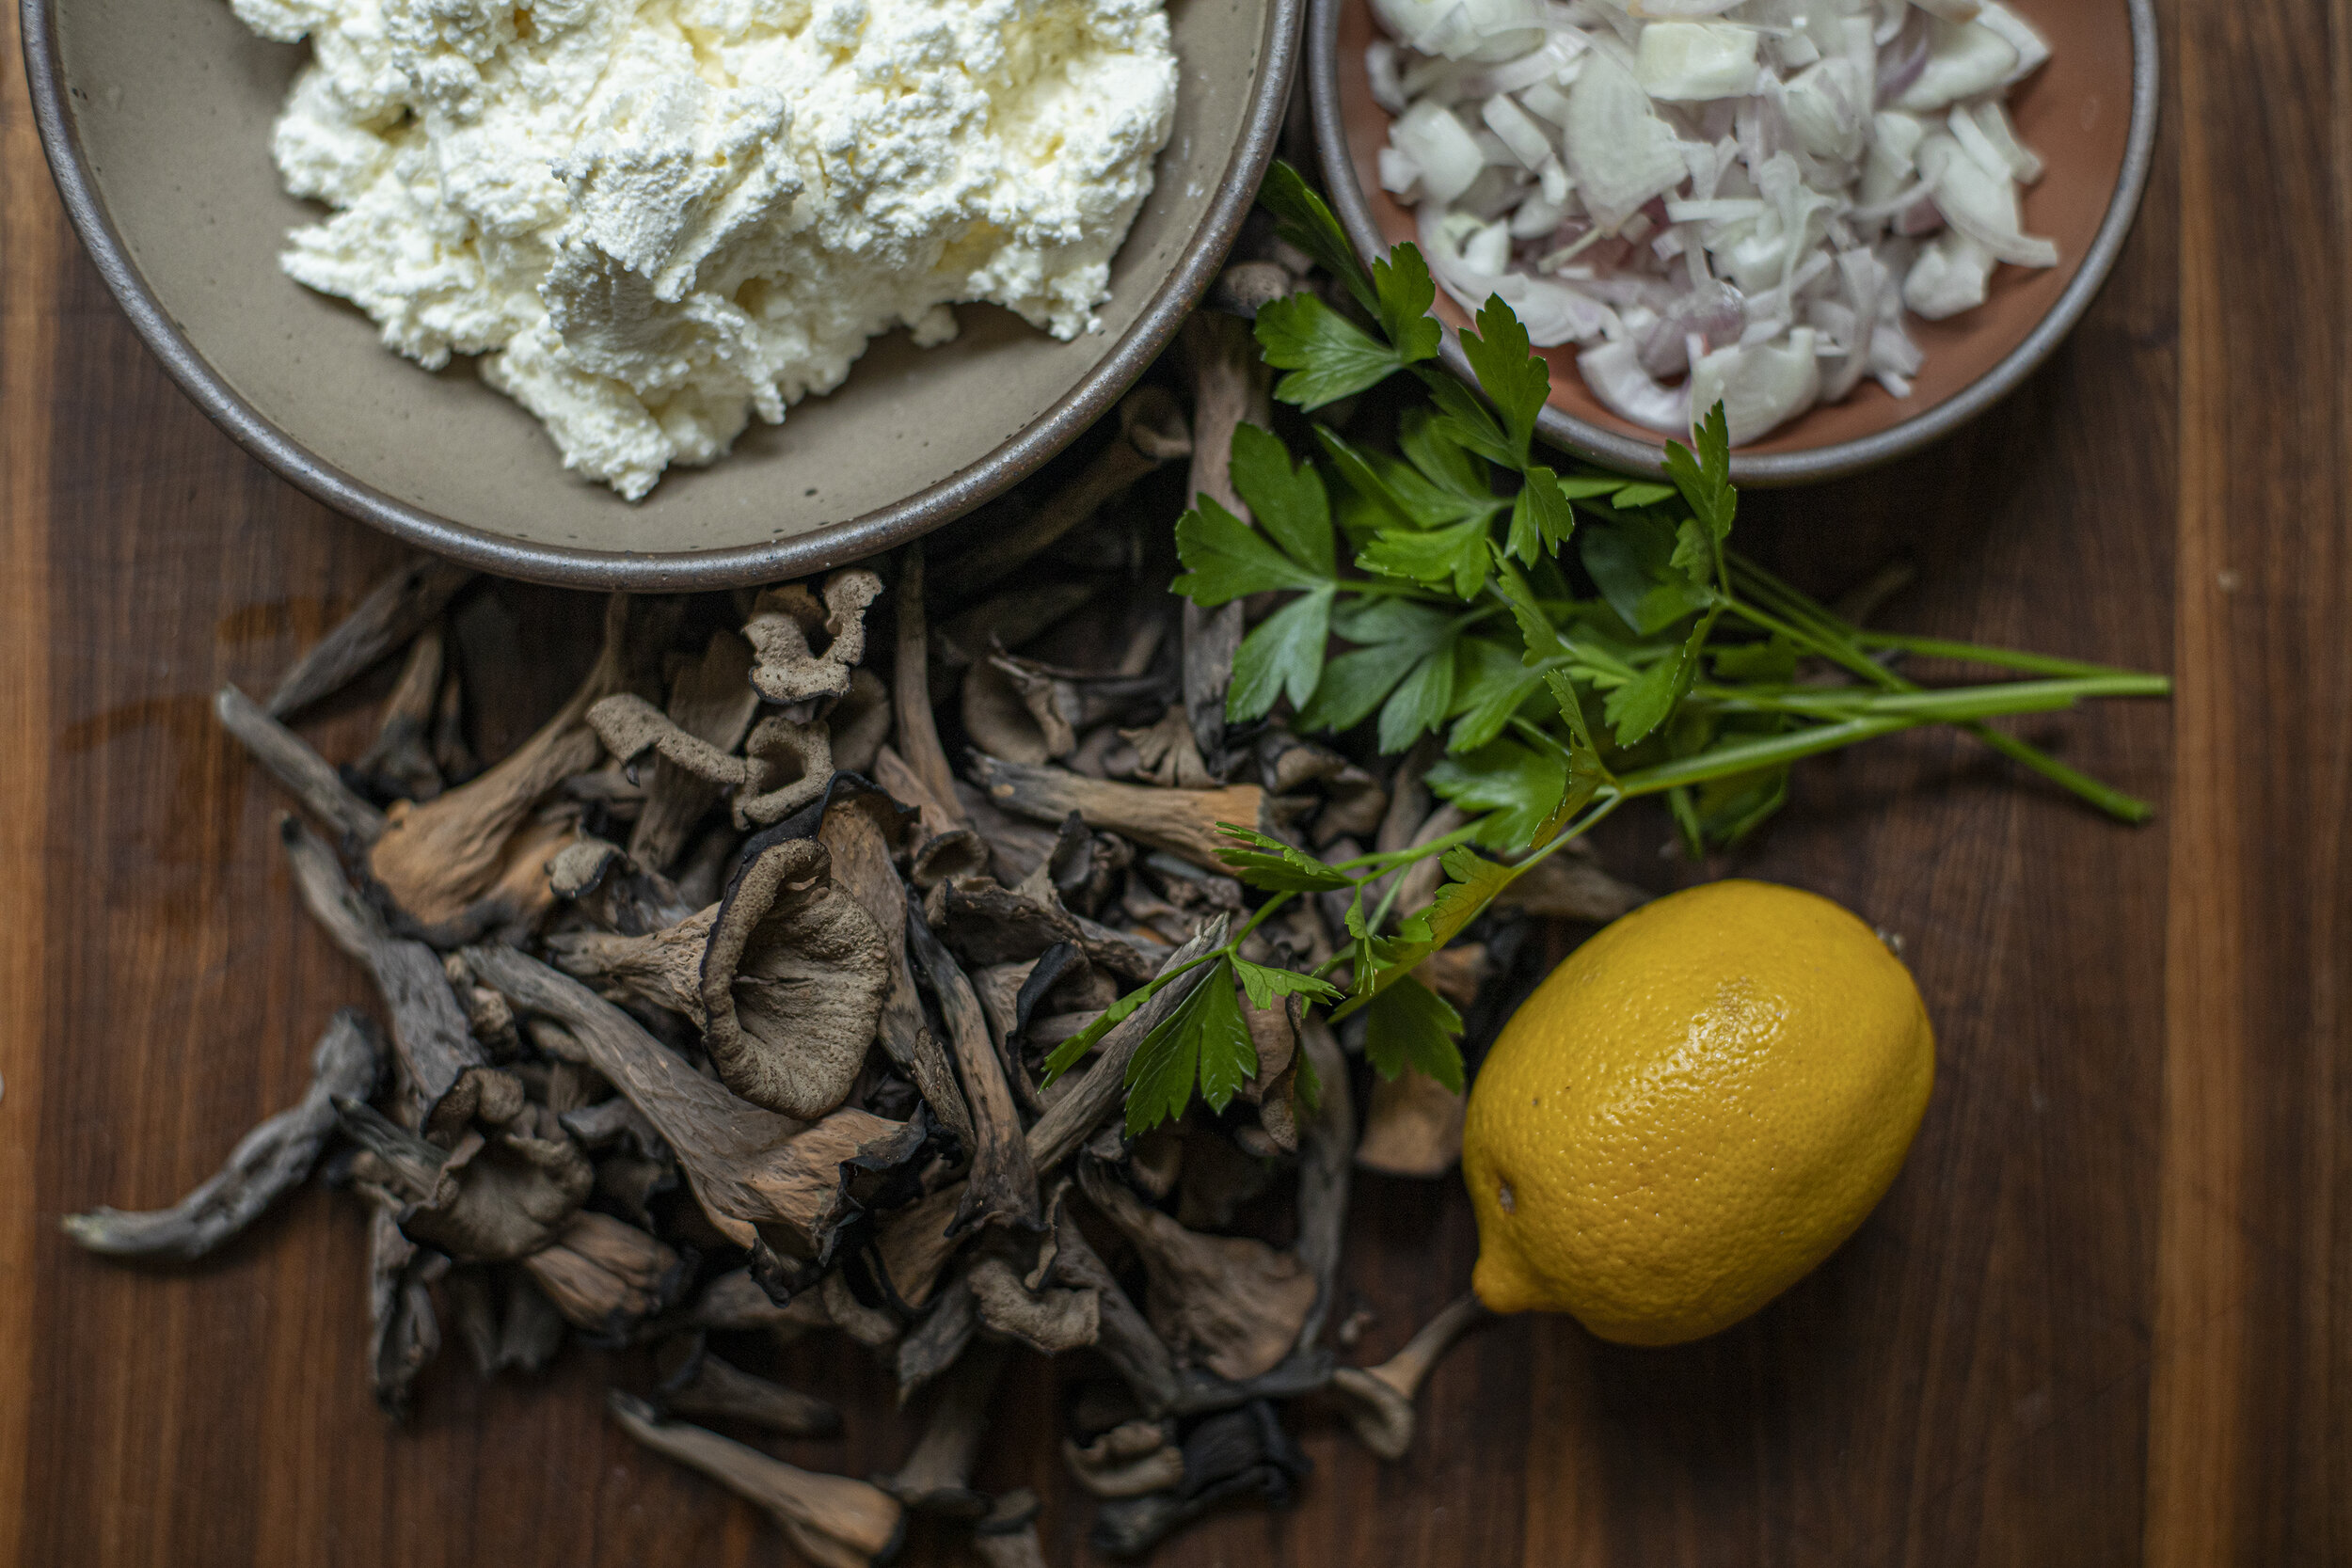
blacktrumpetravioli 1.jpg
filling1.jpg
filling2.jpg

The Filling

Ingredients:

Fresh black trumpet mushrooms (about 2 cups)

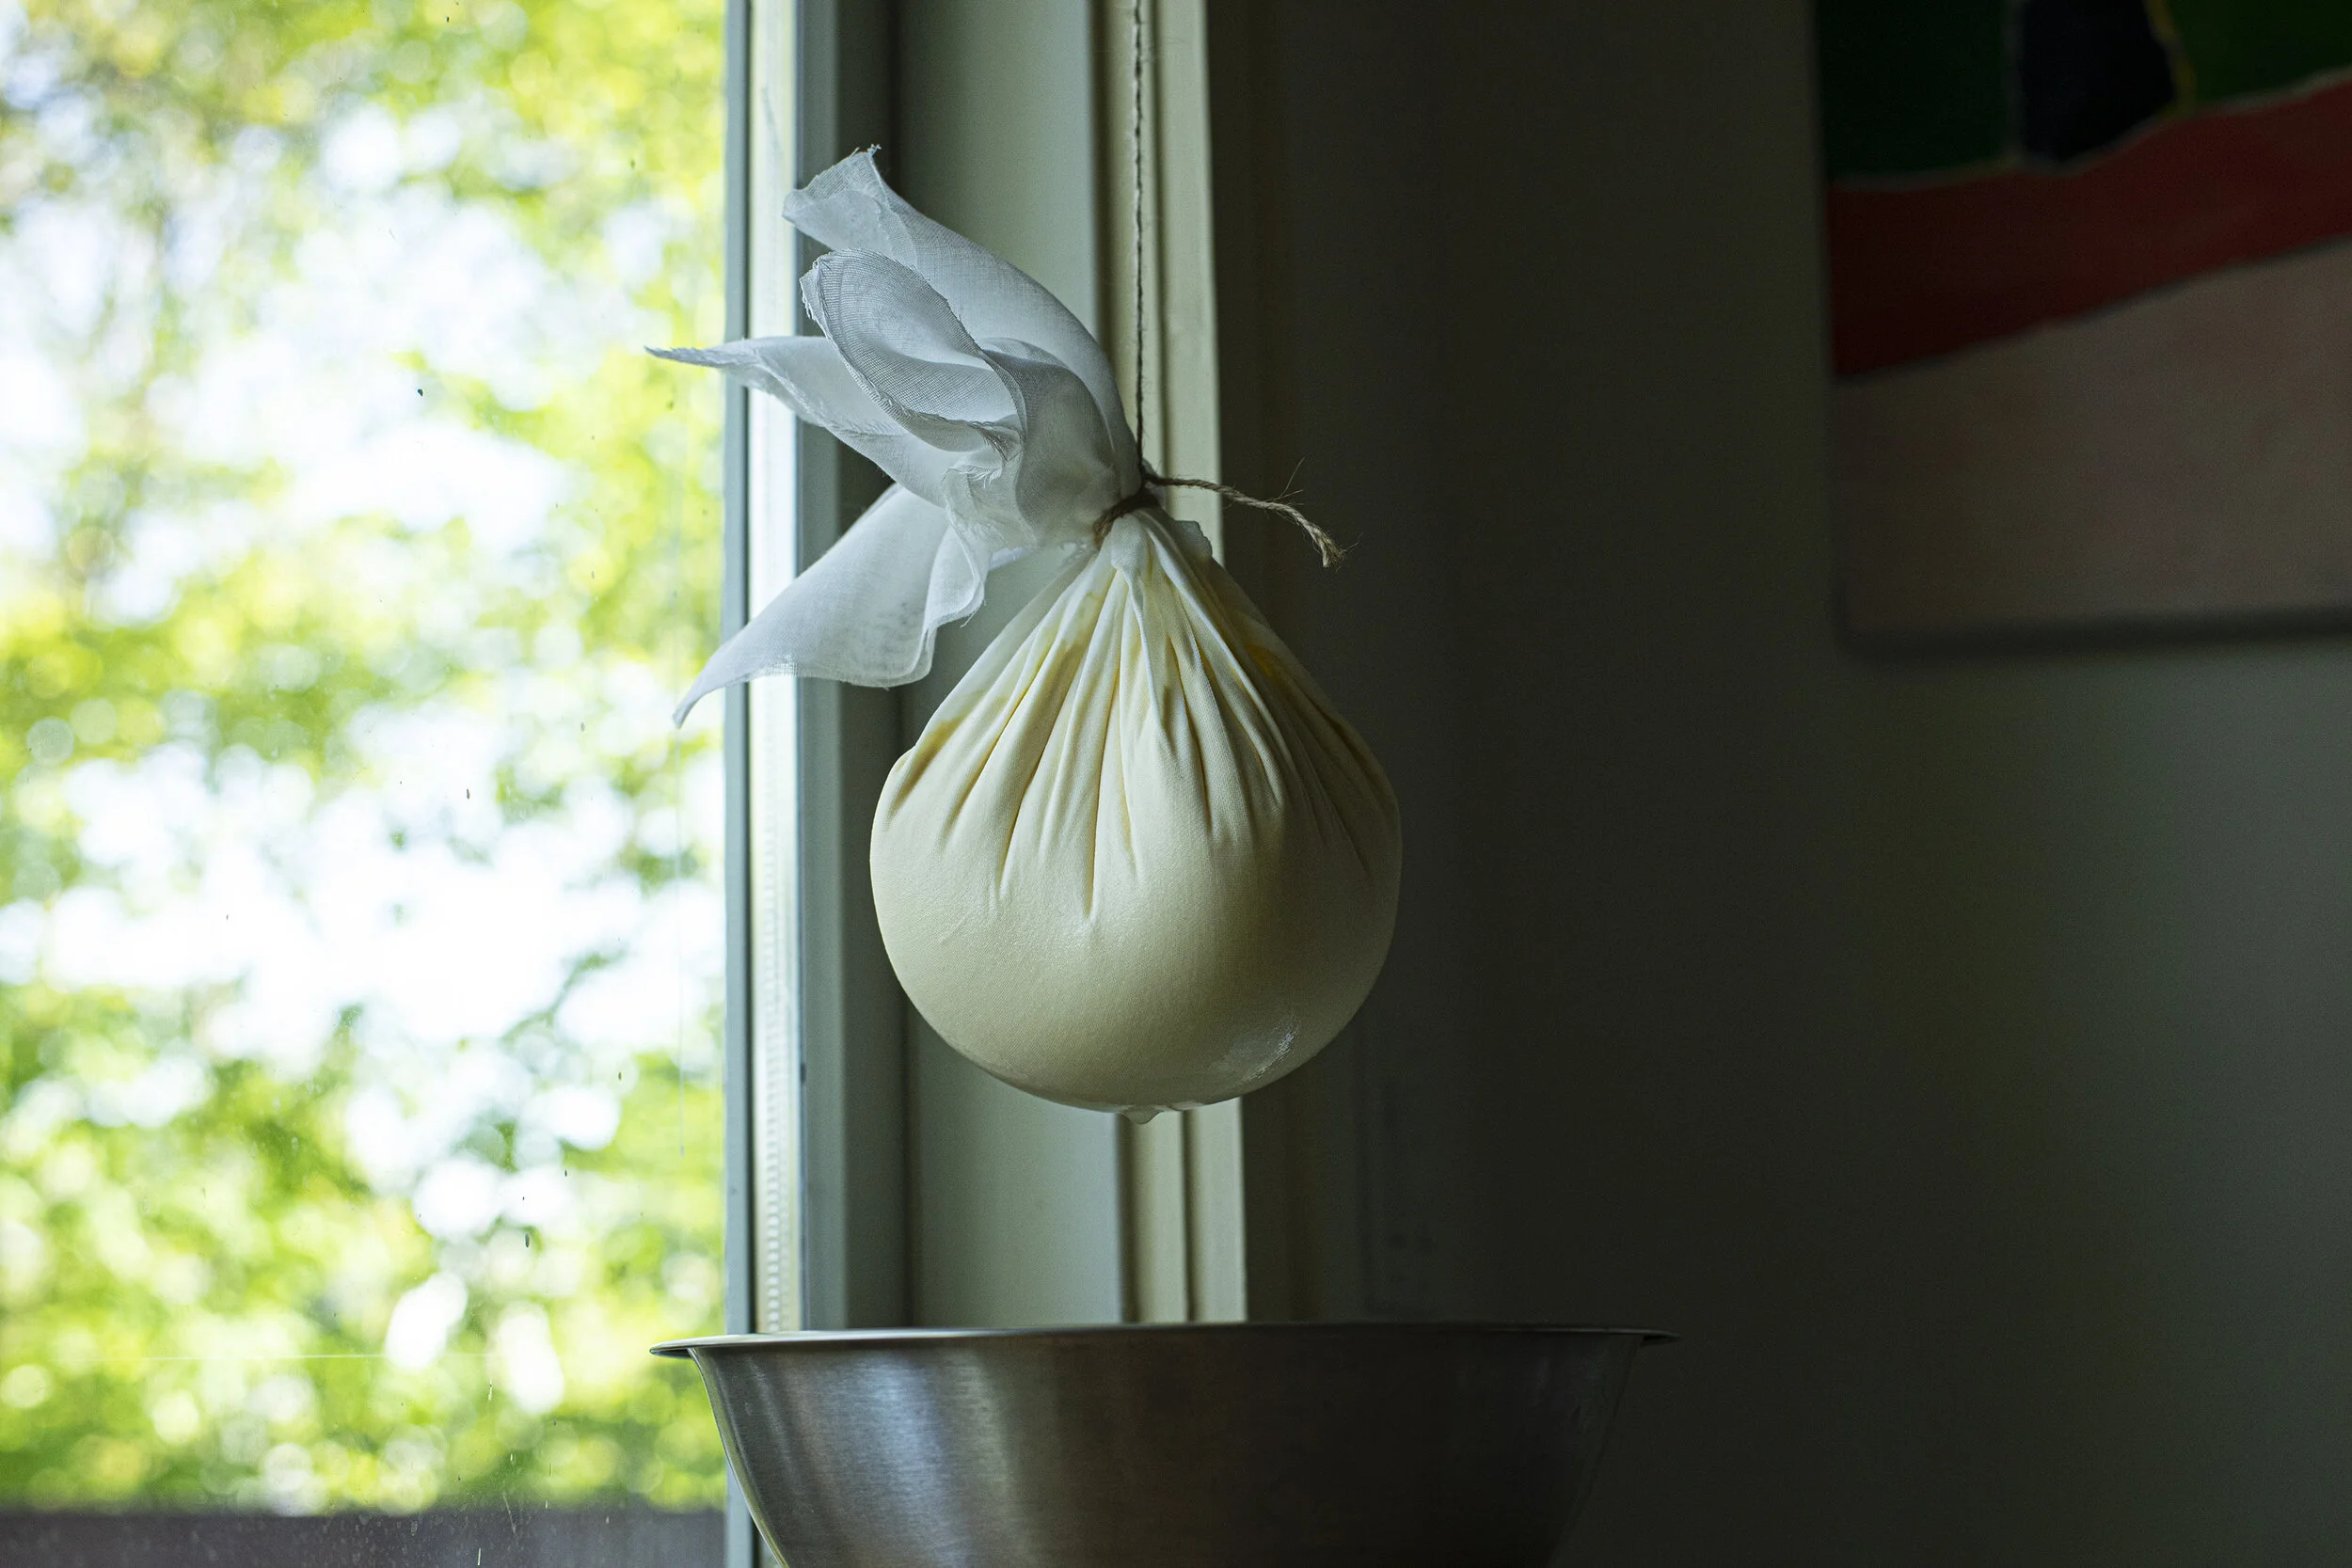
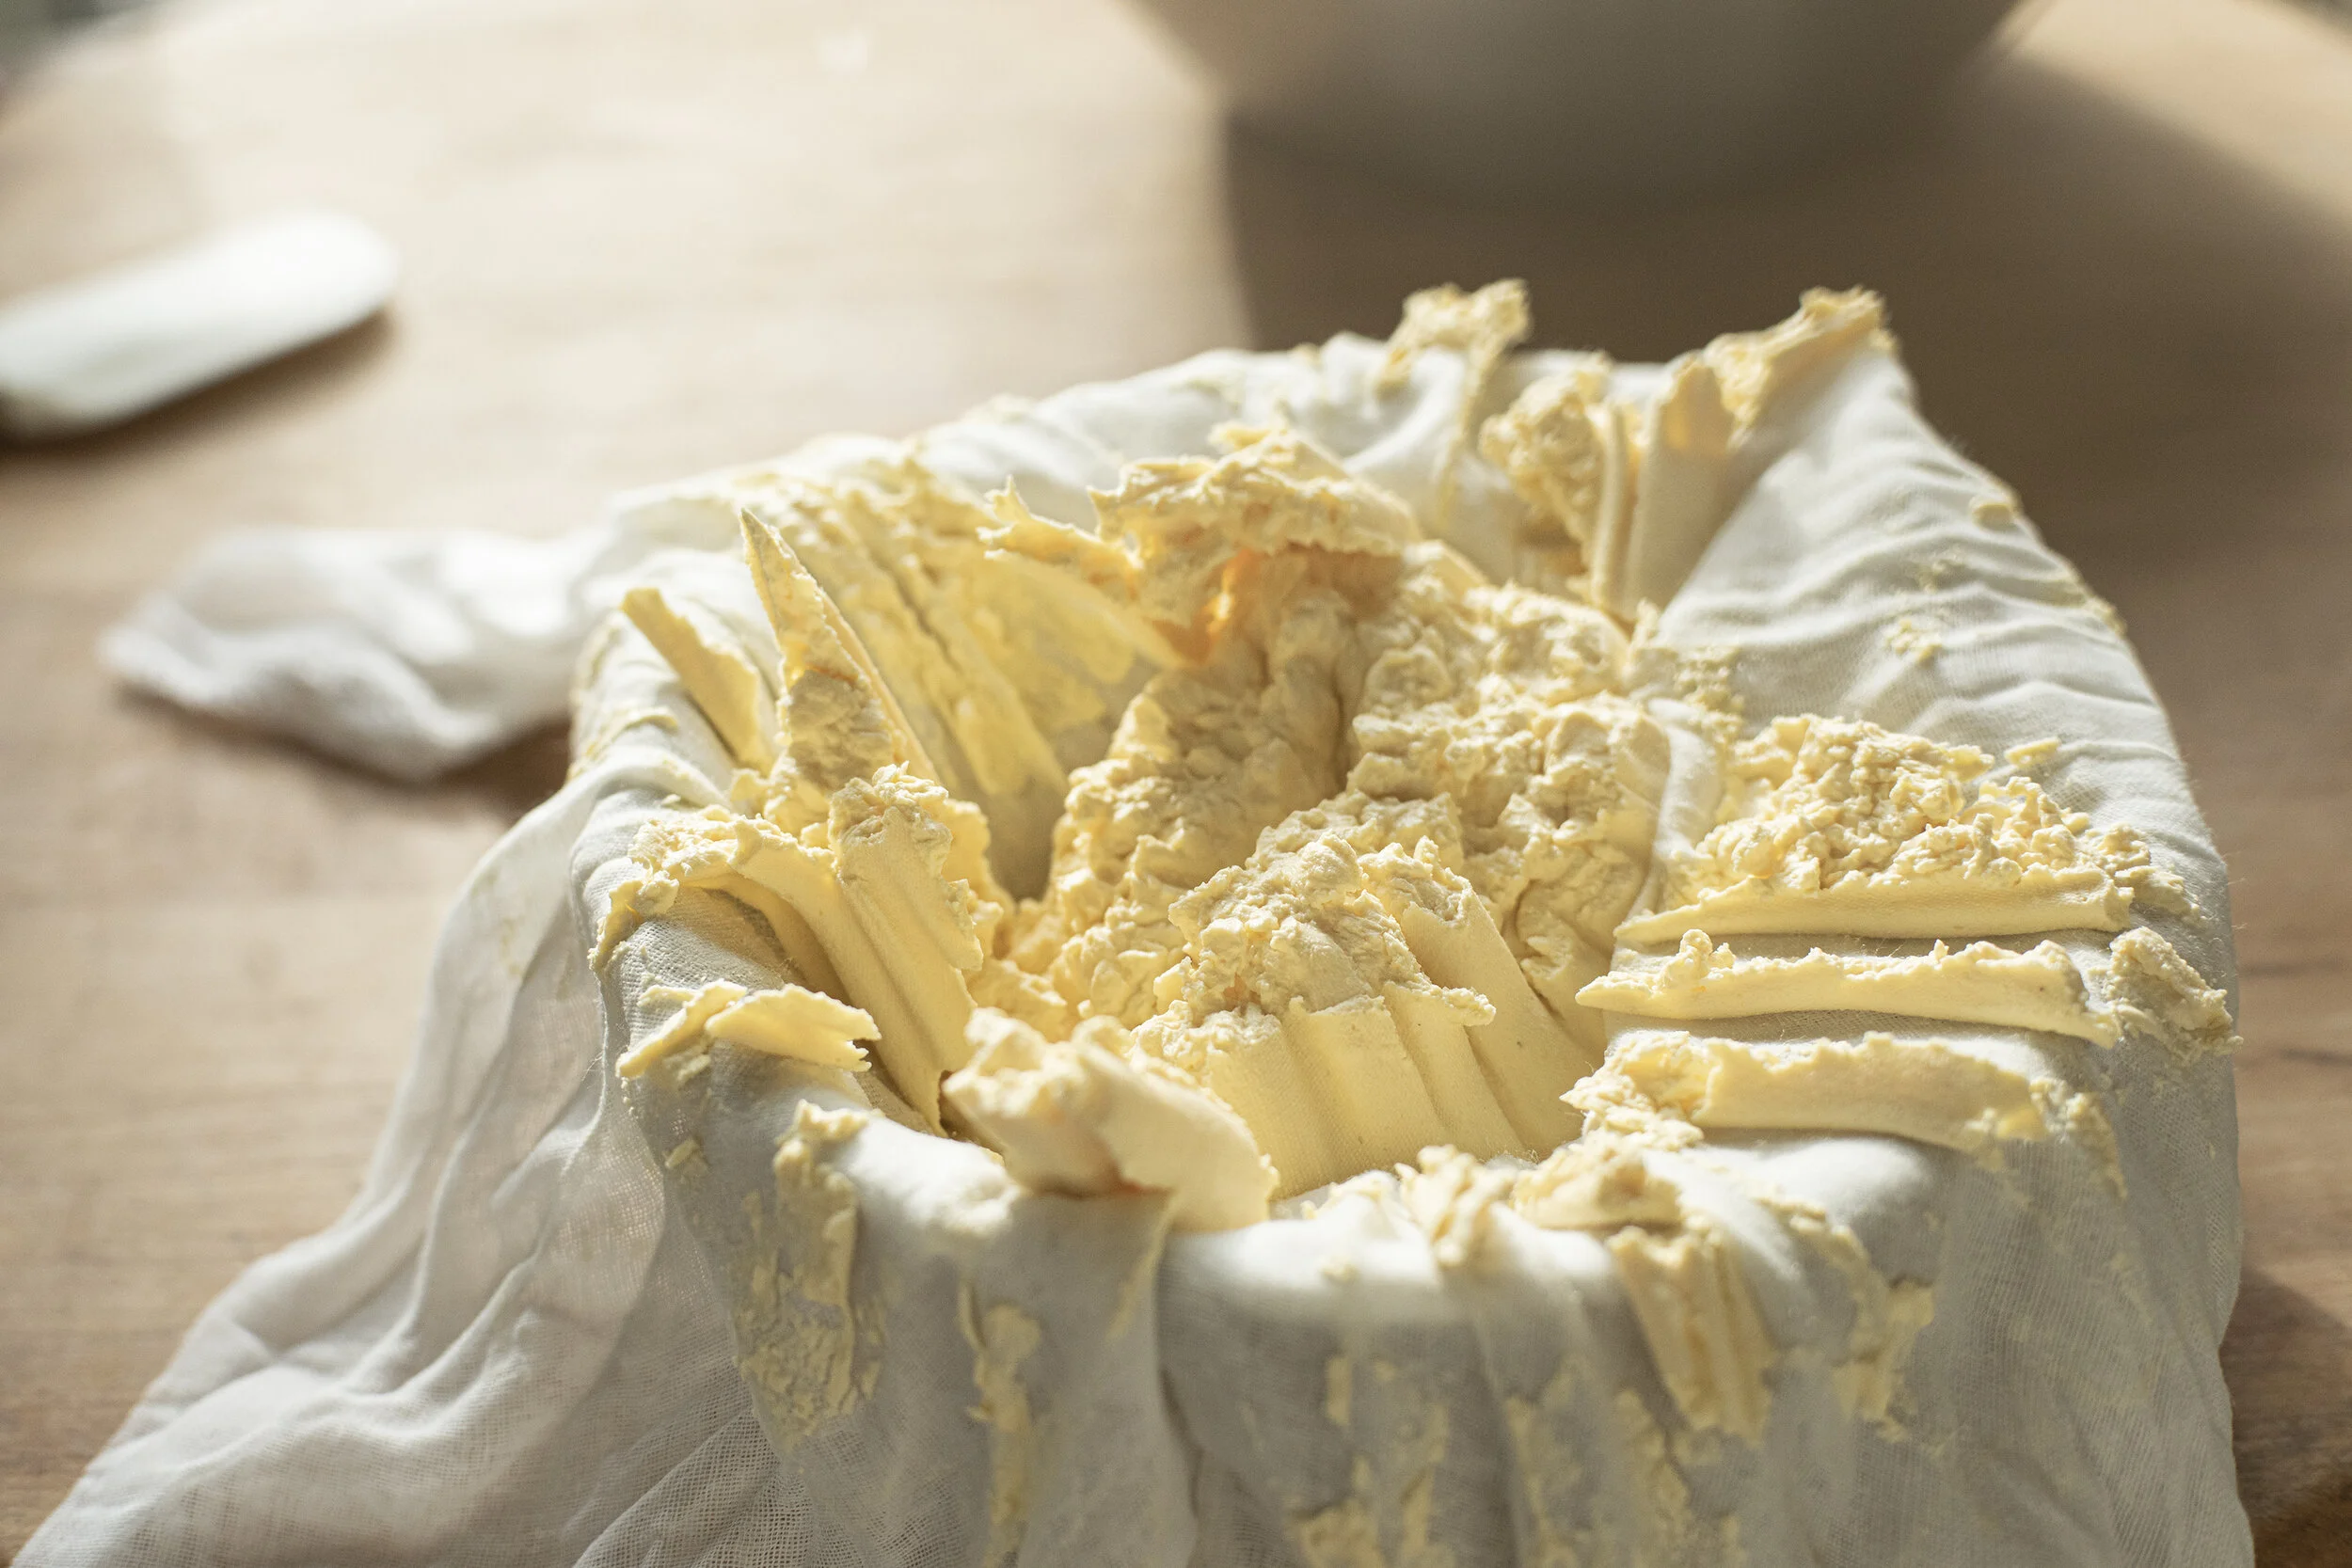
Ricotta (2 cups drained of excess liquid)

2-3 Shallots (finely minced)

Zest of 1 lemon

Parsley (handful)

Olive oil

Directions:

  1. Bring a skillet to medium heat and add a few tablespoons of olive oil.

  2. Add the shallots and saute for about 5 minutes until softened and golden, constantly stirring.

  3. Add the mushrooms and continue to cook down for another 5 minutes until well incorporated.

  4. Season with a little salt and pepper.

  5. Remove from the skillet and set aside to cool.

  6. In a food processor, add the mushroom/shallot mix and parsley and pulse a few times for a a few seconds. The result should be a mix that is finely chopped (NOT completely blitzed into a puree).

  7. Remove from the processor and mix together with the ricotta and lemon zest.

  8. Season with salt to taste.

  9. Cover and set aside (in refrigerator) until ready to fill the ravioli.

The Pasta

Ingredients

454 g 00 Flour

258 g eggs (beaten before mixing)

1 extra egg (beaten for sealing)

*Portioned for 5 - 6 people

Directions

  1. Dump the weighed flour onto a clean work surface.

  2. Use your hand to form a well (like a volcano) in the center of the flour.

  3. Carefully pour your eggs into the center and begin slowly mixing together with a fork. Gradually, carefully, work your way all around to incorporate the eggs with the flour, without breaking the outer wall.

  4. After about 5 - 10 minutes it will start coming together into a shaggy mass. Begin using your hands to knead the dough together. Work diligently for another 5 minutes until it is no longer shaggy.

  5. Use the edges of your hands, knuckles, to work the dough until it starts to form a smooth ball. Roll it, applying pressure, into the work surface. Fold it. Roll it again. After about ten minutes it should be a smooth, and ready to rest.

  6. Cut the dough into two and wrap each in plastic wrap. Set into the fridge for at least 30 minutes.

  7. The following steps revolve around using a pasta attachment on a Kitchenaid - but you could also do this by hand with a rolling pin. Remove one of the dough balls, unwrap, and cut off a portion of the dough. Lightly flour and cover the rest back with plastic. Press gently and form a rectangle.

  8. Pass the dough through the sheet pasta attachment at it’s widest setting. If it feels sticky, add a little more flour. Gradually tighten the settings of the pasta attachment, one click at a time, and pass the pasta sheet through until it is light and delicate. For ravioli, I normally go to the 6th setting.

  9. Cut off any irregular ends and you should be left with a long sheet of sfoglia that is about 5-6 inches thick.

  10. My method is best visualized in the video below - and this is only one way to do it. There are many other much more skilled pasta makers out there who likely would recommend doing it another way - but this was my approach. This method involves folding the sheet of dough over on to itself vs using two different sheets stacked on top of each other.

  11. Using a spoon and your finger tips, carefully place a dollop of filling about the size of the tip of your pinky - in one corner of the sfoglia. Leave about a half to 3/4 inch of space on either side to the edge. Continue placing the dollops of filling along one entire side of the rectangle.

  12. Brush on a light coating of egg wash around the filling and along the edge of the sfoglia.

  13. Carefully fold over the exposed half of the sfoglia onto the other half, covering the filling. Use your fingers to gently press down around the mounds of filling, pushing out any air pockets to the other edge. Work intentionally to eliminate any remaining air pockets.

  14. Using a scalloped pasta cutter - trim off the outer edges - but leaving the folded edge in tact.

  15. Now cut between each individual ravioli with the cutter until you have none left.

  16. Gently dust with semolina, and transfer to a pan with semolina sprinkled on the bottom to avoid sticking. Allow to air dry for about 10 minutes and transfer to the refrigerator until ready to cook.

  17. Repeat the process until you have no more dough or no more filling left.

fillingravioli.jpg
cut ravioli.jpg

The Sauce & Final Dish

Ingredients:

1 Cup heavy cream

3 tbsp butter

1/2 cup grated pecorino Romano

1 tbsp very finely minced sage

Pasta water as necessary

Directions:

  1. You should make the sauce right before you drop the ravioli into the boiling water. This step only takes a few minutes and you don’t want the sauce sitting around.

  2. Melt the butter in a skillet on medium heat.

  3. Add the finely minced sage and stir into the butter, cooking for a minute or two.

  4. Add the heavy cream and continue to stir so nothing sticks to the bottom of the pan.

  5. Add the grated pecorino Romano and continue to stir as the sauce begins to thicken.

  6. Add pasta water to adjust the consistency of the sauce, a few tablespoons at a time. This will also help make the sauce more silky.

  7. Add the ravioli to salted boiling water. The fresh pasta will only take about 3-4 minutes to cook. Continue simmering your sauce.

  8. Remove the sauce from the heat and add the cooked/drained ravioli directly to the pan. Using a large spoon, stir together, completely coating all of the ravioli with sauce.

  9. Plate each serving and finish with a sprinkle of more freshly grated pecorino and fresh cracked black pepper.

blacktrumpetravioli 2.jpg
trumpets1.jpg

Brown Butter Hen of the Woods Pappardelle

Wild mushroom pappardelle with brown butter, sage, pecorino, and a raw egg yolk. This is one of my favorite times of year and also one of my favorite wild mushrooms - Hen of the Woods, or Sheepshead, or Maitake, Grifola frondosa. They’re easy to miss if you don’t know what to look for. They resemble the fallen leaves of the oak tree in which they like to grow under. I was pleasantly surprised today to find two perfect hens a little earlier than I was expecting. This could be substituted for any of your favorite mushrooms, but I personally love how the meatiness of the Hen of the Woods stands up against the heft of the pappardelle.

henpapardelleplate.jpg
maitake2.jpg
maitake3.jpg

Pappardelle

Ingredients

450 g 00 Flour

250 g eggs (beaten before mixing)

*Portioned for 5 - 6 people

Directions

  1. Dump out the weighed flour onto a clean work surface.

  2. Use your hand to form a well (like a volcano) in the center of the flour.

  3. Carefully pour your eggs into the center and begin slowly mixing together with a fork. Gradually, carefully, work your way all around to incorporate the eggs with the flour, without breaking the outer wall.

  4. After about 5 - 10 minutes it will start coming together into a shaggy mass. Begin using your hands to knead the dough together. Work diligently for another 5 minutes until it is no longer shaggy.

  5. Use the edges of your hands, knuckles, to work the dough until it starts to form a smooth ball. Roll it, applying pressure, into the work surface. Fold it. Roll it again. After about ten minutes it should be a smooth, and ready to rest.

  6. Cut the dough into two and wrap each in plastic wrap. Set into the fridge for at least 30 minutes.

  7. The following steps revolve around using a pasta attachment on a Kitchenaid - but you could also do this by hand with a rolling pin. Remove one of the dough balls, unwrap, and cut off a portion of the dough. Lightly flour and cover the rest back with plastic. Press gently and form a rectangle.

  8. Pass the dough through the sheet pasta attachment at it’s widest setting. If it feels sticky, add a little more flour. Gradually tighten the settings of the pasta attachment, one click at a time, and pass the pasta sheet through until it is light and delicate. For pappardelle, I normally go to the 5th setting.

  9. Allow the sheet of dough (sfoglia) to dry for 2-3 minutes and fold in half. With a knife, trim off irregular edges. Gently fold the dough into about 3 inch folds, over and over until you have a nice compact roll.

  10. Using your knife, carefully begin cutting strips of the roll into about 3/4 - 1 inch (1.9 - 2.5 cm) pieces. I like my pappardelle nice and wide. With your fingers, unroll each strip and sprinkle with a light coating of semolina. You can make little nests with each batch that is finished. Repeat until all of your dough has transformed unto tagliatelle.

  11. Cook right away or store in the fridge covered with a towel.

flour and eggs.jpg

The Pasta

Ingredients

Wild mushrooms thinly sliced (.5 lb or 250 g)

Butter (1 stick or 120 g)

Garlic (3 cloves finely minced)

Pecorino romano

Black pepper

Sage

Egg

Pasta Water

Directions

  1. Bring a large pot of water to a boil.

  2. Bring a large skillet to medium heat.

  3. Add the thinly sliced mushrooms to the pan and dry saute for a few minutes, stirring frequently and careful not to burn. This will remove some of the water weigh of the mushrooms before you add the fat. Add a drizzle of olive oil and a sprinkle of salt. Stir again.

  4. Add in the butter and bring to a low simmer, continuing to stir.

  5. Add the sage and garlic, continue to saute and stir for another ten minutes until the mushrooms are completely cooked through and tender.

  6. Meanwhile, cook your pasta to your liking and be sure to reserve a little pasta water to lubricate the noodles if necessary.

  7. Drain the pasta, and transfer the noodles directly into the pan with the mushrooms and browned butter. Toss well so all the noodles are completely covered in the sauce. Add pasta water (or any extra browned butter) as necessary if it feels too dry.

  8. Plate each dish with the pappardelle and mushrooms. Create a small well in the middle of each plate for the egg yolk.

  9. Very carefully, crack and egg and discard of the egg white. Gently place an egg yolk in the middle of each plate without breaking it.

  10. Add a generous sprinkle of freshly grated pecorino to each plate, along with black pepper to taste.

  11. Enjoy!

henpapardelleplate2.jpg
henpapardelleplate3.jpg

Tagliatelle with Morels in Cream Sauce

A mind melting delicious plate of tagliatelle and morels in a white wine + cream sauce needed no fancy garnish or embellishment. As the morel season in the northeast winds down, this was pure magic on a plate. If morels are not readily available or in season, any fresh wild mushroom would work nicely. Video of the whole process below.

bowl of morels in cream.jpg

Morel Cream Sauce

Ingredients

Fresh morel mushrooms

2 -3 finely diced ramp leaves (or cloves of garlic)

1 cup of heavy cream

1/4 cup white wine

Salt and pepper

1/2 stick of butter

1/4 cup freshly grated parmesan (plus more for finishing)

Instructions

  1. Clean and slice the morels into pinky sized pieces.

  2. Bring a skillet to medium heat and melt the butter.

  3. Sauté the mushrooms for a few minutes and add the diced ramp leaves. Sauté for another minute.

  4. Add the wine and bring up to a simmer so it starts to render down.

  5. Continue stirring the mushrooms and slowly add in the heavy cream. Continue stirring and bring back to a simmer.

  6. Simmer for another 5 minutes or so, and add more cream (or water) to adjust if necessary.

  7. Add the freshly grated parmesan cheese and continue stirring. The sauce should be thickening, creamy, and will start to smell incredible. Season with salt and black pepper after tasting. The parmesan cheese is already quite salty and you don’t want to over salt.

  8. The mushrooms should be tender, and completely cooked down. The total time should take about 20 minutes.

  9. Transfer your cooked pasta directly into the pan with the cream sauce. Using tongs, roll the pasta around so the sauce complete coats all of the noodles.

  10. Garnish each plate with some more freshly ground black pepper and parmesan cheese.

morels on table.jpg
making dough.jpg
Freshly made tagliatelle is an excellent pair for the cream sauce.

Freshly made tagliatelle is an excellent pair for the cream sauce.

Sourdough Bagels, Homemade Cream Cheese, and Gravlax

After a few iterations on this sourdough bagel I am finally happy to share the recipe. The texture and taste fall somewhere in between a New York and Montreal style bagel. Along with the homemade gravlax and cream cheese, this makes for an incredibly satisfying breakfast/brunch combination. A detailed video of the whole process is below.

finished bagels with lax.jpg

The Bagels

The whole process takes about 22 hours from start to finish and a little bit of smart planning. Ultimately it is a very approachable recipe if you have the right ingredients on hand. I typically start my process around noon on day one and bagels will start coming out of the oven around 10am the next morning. These bagels are approximately 55% hydration which seems to be the gold standard when researching recipes.

Ingredients (for 5 bagels)

250 g water

65 g active sourdough starter

450 g bread flour

10 g salt

4 g barley malt syrup (for the dough)

3 g barley malt syrup (for the boiling water)

1 tsp baking soda (for the boiling water)

semolina (for dusting the tray)

Sesame and poppy seeds (for topping)

*The one ingredient you’re most likely not to have in your kitchen is the barley malt syrup. While it is possible to make bagels without it, it does serve a very specific purpose and is what many New York / Montreal bagel makers use in their formulations. It adds color, sweetness, and helps to condition the dough through the enzymatic processes that it contributes. If you don’t have barley malt syrup, you can use honey, brown sugar, or molasses to add a touch of sweetness - but keep in mind they function very differently.

Instructions

  1. Mix all of your ingredients together in a stand mixer with the dough hook (except for the additional 3 g malt syrup, baking soda, and semolina). Mix for about 10 minutes starting at the slowest setting and gradually increase to medium speed. This can be done by hand but it will take a lot longer to get to the right consistency. When fully mixed the dough should be tacky to touch, but not overly sticky. Cover the bowl and let ferment for 3 - 4 hours at room temperature depending on how warm your area is. Cooler ambient temperature will require longer ferment time.

  2. After 3 - 4 hours, dump your dough onto a clean (lightly floured) work surface and divide into 5 equal portions. Use your hands to roll each piece into a cylinder approximate 8 inches long and about an inch in diameter. Wrap the cylinder around your hand, press the two ends together, and gently roll the seam with your fingers to form a circular shape with a hole in the middle. This may take a few times to get it right, where you have uniform size all the way around each bagel.

  3. Transfer the bagels into a tray, lined with parchment paper and dusted with semolina. Cover with plastic wrap, and a light weight cloth or towel. Allow to ferment at room temperature for one more hour.

  4. Transfer the tray into the refrigerator to cold ferment overnight.

  5. In the morning, around 8am, remove the tray and allow to come to room temperature for about 30 minutes. Meanwhile bring a pot of water to a boil, mix in the baking soda and 3 g of additional malt syrup. Set your oven 500 F. Mix together the poppy seeds and sesame seeds (or whatever topping you like) in a medium sized bowl.

  6. Gently drop a few bagels at a time into the pot of boiling water. They may sink at first, but they should rise to the surface relatively quickly. Boil each side for about 1 minute each. Using a slotted spoon, transfer the boiled bagels to your tray for a few seconds, before transferring them into the bowl of toppings. Use your hands to roll the bagels around so there is a nice even coating on both sides. Transfer the bagels back into your tray. Repeat until all bagels are done.

  7. The bagels can be baked right in the tray or directly onto a pizza stone if you have one. Bake for 7 minutes and then flip, and then 7 more minutes - 14 minutes total time.

  8. Allow to cool slightly before enjoying.

Shaped and proofed.

Shaped and proofed.

Bagels will float when properly fermented and proofed.

Bagels will float when properly fermented and proofed.

seeded bagels.jpg

The Gravlax

This recipe is heavily inspired by a recipe from George Lang that my dad always used to make during the holidays. With the exception of a few minor tweaks, it is very similar to his original recipe.

Ingredients

2 pounds salmon with skin on

2 tbsp Aquavit or Vodka

1/3 cup coarse salt

1/3 cup white sugar

2 tbsp crushed black pepper

4 oz fresh dill sprigs (chopped)

Instructions

  1. Pat the salmon dry with a paper towel. Place it in a bowl or tray.

  2. Coat the salmon with the aquavit or vodka, rubbing it evening on all sides of the fish.

  3. In a small bowl, mix together the salt, sugar, pepper, and dill. Using your hands, pack the mixture onto all sides of the fish. Make sure there is an even coat all around. If some area seem like the fish is exposed, you can sprinkle on a little more salt.

  4. Place a piece of plastic wrap on top of the fish. Now you need something heavy to weigh down the fish. I use a small piece of bluestone, but anything will work. Wrap the bowl/tray/weight with another piece of plastic wrap to ensure it is completely sealed. Transfer into the refrigerator.

  5. After 8 - 12 hrs, flip the salmon over onto the other side, put the weight back on, wrap again in the plastic, and put it back into the refrigerator for another 12 - 20 hours. For a thicker piece of salmon, you’ll likely need more time so the salt can properly penetrate the meat.

  6. Remove the salmon and rinse in cold water. I like to leave a little bit of the cure on the outside, but that’s a personal preference.

  7. Now thinly slice the meat, and serve with crackers, on a bagel, or just eat it by itself.

Day 1: Packing the salmon with salt, sugar, pepper, and dill.

Day 1: Packing the salmon with salt, sugar, pepper, and dill.

Best when sliced thinly.

Best when sliced thinly.

bagels and gravlax.jpg

The Cream Cheese

It’s hard to compete with Philadelphia cream cheese, but what you’ll get by making your own is a heavenly and luxurious texture and something that feels a little more wholesome. The flavor is a bit more “farmy,” especially if using farm fresh milk and cream so it’s not for everyone - but for me the whole experience was well worth the effort just to be able to experience the difference between homemade and store-bought.

Ingredients

3 cups whole milk

3 cups heavy cream

1/4 tsp mesophilic culture

3 drops of rennet (dissolved into a tablespoon of water)

Chives/scallions (optional)

*You’re going to need a few obscure items here to make homemade cream cheese, but all are readily available either through Amazon or local distributors. Rennet, mesophilic culture, and butter cloth are all important to ensure you have success. This is a two day process, so you’ll need to plan ahead. I start my process at 2pm on day 1 and finish at about 4pm the following day.

Instructions

  1. Combine the milk and heavy cream into a heavy duty pot.

  2. Set your stove top to the lowest setting and bring the mixture up to 75/76 F. You need to pay close attention here so that it does not overheat.

  3. Once you’ve reached temperature, sprinkle in the mesophilic culture and rennet diluted in water, and stir until well incorporated.

  4. Cover and set aside at room temperature for 12 - 18 hours.

  5. When ready, you’ll notice that the whey has separated and there will be a big block of cheese that has coagulated. Take a spatula or spoon and gently break it apart.

  6. Line a medium sized bowl with a folded piece of butter cloth, and carefully transfer the cheese into it. Pull up the corners of the butter cloth, and tie it together in a tight ball. You’ll need to hang the ball over the bowl for the next 8 hours, so you may need to get crafty with how you do this. Over the 8 hours, all the whey will drain out, leaving you with a super creamy ball of cream cheese.

  7. Open the butter cloth and transfer to a clean bowl. It might seem a little stiff at first, but use a spatula to spread it around and reveal it’s velvety texture. Season with salt to your preference. Add in scallions/chives if you’d like. Enjoy!

After the rennet has done it’s work, this is the moment the coagulated cheese is broken.

After the rennet has done it’s work, this is the moment the coagulated cheese is broken.

Transferring the cheese into the butter cloth.

Transferring the cheese into the butter cloth.

Hanging the cheese for 8hrs to drain the whey.

Hanging the cheese for 8hrs to drain the whey.

The moment the butter cloth is opened.

The moment the butter cloth is opened.

chive cream cheese.jpg

Whole Wheat Oat Bran Seeded Sourdough

seeded WF baguettes.jpg

Mix together 430 g of water, 424 g of bread flour, 106 g of whole wheat flour and 15 g of oat bran and set to autolyse for up to six hours.  Add 15 g of salt and 90 g of active sourdough starter and start working into the dough with your hands or with a rubber spatula until more or less homogenous. Let rest for 45 minutes. You’ll want to fold the dough two more times (with your hands) over the course of the next 1 - 2 hours to develop the gluten. By the end the dough should be very smooth and should not stick to your hands while folding. Cover and rest for about 10 hours at room temperature. For timing, I normally will aim to start mixing in the salt and active starter around 7pm. By 9pm I leave it alone for the bulk ferment at room temperature.

In the morning (around 7am) transfer the dough to a clean working surface lightly dusted with flour. Divide the dough into 4 - 6 equal parts depending on the size and shape of the rolls you’re making. Shape each piece being careful not to degas the dough. Gently roll each dough into a mix of seeds. I like to use golden flax, sesame, and poppy seeds. Cover and let rise for 2 - 3 hours. 

Set oven to 450F. Using a bread laim, score each dough. Bake for 20 - 25 minutes with a heat proof bowl of water in the oven to create ambient moisture. Remove rolls from oven and allow to cool before slicing.

This recipe also works really well for a larger loaf which I bake in a Dutch oven t 475F for 20 minutes with the lid on and 20 minutes with the lid off. See below.

seeded loaf from top.jpg
seeded loaf crumb.jpg

Chanterelle and Pesto Pizza

Summer is in full effect. With a bounty of chanterelles the next obvious thing to do was pizza. This pie features fresh chanterelles, basil pesto, shredded mozzarella, and nastrutium flowers. I wanted to keep it limited to simple fresh ingredients and make the mushrooms really shine. The nasturtium flowers add a subtle sweet and peppery kick and I loved the way the mimic the shape and color of the chanterelles.

The crust is naturally leavened using a Ken Forkish (Flour Water Salt Yeast) recipe as the basis of the dough with some slight timing deviations. Wood fired in the Ooni pro in approximately 60 seconds. I made a short video about the forage and pizza making process. (Embedded below)

chant pesto pie 2.jpg

These were the best chanterelles that I’ve ever found - a large patch of Cantharellus Lateritius in western New Jersey. They were in perfect condition and we came home with a few bags full.

handful of chants.jpg
chants on counter.jpg

I highly recommend Flour Water Salt Yeast if you’re interested in making bread and pizza dough. There are recipes that use commercial yeasts and wild yeasts and all recipes are flexible and easy to adapt for real-world schedules.

chant pesto pie.jpg