Pici & Crab Sauce

Pici has been on my to-do list for a while. This style of pasta originates in the Tuscan region in Italy. It’s a thicker - rustic noodle that stands up well to ragus and heavier sauces. They're also one of the easier style pastas to make that require minimal tools or technical finessing. I opted for an eggless dough to keep it true to its roots. Flour & water- in this case a mix of 00 @mulinocaputo , tumminia flour from @molini_del_ponte_drago , and semolina. For the sauce I went pretty untraditional - a red sauce using @biancodinapolitomatoes tomatoes, white wine, chili flakes, butter, evoo, bay leaf, loads of garlic and a whole mess of blue crabs. Non traditional yes, but super decadent and well worth the effort. Video of the process is below.

pici plate 2.jpg

The Pasta

Ingredients:

156 g semolina

168 g 00 flour

68 g tumminia flour or similar (whole wheat)

190 g water

1 tbsp olive oil

*serves 4 - 5 people

pici flours.jpg

Directions:

1. Mix together the dry ingredients and form a mound in the center of your work surface. Use your fingertips to create a well in the center, like a volcano.

2. Slowly begin to pour water, little by little, into the center of the well.

3. Using a fork and bench knife, slowly begin working the flour into water, working methodically, from the center outwards, gradually incorporating more flour as you go.

4. Once the dough becomes shaggy, you can now use your hands to begin working it together with more pressure. If it feels too dry, add a little room temperature water. And if it feels too wet, add a little flour. Knead/work the dough for about ten minutes, which will result in a nice smooth, elastic ball of dough. Wrap the ball in plastic wrap (or cover with a wet towel).

5. Rest in the refrigerator for at least 30 minutes.

6. Unwrap the dough and cut off about 1/4. Wrap the portion that is on standby.

7. Lightly dust the work surface and press down to flatter the cut piece of dough.

8. Begin rolling out the dough with a rolling pin (mattarello). If you prefer to use a pasta roller for this, that will work also. Work methodically, going from the center outwards to the edges, creating a rectangular sheet (sfoglia) about the length of your hand. Sprinkle with more flour if the dough seems to be sticking to any surface. Roll it out to about a few millimeters thickness, flipping the pasta sheet over a few times to work from both sides.

9. Using a knife, working from the edge, slice ribbons of the dough about a centimeter wide.

10. One by one, take each cut piece, and gently begin rolling it in your fingertips. Start in the center, and with a rocking motion back and forth, roll the piece down into the palm of your hands, working outwards. The video below will help visualize the process.

rolling pici.jpg

11. Each piece of pici should be about a few millimeters in diameter - keep it mind it will swell when cooked.

12. Repeat the process with all the remaining dough, setting aside the finished pici into little nests. The nests of noodles should be sprinkled with some semolina as they air dry to prevent them from sticking. These can stay in the refrigerator for up to 24 hrs or cooked right away.

pici in hand.jpg
hand crushing tomatoes.jpg

The Sauce

The preparation of the crabs is by far the most labor intensive part of this recipe. If you want to save some steps, you could use lump crab meat added to the red sauce - but you will miss out on some of the flavor you get from the simmering crabs.

Ingredients:

12 live blue crabs

3 x 28oz cans of high quality whole peeled tomatoes crushed by hand (Bianco DiNapoli, Gusto Rosso, Cento)

1 yellow onion (peeled, cut in half)

4 cloves of garlic (minced)

1/2 cup white wine

1/2 tbsp red chili flakes

1/4 cup tomato paste

2 bay leaves

Extra virgin olive oil

Few tbsp butter

Salt and pepper to taste

crabs on counter.jpg

Directions:

  1. Cleaning the crabs (which is a two step process) is your biggest task. There are many Youtube tutorials that demonstrate exactly how to do it so I won’t go too deep on that here. I stunned them in ice until they were in torpor before I remove the top shell, split them in half, and removed the guts. There are also strong opinions from folks who think it’s a crime to take the guts out, but for this recipe I wanted to keep the sauce a bit “cleaner.” After they are scrubbed, gutted, and split - set them aside on a bed of ice while you move on to the next steps.

  2. Bring a large pot up to medium heat and pour in a few tbsp of olive oil.

  3. Add the split onion halves and simmer for a few minutes before adding the bay leaf, red chili flakes, and garlic. Stir continuously to prevent burning. Add the tomato paste and continue stirring for another minute or so. Season with salt and pepper to taste.

  4. Add the white wine and cook down for a few more minutes before adding the crabs - layering them on top of each other until they fill the pot. Stir together so they get coated in the juices on the bottom of the pan. Cover and allow to steam for about 5 minutes.

  5. Uncover and add the tomatoes so they cover all of the crabs. Stir carefully and bring back to a simmer. Simmer for about another 20 minutes until the crabs have turned bright red.

  6. Remove from the heat, and transfer the crabs to a large bowl to allow to cool so you can handle them. Add the butter to the remaining sauce and stir to incorporate. Set a large pot of water to boil.

  7. Once the crabs have cooled you’ll begin breaking the shells apart to separate the meat. You’ll need one small bowl for the meat and another for the empty shells. The back fin joints provide the most choice meat, but work as diligently as you can to collect as much as you can. I like to leave a few pieces in their shells to garnish each plate.

  8. Once you have a small bowl full of meat, you can fold it back into the sauce and stir to incorporate. Bring back to a low simmer as you cook the pasta.

  9. The fresh pasta will take 2-3 minutes to cook.

  10. Drain the pasta, and transfer it directly into a bowl with the hot crab sauce. Stir to coat every noodle.

  11. Plate each dish and top with a generous spoonful of more crab sauce and a few pieces of crab claws.

  12. Enjoy!

simmering crabs.jpg

Black Trumpet Ravioli with Sage Cream Sauce

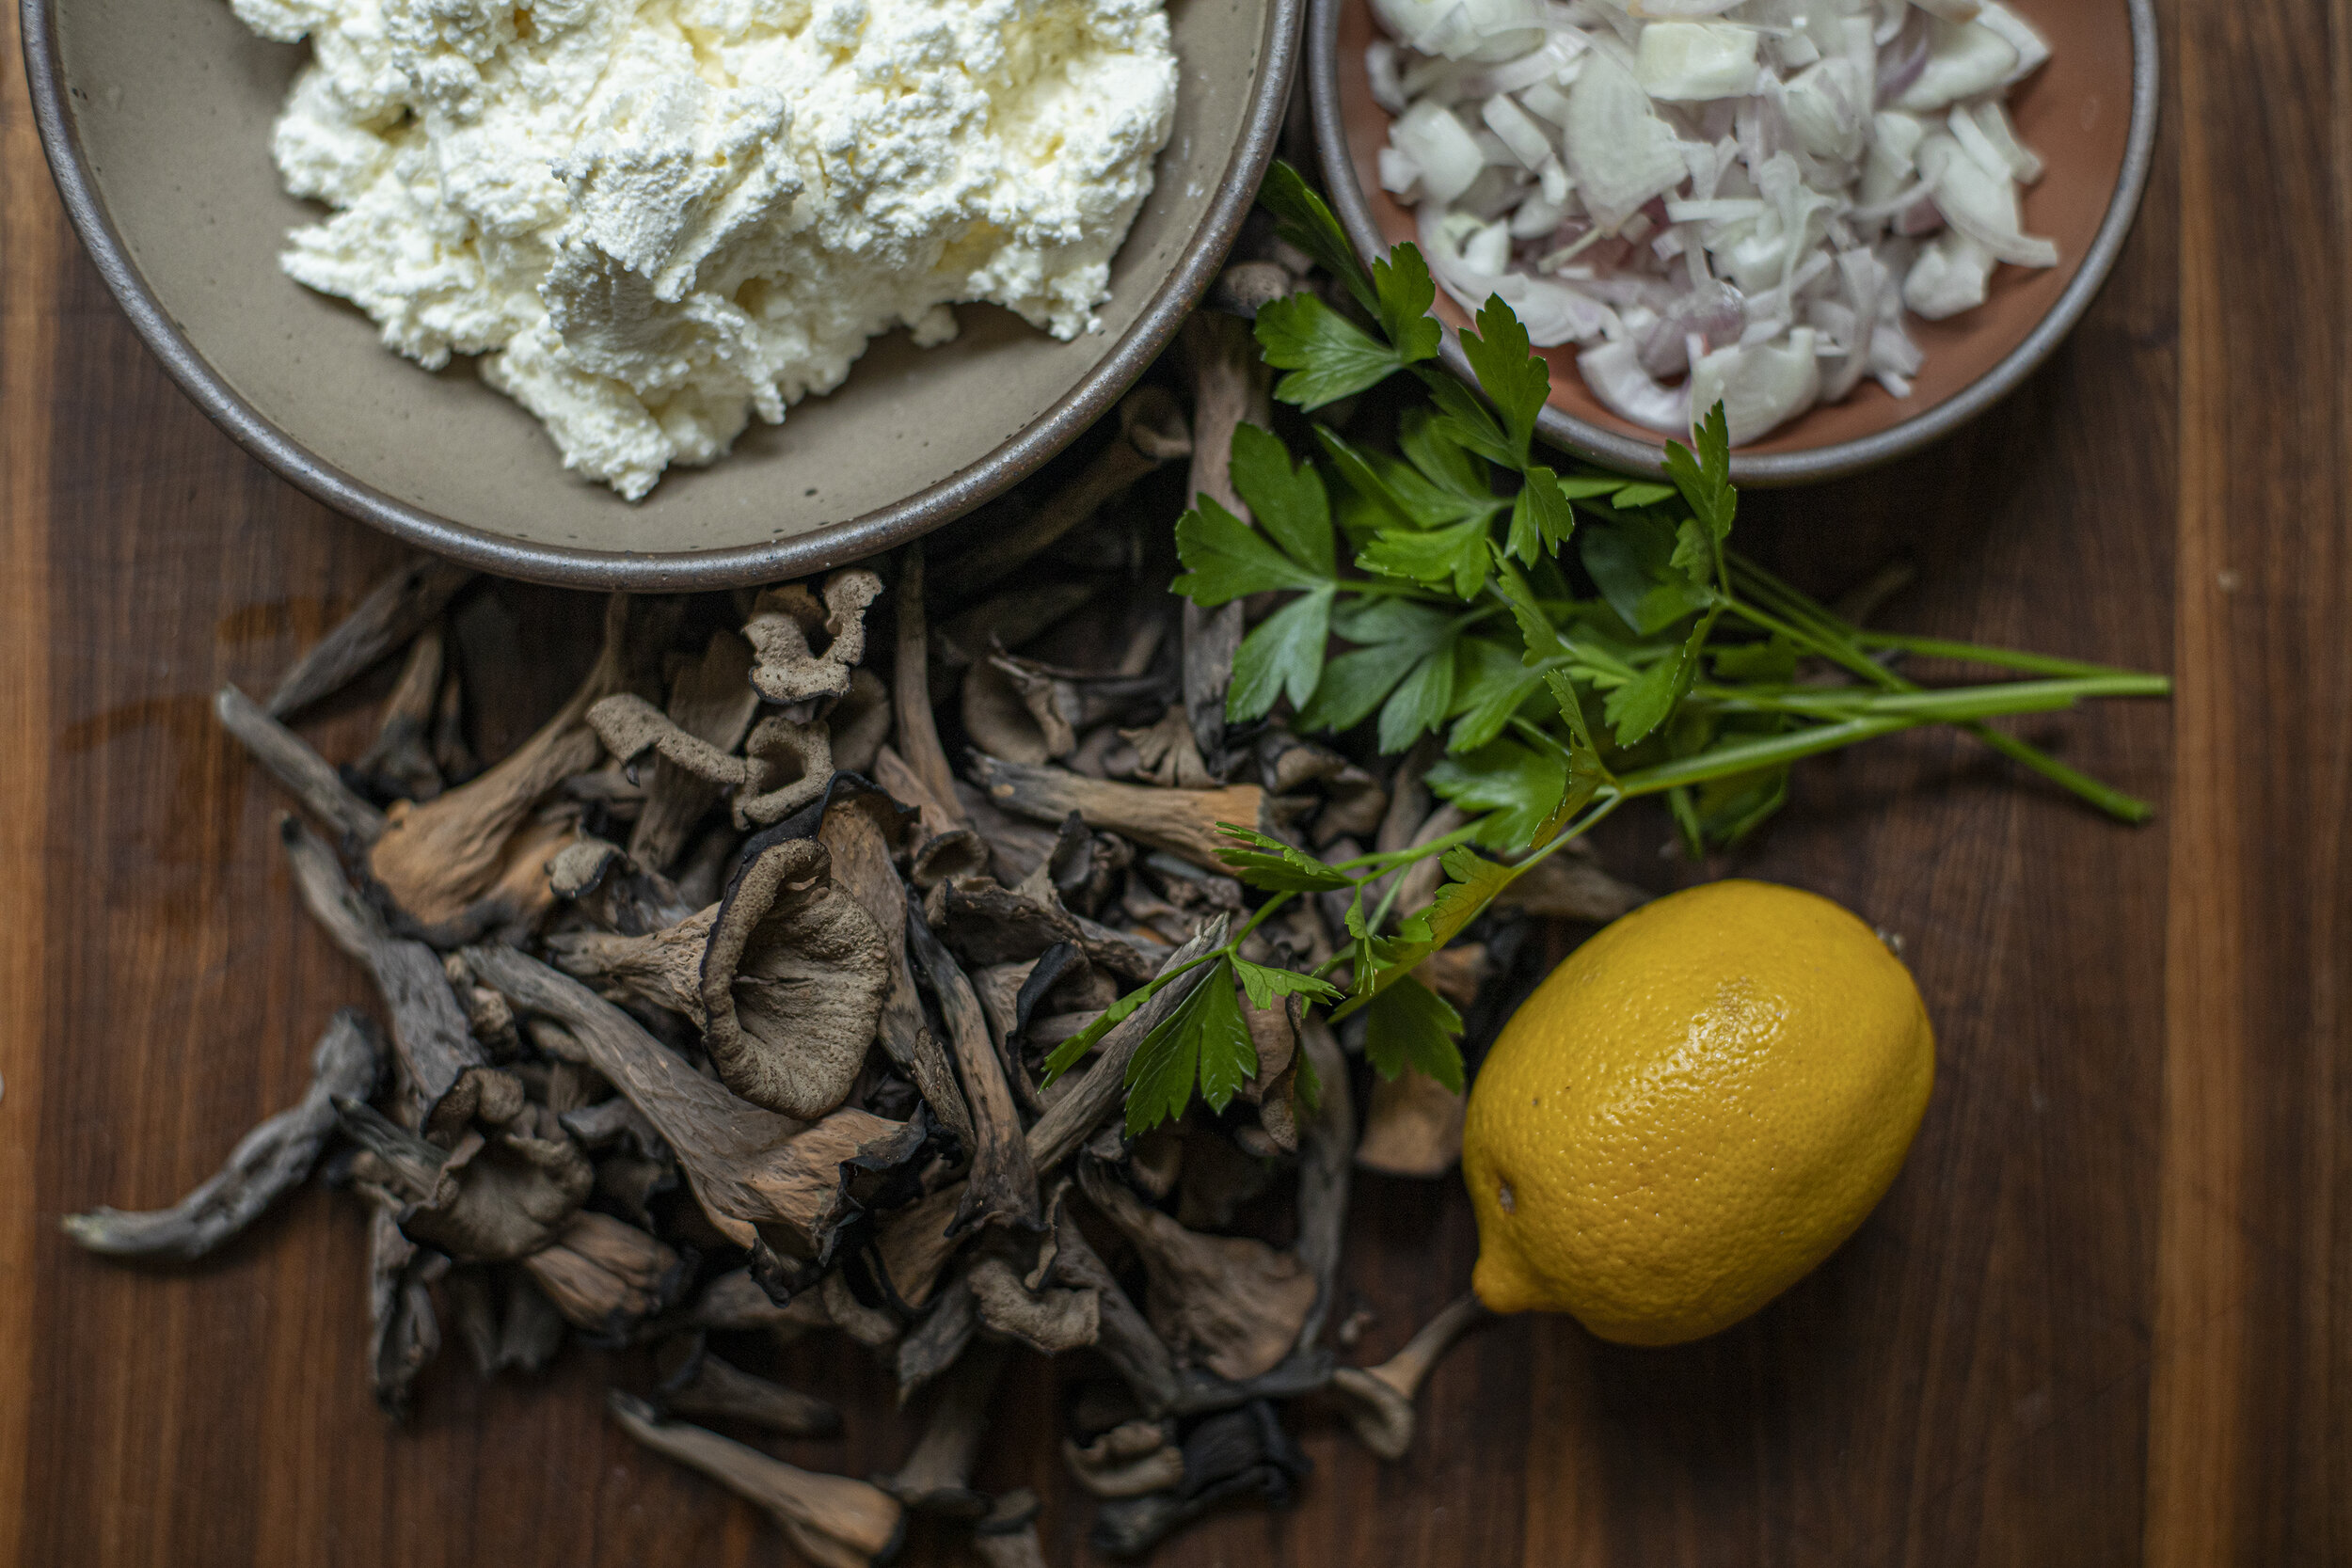
Black trumpet ravioli filled with sautéed black trumpets & shallots, parsley, lemon zest, and fresh ricotta served with a creamy sage butter sauce and cracked black pepper. Simple and decadent, meant to showcase one of the most unique wild mushrooms available this time of year. The smell of fresh trumpets are hard to define; earthy, floral, almost intoxicating. I always enjoy thinking of new ways to cook with them. A short video of the process is below.

blacktrumpetravioli 1.jpg
filling1.jpg
filling2.jpg

The Filling

Ingredients:

Fresh black trumpet mushrooms (about 2 cups)

Ricotta (2 cups drained of excess liquid)

2-3 Shallots (finely minced)

Zest of 1 lemon

Parsley (handful)

Olive oil

Directions:

  1. Bring a skillet to medium heat and add a few tablespoons of olive oil.

  2. Add the shallots and saute for about 5 minutes until softened and golden, constantly stirring.

  3. Add the mushrooms and continue to cook down for another 5 minutes until well incorporated.

  4. Season with a little salt and pepper.

  5. Remove from the skillet and set aside to cool.

  6. In a food processor, add the mushroom/shallot mix and parsley and pulse a few times for a a few seconds. The result should be a mix that is finely chopped (NOT completely blitzed into a puree).

  7. Remove from the processor and mix together with the ricotta and lemon zest.

  8. Season with salt to taste.

  9. Cover and set aside (in refrigerator) until ready to fill the ravioli.

The Pasta

Ingredients

454 g 00 Flour

258 g eggs (beaten before mixing)

1 extra egg (beaten for sealing)

*Portioned for 5 - 6 people

Directions

  1. Dump the weighed flour onto a clean work surface.

  2. Use your hand to form a well (like a volcano) in the center of the flour.

  3. Carefully pour your eggs into the center and begin slowly mixing together with a fork. Gradually, carefully, work your way all around to incorporate the eggs with the flour, without breaking the outer wall.

  4. After about 5 - 10 minutes it will start coming together into a shaggy mass. Begin using your hands to knead the dough together. Work diligently for another 5 minutes until it is no longer shaggy.

  5. Use the edges of your hands, knuckles, to work the dough until it starts to form a smooth ball. Roll it, applying pressure, into the work surface. Fold it. Roll it again. After about ten minutes it should be a smooth, and ready to rest.

  6. Cut the dough into two and wrap each in plastic wrap. Set into the fridge for at least 30 minutes.

  7. The following steps revolve around using a pasta attachment on a Kitchenaid - but you could also do this by hand with a rolling pin. Remove one of the dough balls, unwrap, and cut off a portion of the dough. Lightly flour and cover the rest back with plastic. Press gently and form a rectangle.

  8. Pass the dough through the sheet pasta attachment at it’s widest setting. If it feels sticky, add a little more flour. Gradually tighten the settings of the pasta attachment, one click at a time, and pass the pasta sheet through until it is light and delicate. For ravioli, I normally go to the 6th setting.

  9. Cut off any irregular ends and you should be left with a long sheet of sfoglia that is about 5-6 inches thick.

  10. My method is best visualized in the video below - and this is only one way to do it. There are many other much more skilled pasta makers out there who likely would recommend doing it another way - but this was my approach. This method involves folding the sheet of dough over on to itself vs using two different sheets stacked on top of each other.

  11. Using a spoon and your finger tips, carefully place a dollop of filling about the size of the tip of your pinky - in one corner of the sfoglia. Leave about a half to 3/4 inch of space on either side to the edge. Continue placing the dollops of filling along one entire side of the rectangle.

  12. Brush on a light coating of egg wash around the filling and along the edge of the sfoglia.

  13. Carefully fold over the exposed half of the sfoglia onto the other half, covering the filling. Use your fingers to gently press down around the mounds of filling, pushing out any air pockets to the other edge. Work intentionally to eliminate any remaining air pockets.

  14. Using a scalloped pasta cutter - trim off the outer edges - but leaving the folded edge in tact.

  15. Now cut between each individual ravioli with the cutter until you have none left.

  16. Gently dust with semolina, and transfer to a pan with semolina sprinkled on the bottom to avoid sticking. Allow to air dry for about 10 minutes and transfer to the refrigerator until ready to cook.

  17. Repeat the process until you have no more dough or no more filling left.

fillingravioli.jpg
cut ravioli.jpg

The Sauce & Final Dish

Ingredients:

1 Cup heavy cream

3 tbsp butter

1/2 cup grated pecorino Romano

1 tbsp very finely minced sage

Pasta water as necessary

Directions:

  1. You should make the sauce right before you drop the ravioli into the boiling water. This step only takes a few minutes and you don’t want the sauce sitting around.

  2. Melt the butter in a skillet on medium heat.

  3. Add the finely minced sage and stir into the butter, cooking for a minute or two.

  4. Add the heavy cream and continue to stir so nothing sticks to the bottom of the pan.

  5. Add the grated pecorino Romano and continue to stir as the sauce begins to thicken.

  6. Add pasta water to adjust the consistency of the sauce, a few tablespoons at a time. This will also help make the sauce more silky.

  7. Add the ravioli to salted boiling water. The fresh pasta will only take about 3-4 minutes to cook. Continue simmering your sauce.

  8. Remove the sauce from the heat and add the cooked/drained ravioli directly to the pan. Using a large spoon, stir together, completely coating all of the ravioli with sauce.

  9. Plate each serving and finish with a sprinkle of more freshly grated pecorino and fresh cracked black pepper.

blacktrumpetravioli 2.jpg
trumpets1.jpg

Wild Wintercress Corzetti

Spring heralds the time to harvest one of my favorite wild greens - wintercress (Barbarea vulgaris) - an herbaceous biennial plant in the mustard family. The rosettes that form prior to going to flower are remarkably similar to broccoli rabe. The bitterness you might experience eating it raw is easily eliminated with a quick blanch and shock in ice water. You can then treat them as you would any other greens - sauteed with some good olive oil and garlic.

I wanted to make a pasta that was built around the spring wintercress harvest and got fixated on corzetti - a coin shaped pasta that originates in Northern Italy. Each medallion of pasta is imprinted with a decorative stamp that in many cases has been carved by artisans who have spent their lives uniquely focused on this singular pursuit. What began as a mark of nobility has evolved into an art form. Instead of paying big bucks to have one shipped over from Italy, the tinkerer in me was intrigued by the idea of making one myself. I got my hands on some cherry wood, some basic carving knives, and had myself a go at it. In the process I found myself totally captivated by the meditative enjoyment of carving. The resultant stamp is perhaps a bit rough around the edges but at the end of the day it works.

The final dish is pretty simple. Corzetti with wintercress, anchovies, garlic, chili flakes, good olive oil, a little butter, toasted breadcrumbs and shaved pecorino Romano. Video of the process below.

finished corzetti plate.jpg

The Dough

Ingredients

200 g Semola Rimacinata Cuore flour (or similar)

200 g 00 Manitoba Flour (or similar)

1 tbsp dry White wine

4 eggs

Pinch of salt

*Served 4-5 people

Directions

  1. Mix together the dry ingredients and form a mound in the center of your work surface. Use your fingertips to create a well in the center, like a volcano.

  2. Whisk together the eggs and white wine, and pour into the center of the well.

  3. Using a fork and bench knife, slowly begin working the flour into the eggs, working methodically, from the center outwards, gradually incorporating more flour as you go.

  4. Once the dough becomes shaggy, you can now use your hands to begin working it together with more pressure. If it feels too dry, add a little room temperature water. And if it feels too wet, add a little flour. Knead/work the dough for about ten minutes, which will result in a nice smooth, elastic ball of dough. Cut the ball in half and wrap each ball in plastic wrap.

  5. Rest in the refrigerator for at least 30 minutes.

  6. Unwrap the dough and divide into two. Wrap the portion that is on standby.

  7. Gently dust your work surface and begin rolling out the dough with a rolling pin (mattarello). If you prefer to use a pasta roller for this, that will work also. Work methodically, going from the center outwards to the edges, creating a large round sheet (sfoglia). Sprinkle with more flour if the dough seems to be sticking to any surface. Roll it out to about 2mm thickness, flipping the pasta sheet over a few times to work from both sides. Allow the sfoglia to air dry for a few minutes.

  8. Using a circular cookie cutter (or corzetti stamp), punch out as many circles as you can. Save the scraps for maltagliati. I like to use a diameter of about 2” wide for the corzetti. They’ll naturally shrink a little after you punch them out.

  9. Whether you’re using a Italian made corzetti stamp, or a homemade version (like I did), gently press down with pressure onto each cut circle with the stamp. After a few you’ll start to get a sense of how hard you need to press down. You want the stamp design to really pop, so make sure you’re using enough pressure. A thing to note here is that you may want to throw some semolina down on the work surface to avoid the pasta sticking to the board. The combination of air drying in the previous step (for a few minutes) and the semolina helps to avoid sticking.

  10. Transfer the pasta “coins” to a container and cover with a clean towel. Refrigerate until ready to cook.

The Pasta

Ingredients

Wintercress (large bunch)

Anchovies (smashed into paste)

3-4 cloves of garlic (finely minced)

Red chili flakes

Good olive oil

3-4 tbsp butter

Parmesan cheese

Breadcrumbs

Directions

  1. Blanch wintercress in boiling water for about 1 minute. Transfer to an ice bath to cool immediately. Drain of all excess water. Set aside.

  2. Bring a large pot of water to a boil.

  3. In a medium skillet, toast breadcrumbs in butter (or olive oil) until golden brown. Set aside.

  4. Add a generous pour of olive oil to skillet and bring to low heat. Add the garlic, anchovy paste, and chili flakes and saute for a few minutes until soft and fragrant. Add about 2-3 tbsp of butter, the blanched wintercress and continue sauteing for another minute or so. Season with salt and pepper to taste.

  5. Salt your pot of boiling water and cook the fresh pasta for about 4 minutes until cooked. Reserve about a cup of pasta water before fully draining.

  6. Drain the pasta and transfer to the skillet with the greens and anchovies. Toss to coat all of the noodles. Add a little pasta water if needed.

  7. Plate each portion and finish with a generous sprinkle of bread crumbs and shaved pecorino or parmesan cheese.

  8. Enjoy.

bundle in hand.jpg
blanching wintercress.jpg
dough balls.jpg
punching circles.jpg
rolling sfoglia.jpg
stamping coins.jpg
corzetti drying.jpg
corzetti stamp.jpg
making stamp.jpg

Brodo en Tortellini

Sometimes it takes the mind of a child to trigger something unexpected. Last week I set up my 4 year old with some leftover pasta dough and an assortment of kitchen tools to buy myself a little quiet. He took a big hunk of the dough and made a little bowl and said something to the effect of "Let's put soup inside this." It got me thinking about soup dumplings, how much I miss eating them and what the Italian equivalent would be. There's canederli en brodo, passatelli, and of course the iconic tortellini en brodo - but nothing that was really close to the experience of eating a soup dumpling. All of them were in fact the opposite of what I was thinking. Dumplings or noodles floating in broth, not the other way around. Would it be possible to create without the aid of fancy molecular gastronomy tools? Would they be steamed like a traditional Xiao long bao or boiled as you would pasta? Would all the brodo leak out? Would they even be any good? If done properly I couldn't think of any reason why they wouldn't be, so I was determined to see if it was possible. A few days later, after several iterations on the method, I had it. Brodo en tortellini. A rich bone broth, simmered hard for 10+ hours, topped off with hunks of parmesan and grated nutmeg, chilled until it sets into a gelatinous form, carefully spooned into a thin square of pasta dough, wrapped up into a tortelli, sealed with an egg wash to prevent leaks, simmered in a shallow water bath until the pasta is perfectly cooked and the brodo is liquified, drained and drizzled with some high quality extra virgin olive oil, kissed by a turn of black pepper and finished with freshly grated parmesan.

I'm committing multiple crimes against tradition here, but I must say these are pretty fun. As you bite into each tortelli you get an explosion of brodo in your mouth. I kept this recipe super simple to create a baseline but I think there are all sorts of ways you could riff on this, between the nuances of the brodo, and how you finish it all off. The video includes multiple iterations of the process (condensed together into one timeline) with the final product at the end using 100% duck egg yolks instead of whole chicken eggs (which is what you'll see on screen). I also gradually pushed the sfoglia a few notches thinner once I found the egg wash did a good job sealing the brodo inside. The goal was a pasta delicate enough so it pops in your mouth like a delicious water balloon.

Credit to @jakehow for the cute name.

brodoentortellini1.jpg
brodoentortellini2.jpg
Brodo ingredients.

Brodo ingredients.

makingdough.jpg
brodoentortellini5.jpg
brodoentortellini3.jpg
brodoentortellini4.jpg

Black Trumpet Cappellacci dei briganti

Cappellacci dei Briganti, a pasta shape which imitates the hats worn by 19th century guerrilla fighters known as brigands. These self-declared soldiers formed rebel militias and roamed the hills of Southern Italy at the time of the Risorgimento or the unification of Italy. This style of pasta originated in Molise and is typically served with a lamb ragu. When brainstorming pasta dishes that feature foraged wild mushrooms I couldn't help make the connection between the shape of the pasta with black trumpets. I've been wanting to make these since last summer and finally got myself sorted out to make it happen. The pasta dough incorporates a small percentage of dried black trumpet powder to give them their distinct color. The final flavor of the mushrooms is rather subtle as it competes with the hearty lamb ragu but it adds a nice earthy subtext to the dish. It was perfect for a cold winter night with a good glass of red wine in hand and the kids shipped off to Nonna's house. Video of the process below. It’s a lot easier than it looks.

hats 3.jpg

Black Trumpet Cappellacci dei briganti

Ingredients

430 g 00 Flour

20 g dehydrated wild mushroom powder

250 g eggs (beaten before mixing)

*Portioned for 5 - 6 people

Tools:

Circular cookie cutter, conical metal pastry tip (see photos/video for sizing)

Directions

  1. Using a spice grinder (or similar) blitz your dried mushrooms into a very fine powder. Here I’m using black trumpets but you could easily substitute with any other edible wild mushroom.

  2. Mix together the mushroom powder and flour into a bowl, and dump out onto your clean work surface.

  3. Use your hand to form a well (like a volcano) in the center of the flour.

  4. Carefully pour your eggs into the center and begin slowly mixing together with a fork. Gradually, carefully, work your way all around to incorporate the eggs with the flour, without breaking the outer wall.

  5. After about 5 - 10 minutes it will start coming together into a shaggy mass. Begin using your hands to knead the dough together. Work diligently for another 5 minutes until it is no longer shaggy.

  6. Use the edges of your hands, knuckles, to work the dough until it starts to form a smooth ball. Roll it, applying pressure, into the work surface. Fold it. Roll it again. After about ten minutes it should be a smooth, and ready to rest.

  7. Cut the dough into two and wrap each in plastic wrap. Set into the fridge for at least 30 minutes.

  8. The following step revolve around using a pasta attachment on a Kitchenaid - but you could also do this by hand with a rolling pin. Remove one of the dough balls, unwrap, and cut off a portion of the dough. Lightly flour and cover the rest back with plastic. Press gently and form a rectangle.

  9. Pass the dough through the sheet pasta attachment at it’s widest setting. If it feels sticky, add a little more flour. Gradually tighten the settings of the pasta attachment, one click at a time, and pass the pasta sheet through until it is light and delicate. I normally go to the 6th setting.

  10. Allow the sheet of dough (sfoglia) to dry for 2-3 minutes. Use the circle cookie cutter and punch out as many circles as you can on each sheet of pasta dough. Save the scraps for maltagliati.

  11. The next steps become much easier with a visual reference. I have provided a diagram below and the video helps to show the process. Again, it’s easier than you think. Using your metal pastry tip cone, place the large side in the center of one of the pasta circles. The dough should NOT be sticky. You don’t want it to stick to cone.

  12. Fold the sides of the circle over the cone, and gently press them together with your thumb.

  13. Using your other hand, carefully fold down the top of the cone to form what we’ll call the brim of the hat. The metal cone should be concealed inside the shape of the pasta.

  14. Carefully slide the cone out, continuing to press gently at the seem. Flip upside down and allow to air dry for about 15 - 20 minutes before covering and setting into the refrigerator until you’re ready to cook. Repeat the process until you have no dough left. It moves quickly once you find your rhythm.

  15. Cook right away of store in the fridge covered with a towel for up to a day.

flour and eggs.jpg
sheet of pasta.jpg
pasta drawing.jpg
pasta on finger.jpg
hats 2.jpg

Lamb Ragu

Ingredients:

1 lamb shoulder (broken down, trimmed, cut into 1 inch cubes)

1 onion (finely diced)

4 cloves garlic (minced)

½ cup celery (finely diced)

½ cup carrots (finely diced)

8 oz tomato paste

32 oz canned tomatoes (crushed) 

1 cup red wine

2 cups hot broth

2 tbsp fresh sage (finely minced)

2 tbsp fresh thyme (finely minced)

3-4 bay leaves

lamb ragu.jpg

Directions:

Break down the rabbit into 6 pieces. Hind legs, forelegs, and split the body into two. Season with salt and pepper. 

  1. Brown the meat on all sides in a deep pot. The less oil the better for getting a nice brown crust. Set aside. 

  2.  Add the garlic, onions, celery, carrots and herbs and cook on medium/low for a few minutes until softened.

  3. Add the tomato paste, a little olive oil, and mix together until well incorporated.

  4. Pour in your red wine and simmer down for another few minutes. Use a wood spoon to scrape up any bits stuck to the bottom of the pot.

  5. Add tomatoes and bring up to a low simmer. Add about a half a cup of broth and stir.

  6. Add the lamb back into the pot, partially cover, and simmer for 1.5 hours - turning the meat every 15 minutes and stirring the sauce so it doesn’t stick to the bottom of the pan. If the sauce feels like it’s getting too thick add a little more hot broth to thin it out.

  7. It normally takes me about 5 hours until the meat starts to shred and fall apart. This is how you want the ragu, without any big chunks of meat.  

  8. Shred the meat from the bones and pull apart into small pieces. Add the shredded meat back into the ragu and stir together. 

  9. Transfer a few ladles full into another pan and set on low heat. After your pasta is cooked, toss it with the pan ragu. Plate your pasta, add some more ragu on top. 

  10. Top each plate with a generous amount of freshly grated parmesan cheese or pecorino, and some fresh basil. 

finished plate briganti.jpg

Brown Butter Hen of the Woods Pappardelle

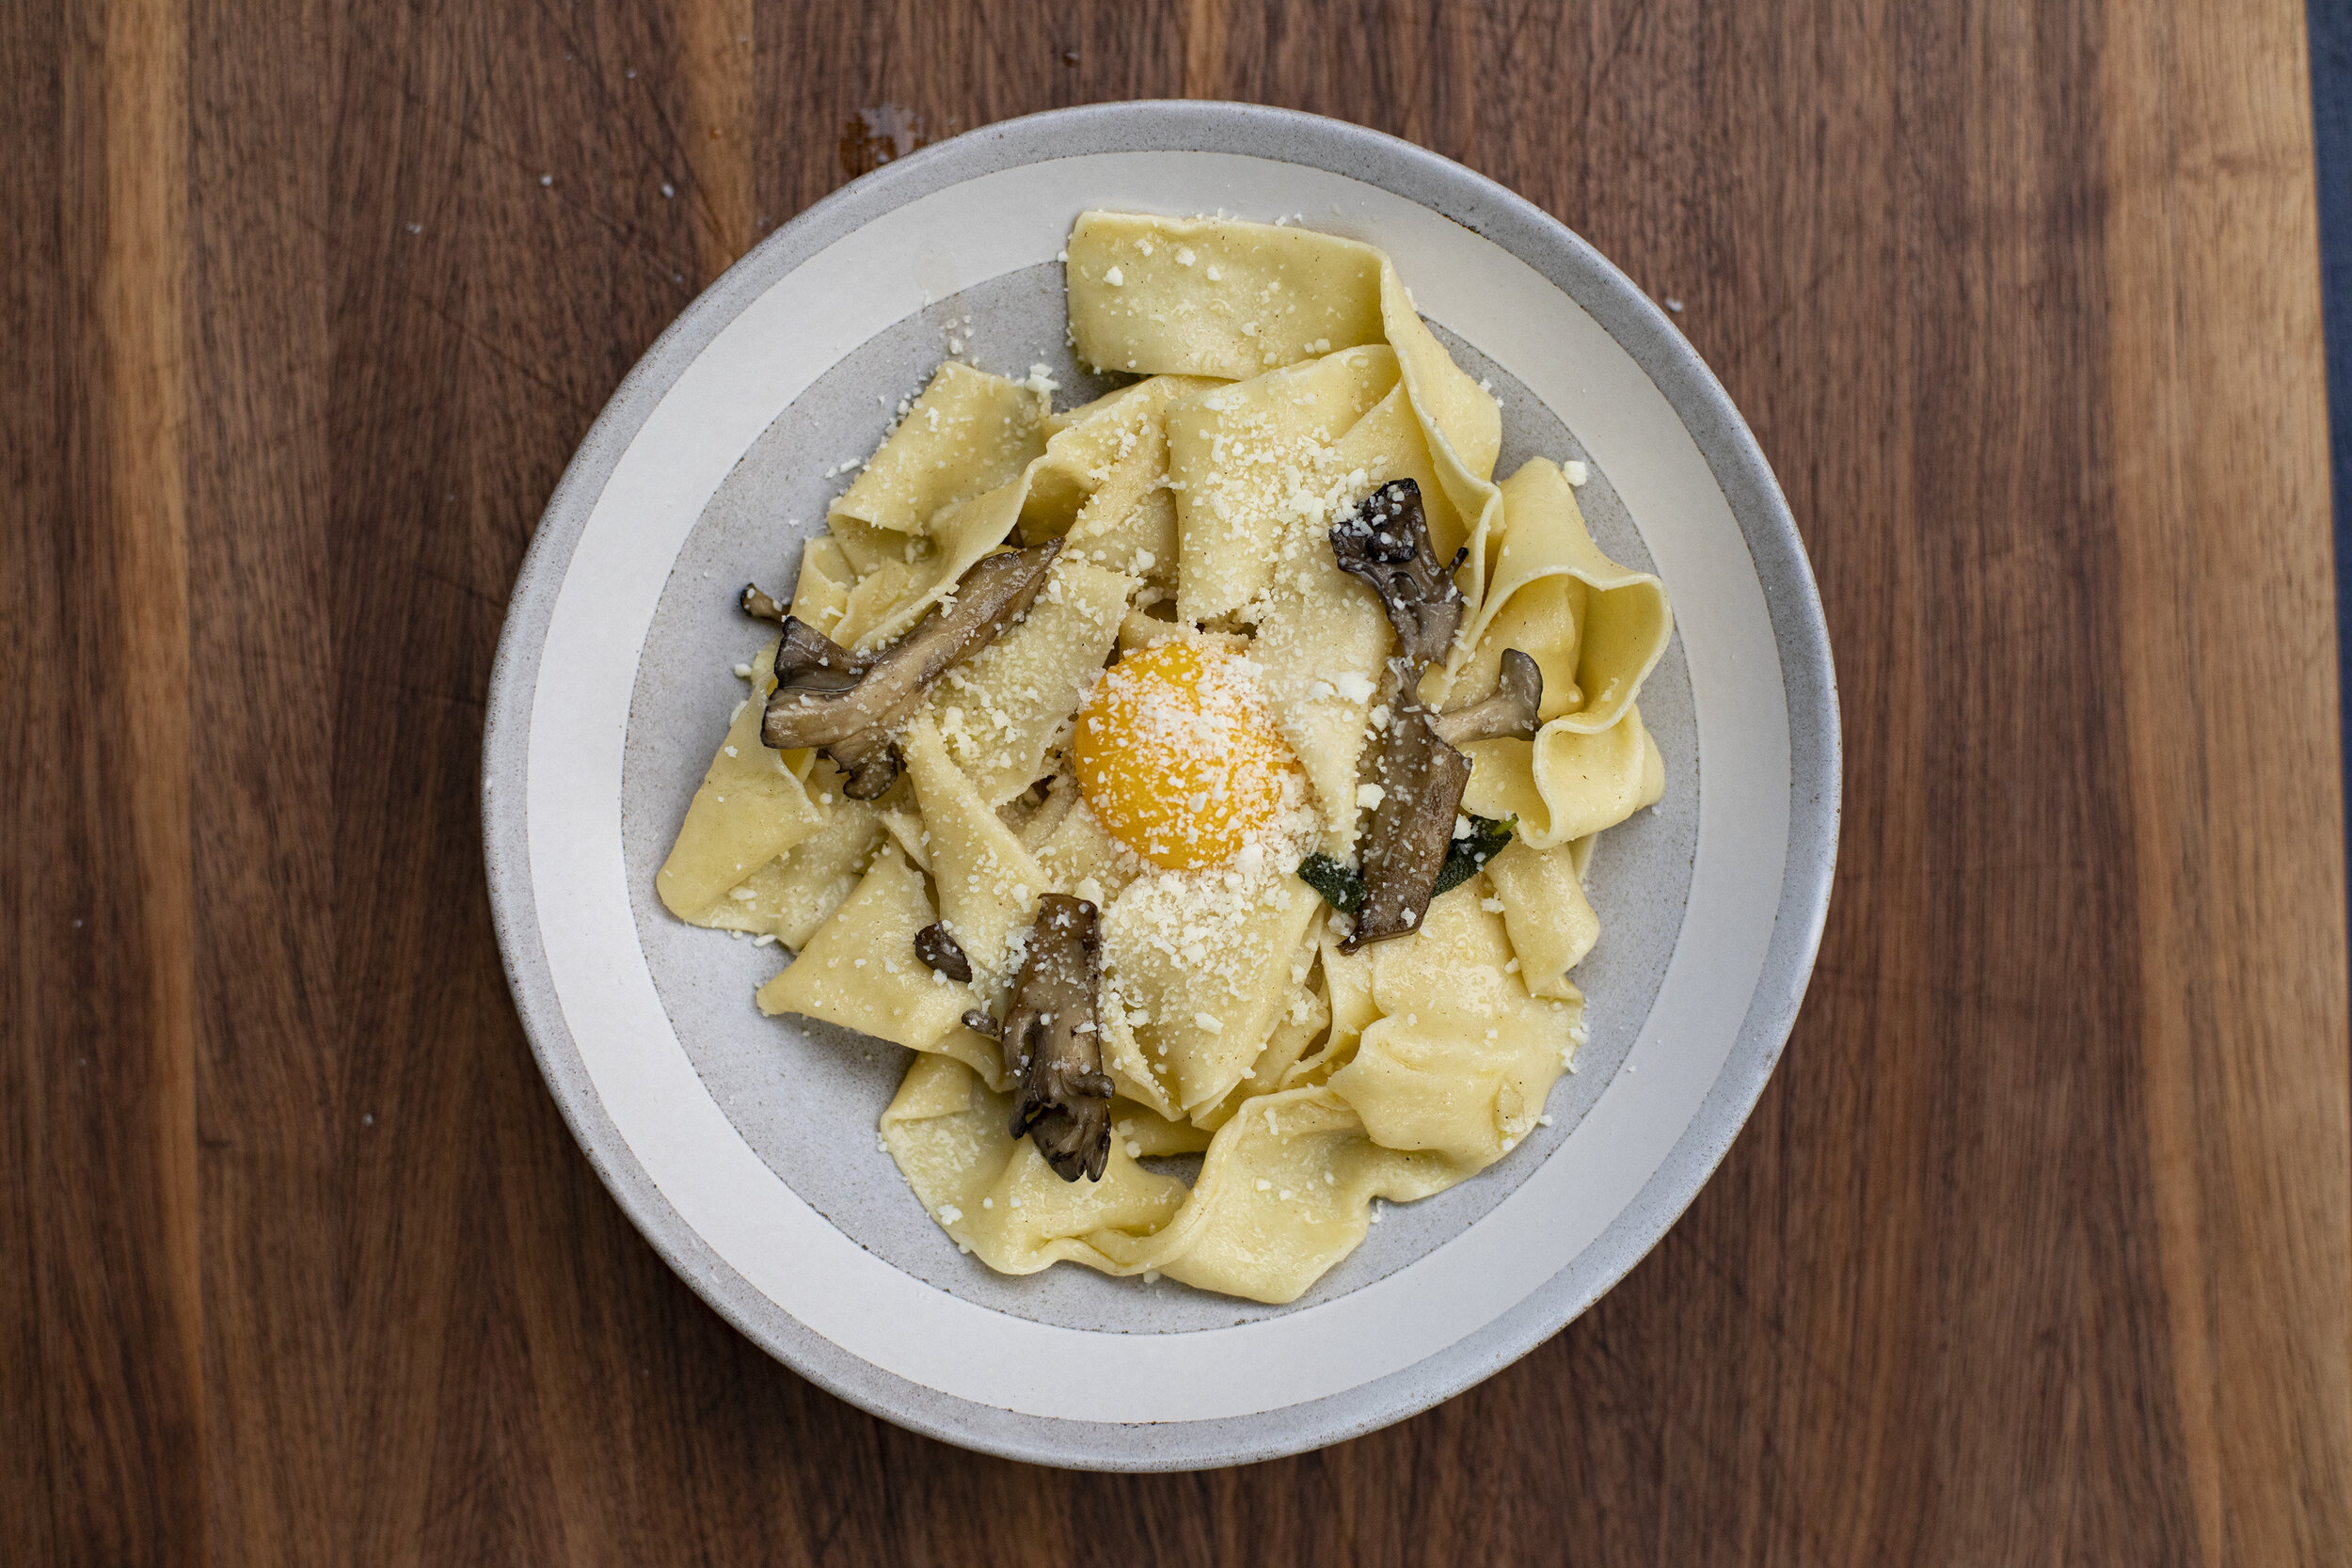
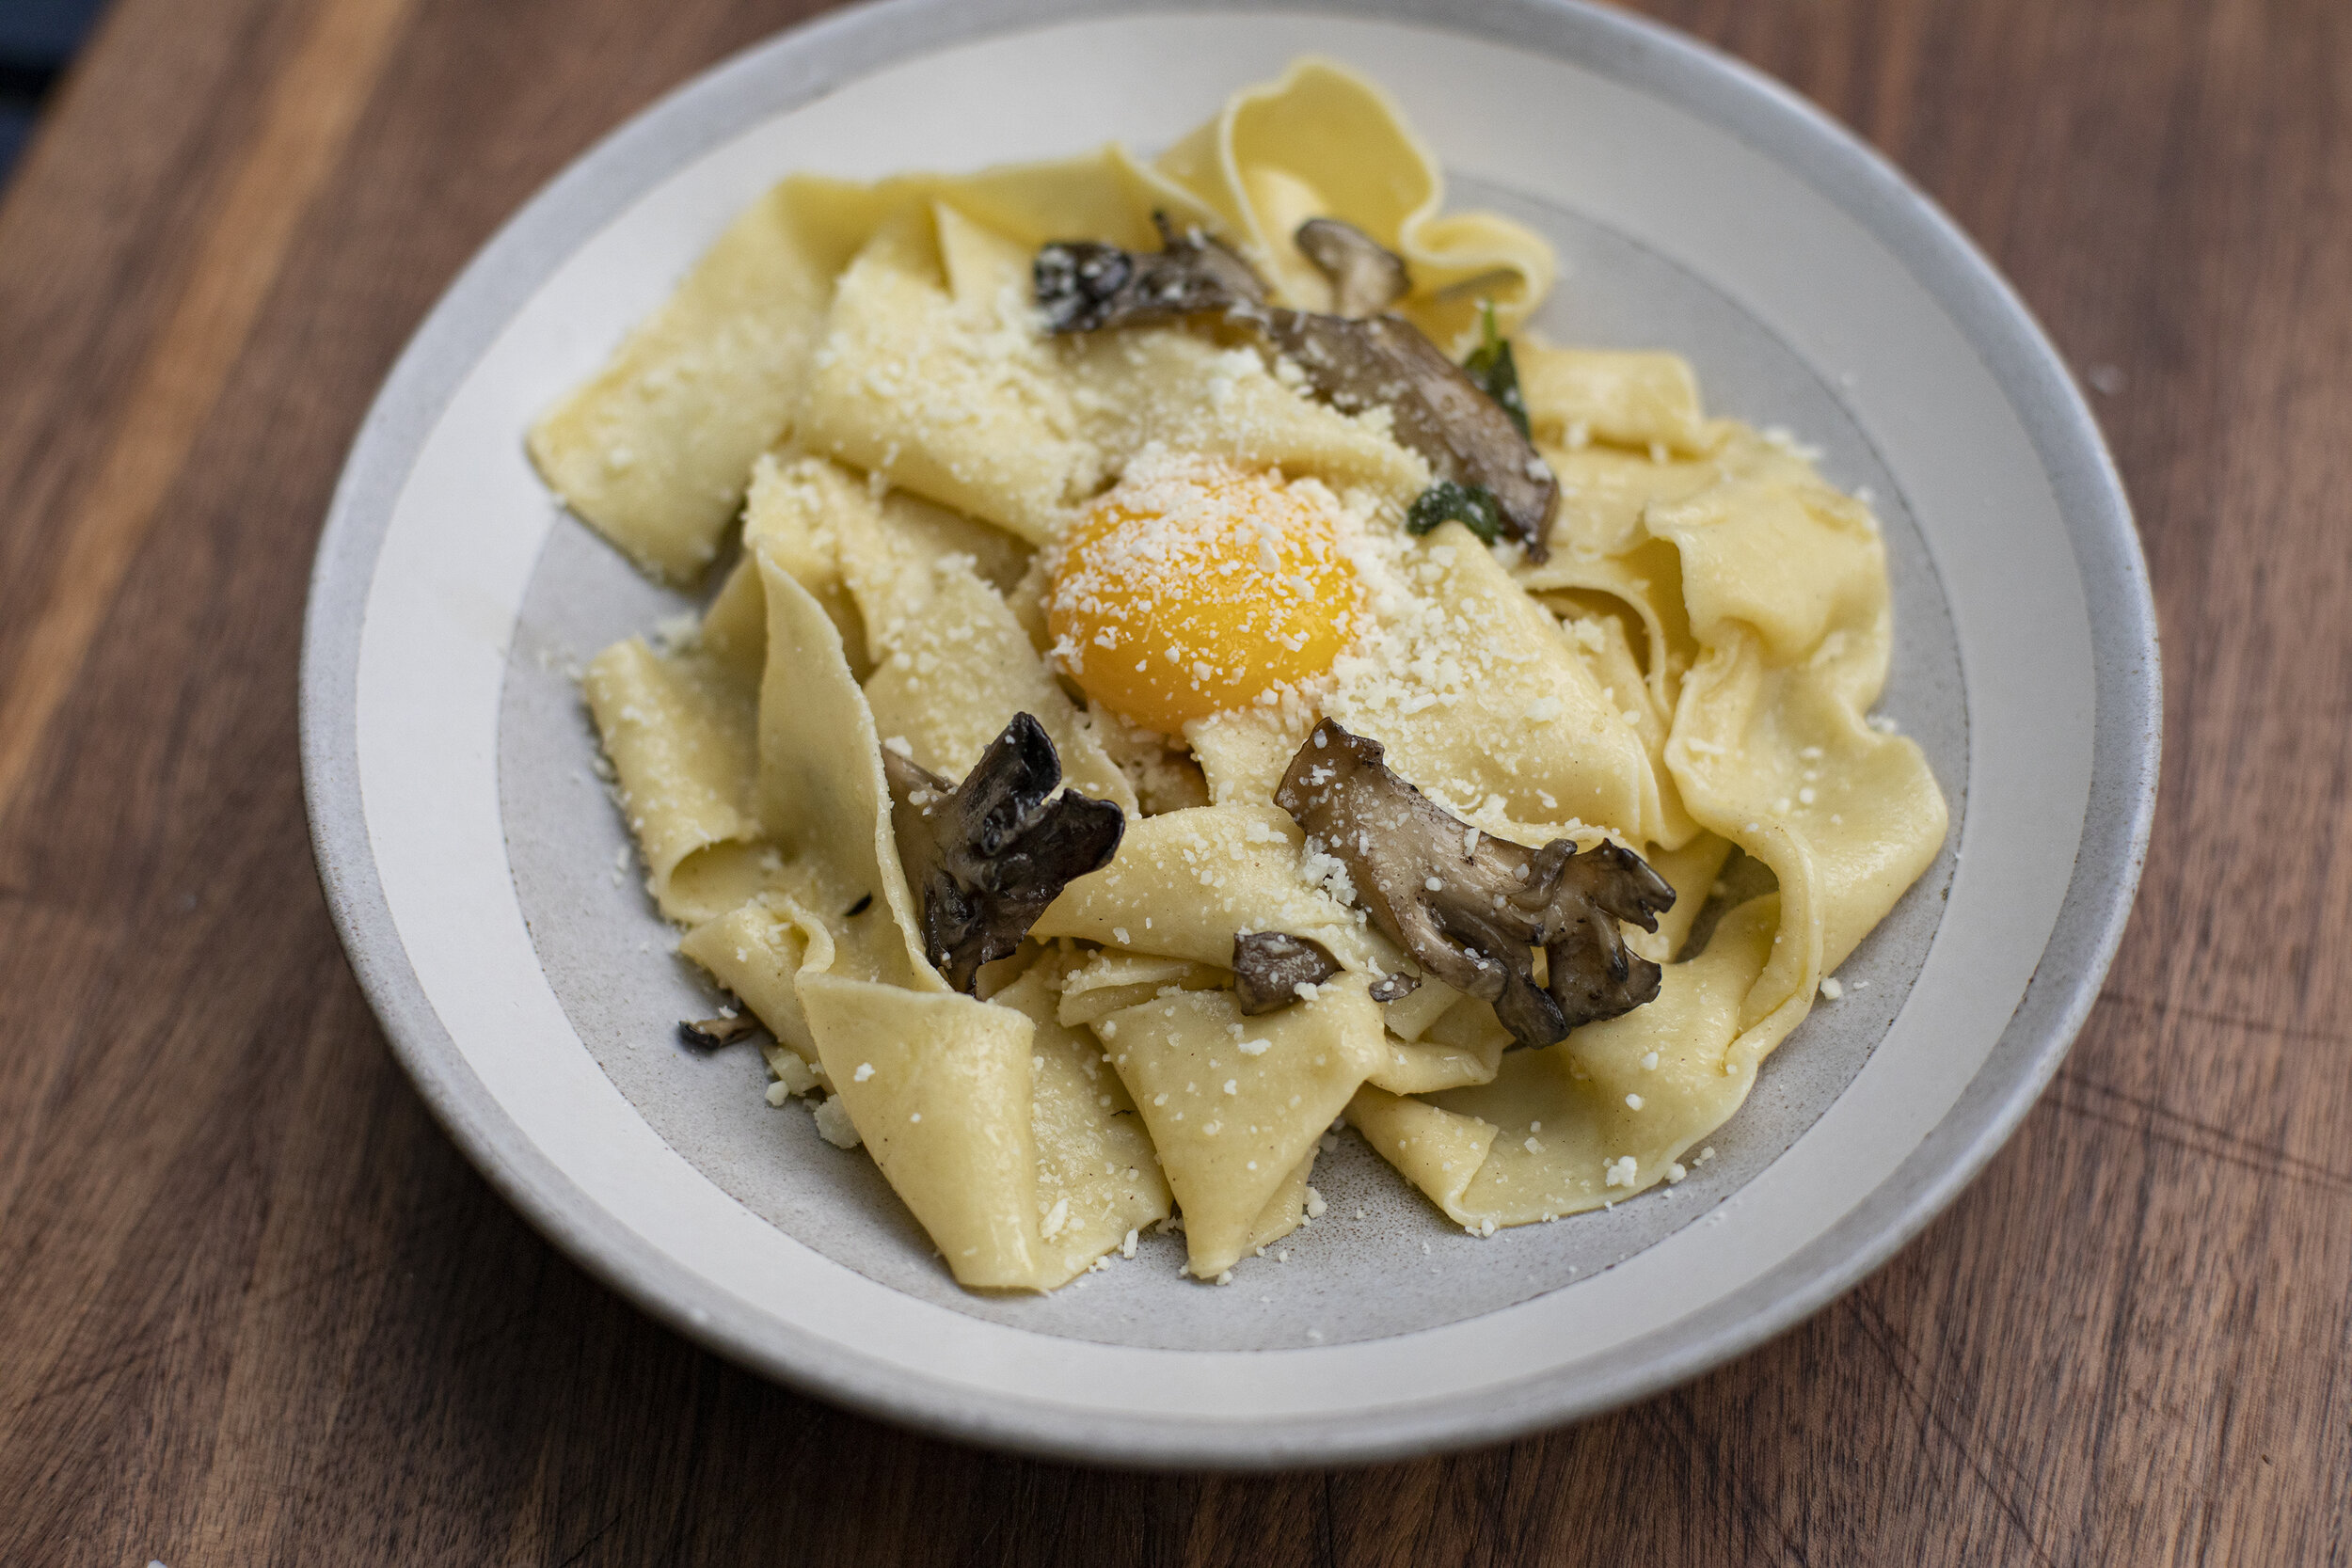
Wild mushroom pappardelle with brown butter, sage, pecorino, and a raw egg yolk. This is one of my favorite times of year and also one of my favorite wild mushrooms - Hen of the Woods, or Sheepshead, or Maitake, Grifola frondosa. They’re easy to miss if you don’t know what to look for. They resemble the fallen leaves of the oak tree in which they like to grow under. I was pleasantly surprised today to find two perfect hens a little earlier than I was expecting. This could be substituted for any of your favorite mushrooms, but I personally love how the meatiness of the Hen of the Woods stands up against the heft of the pappardelle.

henpapardelleplate.jpg
maitake2.jpg
maitake3.jpg

Pappardelle

Ingredients

450 g 00 Flour

250 g eggs (beaten before mixing)

*Portioned for 5 - 6 people

Directions

  1. Dump out the weighed flour onto a clean work surface.

  2. Use your hand to form a well (like a volcano) in the center of the flour.

  3. Carefully pour your eggs into the center and begin slowly mixing together with a fork. Gradually, carefully, work your way all around to incorporate the eggs with the flour, without breaking the outer wall.

  4. After about 5 - 10 minutes it will start coming together into a shaggy mass. Begin using your hands to knead the dough together. Work diligently for another 5 minutes until it is no longer shaggy.

  5. Use the edges of your hands, knuckles, to work the dough until it starts to form a smooth ball. Roll it, applying pressure, into the work surface. Fold it. Roll it again. After about ten minutes it should be a smooth, and ready to rest.

  6. Cut the dough into two and wrap each in plastic wrap. Set into the fridge for at least 30 minutes.

  7. The following steps revolve around using a pasta attachment on a Kitchenaid - but you could also do this by hand with a rolling pin. Remove one of the dough balls, unwrap, and cut off a portion of the dough. Lightly flour and cover the rest back with plastic. Press gently and form a rectangle.

  8. Pass the dough through the sheet pasta attachment at it’s widest setting. If it feels sticky, add a little more flour. Gradually tighten the settings of the pasta attachment, one click at a time, and pass the pasta sheet through until it is light and delicate. For pappardelle, I normally go to the 5th setting.

  9. Allow the sheet of dough (sfoglia) to dry for 2-3 minutes and fold in half. With a knife, trim off irregular edges. Gently fold the dough into about 3 inch folds, over and over until you have a nice compact roll.

  10. Using your knife, carefully begin cutting strips of the roll into about 3/4 - 1 inch (1.9 - 2.5 cm) pieces. I like my pappardelle nice and wide. With your fingers, unroll each strip and sprinkle with a light coating of semolina. You can make little nests with each batch that is finished. Repeat until all of your dough has transformed unto tagliatelle.

  11. Cook right away or store in the fridge covered with a towel.

flour and eggs.jpg

The Pasta

Ingredients

Wild mushrooms thinly sliced (.5 lb or 250 g)

Butter (1 stick or 120 g)

Garlic (3 cloves finely minced)

Pecorino romano

Black pepper

Sage

Egg

Pasta Water

Directions

  1. Bring a large pot of water to a boil.

  2. Bring a large skillet to medium heat.

  3. Add the thinly sliced mushrooms to the pan and dry saute for a few minutes, stirring frequently and careful not to burn. This will remove some of the water weigh of the mushrooms before you add the fat. Add a drizzle of olive oil and a sprinkle of salt. Stir again.

  4. Add in the butter and bring to a low simmer, continuing to stir.

  5. Add the sage and garlic, continue to saute and stir for another ten minutes until the mushrooms are completely cooked through and tender.

  6. Meanwhile, cook your pasta to your liking and be sure to reserve a little pasta water to lubricate the noodles if necessary.

  7. Drain the pasta, and transfer the noodles directly into the pan with the mushrooms and browned butter. Toss well so all the noodles are completely covered in the sauce. Add pasta water (or any extra browned butter) as necessary if it feels too dry.

  8. Plate each dish with the pappardelle and mushrooms. Create a small well in the middle of each plate for the egg yolk.

  9. Very carefully, crack and egg and discard of the egg white. Gently place an egg yolk in the middle of each plate without breaking it.

  10. Add a generous sprinkle of freshly grated pecorino to each plate, along with black pepper to taste.

  11. Enjoy!

henpapardelleplate2.jpg
henpapardelleplate3.jpg

Cacio e Pepe with Black Trumpet Tagliatelle

Where you'd normally use tonnarelli I've gone and made a wild mushroom tagliatelle using black trumpet powder. Otherwise, I followed the rules of a traditional Cacio e Pepe - keeping it simple and limited to minimal ingredients; lots of cracked black pepper, sheep’s milk pecorino romano, a little olive oil, pasta water and some basil mostly just for show. When competing with lots of black pepper, the wild mushroom umami flavor is subtle but adds a nice layer to an otherwise simple simple dish. The color and texture of the noodles are beautiful and I’m looking forward to testing it out with other pasta dishes. A video of the whole process is below.

black trumpets pasta 3.jpg
black trumpets in ground.jpg
black trumpets in basket.jpg
black trumpets in blender.jpg

Black Trumpet Tagliatelle

Ingredients

430 g 00 Flour

20 g dehydrated wild mushroom powder

250 g eggs (beaten before mixing)

*Portioned for 5 - 6 people

Directions

  1. Using a spice grinder (or similar) blitz your dried mushrooms into a very fine powder. Here I’m using black trumpets but you could easily substitute with any other edible wild mushroom.

  2. Mix together the mushroom powder and flour into a bowl, and dump out onto your clean work surface.

  3. Use your hand to form a well (like a volcano) in the center of the flour.

  4. Carefully pour your eggs into the center and begin slowly mixing together with a fork. Gradually, carefully, work your way all around to incorporate the eggs with the flour, without breaking the outer wall.

  5. After about 5 - 10 minutes it will start coming together into a shaggy mass. Begin using your hands to knead the dough together. Work diligently for another 5 minutes until it is no longer shaggy.

  6. Use the edges of your hands, knuckles, to work the dough until it starts to form a smooth ball. Roll it, applying pressure, into the work surface. Fold it. Roll it again. After about ten minutes it should be a smooth, and ready to rest.

  7. Cut the dough into two and wrap each in plastic wrap. Set into the fridge for at least 30 minutes.

  8. The following steps revolve around using a pasta attachment on a Kitchenaid - but you could also do this by hand with a rolling pin. Remove one of the dough balls, unwrap, and cut off a portion of the dough. Lightly flour and cover the rest back with plastic. Press gently and form a rectangle.

  9. Pass the dough through the sheet pasta attachment at it’s widest setting. If it feels sticky, add a little more flour. Gradually tighten the settings of the pasta attachment, one click at a time, and pass the pasta sheet through until it is light and delicate. For tagliatelle, I normally go to the 6th setting.

  10. Allow the sheet of dough (sfoglia) to dry for 2-3 minutes and fold in half. With a knife, trim off irregular edges. Gently fold the dough into about 3 inch folds, over and over until you have a nice compact roll.

  11. Using your knife, carefully begin cutting strips of the roll into about 1/2 inch (1.3 cm) pieces. With your fingers, unroll each strip and sprinkle with a light coating of semolina. You can make little nests with each batch that is finished. Repeat until all of your dough has transformed unto tagliatelle.

  12. Cook right away of store in the fridge covered with a towel.

black trumpets pasta 2.jpg

Cacio e pepe

Ingredients

1 1/2 cups freshly grated Pecorino Romano

1 1/2 tsp. of freshly ground black pepper

3 Tbsp. extra virgin olive oil

Salt

1.5 cups pasta water

Directions

  1. Bring a pot of water to a boil and add a dash of salt.

  2. In a large skillet, heat the olive oil and add in crushed black pepper. Stir until the pepper becomes very fragrant. Turn off the heat.

  3. Boil the fresh pasta.

  4. Reserve about 1.5 cups of pasta water as the pasta finishes. The starch from the water is why you wouldn’t just use regular water here.

  5. Transfer the cooked pasta into the skillet with pepper and oil. Toss until all of the noodles are coated.

  6. Add about a cup of pasta water to the noodles and stir. This may feel like a lot but it will all come together when you…

  7. Add all of the freshly grated Pecorino to the pasta, and stir very well until the cheese and water form a luxurious creamy coating all over the noodles. Add more pasta water as necessary.

  8. Divide the pasta into individual plates and sprinkle on a little more fresh Pecorino. Garnish with basil is optional.

Orecchiette with spring greens and guanciale

I got inspired by seeing all the orecchiette action over at @pastasocialclub and had my first go at it.
It's one of those pastas that might seem daunting, but is actually somewhat simple and doesn't require any fancy equipment. I prepared them with some wonderful guanciale from @fa.lu.cioli , charred spring greens (chard, and agretti), scapes, ricotta, lemon zest, and parmesan cheese. I'll definitely be making these again! Video of the whole process below.

orecchiette birds eye.jpg

The Orecchiette

Ingredients

1.5 cups Semolina ( 265 g)

.5 cups Tumminia Flour ( 85 g Sicilian whole wheat from from Molini del Ponte)

1 cup Water ( 215 g)

*Portion is good for 5-6 people.

Instructions

  1. Mix together the dry ingredients, and dump them out onto a clean work surface. Form them into a mountain shape with your hands. Using the tips of your fingers, create a well in the center.

  2. Slowly pour the water into the center and in a circular motion, begin incorporating the flour into the water, working outwards as you go. I find eggless dough is always a bit easier to work with.

  3. Once you’ve poured out all of the water the mixture should be a bit clumpy. Now you can start using your hands to begin working the dough. Scraping up all the clump, and pressing them together firmly. Do this methodically for about 5 minutes, until the mass begin to take on a smooth form. Use the palm of your hand to press down, rotating 25 degrees clockwise each time. If you have a flat bench knife/scraper, use this to scrape all any dough that has stuck to the work surface. Resist the urge to add more flour until you’ve worked it for a few minutes and still determine it feels too wet.

  4. After about 5 - 10 minutes, the dough ball should be very smooth, and it should not stick to your hands when you touch it. Wrap the ball in plastic wrap tightly, and allow to rest for 30 minutes.

  5. Unwrap the dough, and divide into about 6 pieces. Cover 5 of the pieces with the plastic wrap again as you begin working with the first smaller piece. This will prevent them from drying out as you work with the dough.

  6. Lightly dust the divided piece with semolina, and begin rolling it out with the palms of your hand into a long rope that is no more than .5 inch thick or the size of your smallest finger. Lightly dust the work surface with more semolina. It is best if your work surface is wood for this as the grain of the wood helps the dough grip the surface. This will be more difficult on a very smooth surface.

  7. Using a butter knife with a serated edge, cut off a small piece of dough and gently rolling it into a ball with your finger tips.

  8. Carefully, with two hands holding the knife, press the edge of the knife into the edge of the dough ball. Begin applying pressure and at the same time start dragging the knife towards you. The pressure and motion will cause the dough to flip back over on top of itself in your direction. It might take a few times to get a hang of it, but it’s really a rather simple movement.

  9. Very gently unfurl the curled shape with the tips of your fingers. Use your thumb or pointer finger to hold the orecchiette in place as you roll down the edges so that it creates a inverted well in the center. Watching the video (below) will help get a better visual on this part of the process.

  10. Repeat this process until you’re through with all of your dough. The finished orecchiette should be set onto a drying rack or clean surface dusted with a light coat of semolina and left to air dray for at least an hour or can be set out to dry overnight.

  11. Fresh pasta should take about 4 - 5 minutes to cook, and if drying out completely they will a few minutes longer.

making dough.jpg
rolling dough.jpg
drying pasta.jpg

The Pasta Dish

Ingredients

Orecchiette

A bunch of spring greens (I used agretti and Swiss chard but any heartier greens will work well for this)

2 finely diced scapes (or 2 cloves of garlic if scapes are not available)

Guanciale (1/2 cup)

Fresh ricotta

Lemon zest

Freshly grated parmesan

Salt and pepper

Instructions

  1. Chop and blanch your greens for 1 - 2 minutes and rinse in cold water. For more tender greens, you can skip ahead to step 6.

  2. Bring pot of water to boil.

  3. Saute the guanciale in a cast iron skillet on medium heat. This time of year I like to use an outdoor wood fired oven, but this can easily be done on the stove top. Make sure however you’re cooking it, the temperature is set to medium as you don’t want to burn the guanciale as the fat renders out. Cook for about 8 minutes, stirring frequently until the guanciale starts to get crispy.

  4. Add in the diced scapes (or garlic) and continue to saute for about another 4 minutes.

  5. At the same time, add the fresh made pasta to the boiling water and cook until tender. Fresh made pasta will typically take no more than 5 minutes. Reserve some pasta water when you drain the cooked pasta to use if you find your pasta to be too dry.

  6. Toss in your greens with the guanciale and scapes and stir together for another minute or two.

  7. Remove from the heat and add the cooked pasta directly into the same pan with the greens and guanciale. Toss together until all the noodles are evenly coated.

  8. Plate each portion and add a dollop of fresh ricotta cheese on top, freshly grated lemon zest, freshly grated parmesan, and some black pepper. Enjoy!

sauteeing guanciale.jpg
tossing pasta.jpg
agretti.jpg
chard.jpg

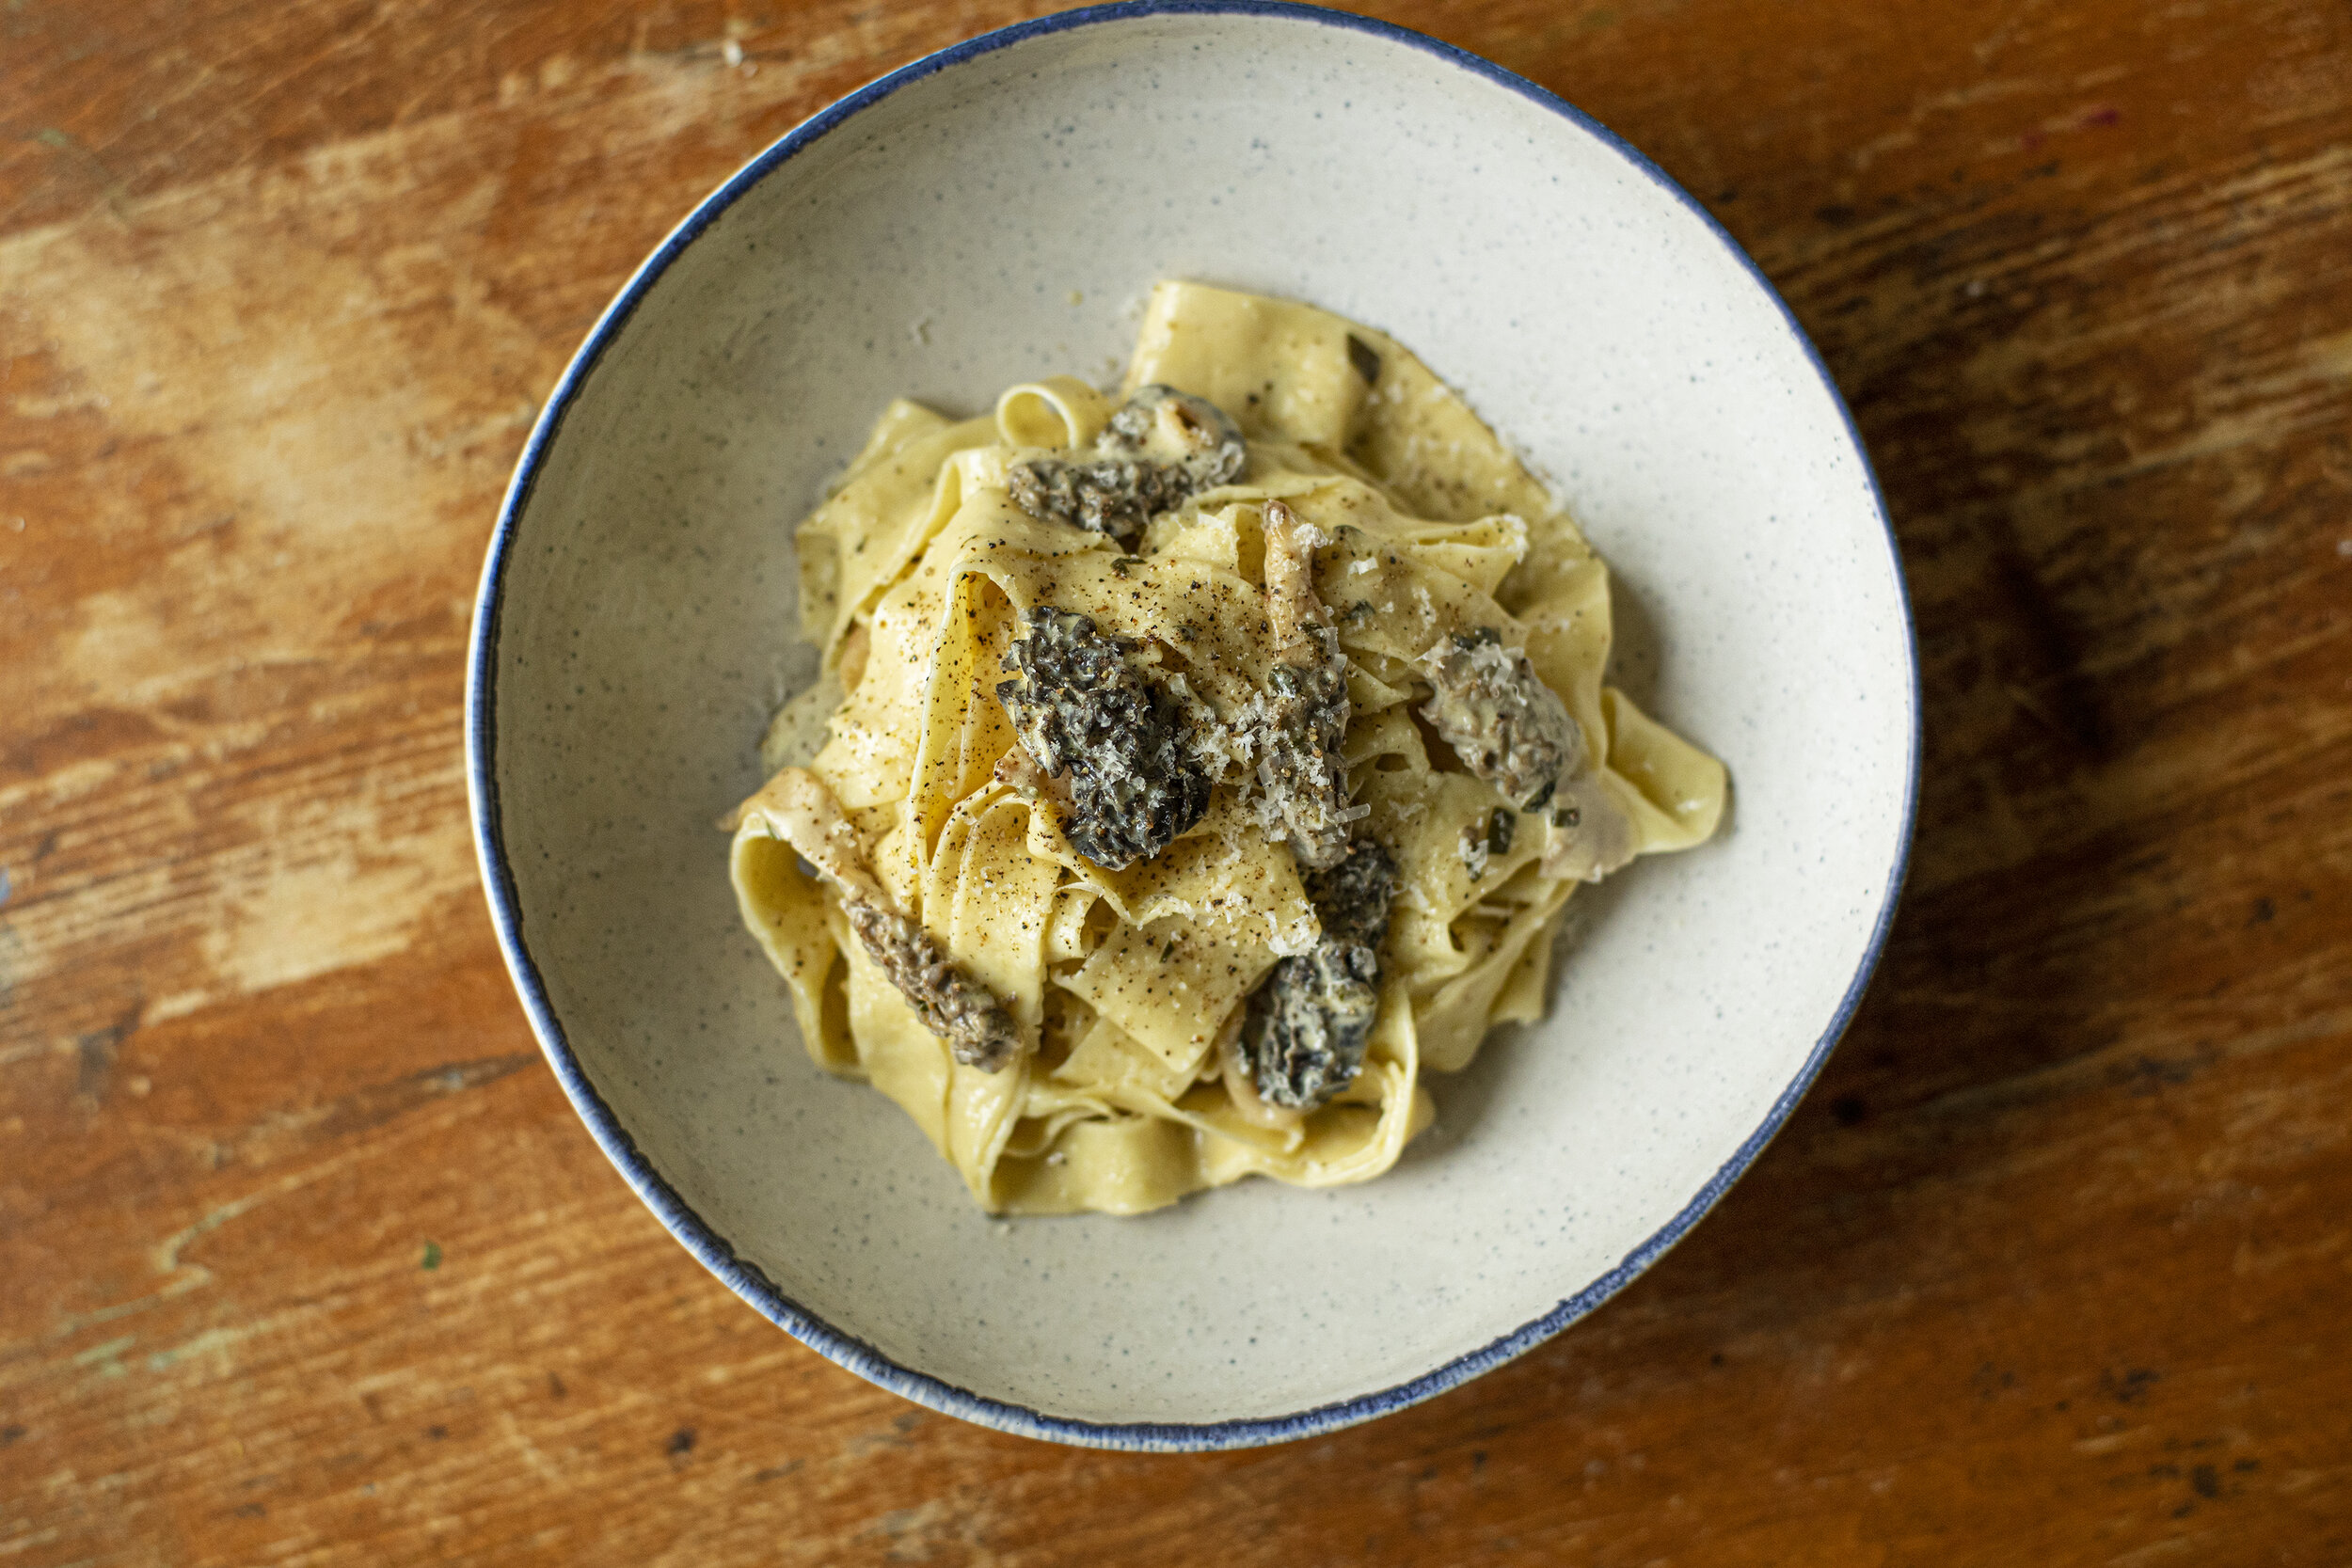
Tagliatelle with Morels in Cream Sauce

A mind melting delicious plate of tagliatelle and morels in a white wine + cream sauce needed no fancy garnish or embellishment. As the morel season in the northeast winds down, this was pure magic on a plate. If morels are not readily available or in season, any fresh wild mushroom would work nicely. Video of the whole process below.

bowl of morels in cream.jpg

Morel Cream Sauce

Ingredients

Fresh morel mushrooms

2 -3 finely diced ramp leaves (or cloves of garlic)

1 cup of heavy cream

1/4 cup white wine

Salt and pepper

1/2 stick of butter

1/4 cup freshly grated parmesan (plus more for finishing)

Instructions

  1. Clean and slice the morels into pinky sized pieces.

  2. Bring a skillet to medium heat and melt the butter.

  3. Sauté the mushrooms for a few minutes and add the diced ramp leaves. Sauté for another minute.

  4. Add the wine and bring up to a simmer so it starts to render down.

  5. Continue stirring the mushrooms and slowly add in the heavy cream. Continue stirring and bring back to a simmer.

  6. Simmer for another 5 minutes or so, and add more cream (or water) to adjust if necessary.

  7. Add the freshly grated parmesan cheese and continue stirring. The sauce should be thickening, creamy, and will start to smell incredible. Season with salt and black pepper after tasting. The parmesan cheese is already quite salty and you don’t want to over salt.

  8. The mushrooms should be tender, and completely cooked down. The total time should take about 20 minutes.

  9. Transfer your cooked pasta directly into the pan with the cream sauce. Using tongs, roll the pasta around so the sauce complete coats all of the noodles.

  10. Garnish each plate with some more freshly ground black pepper and parmesan cheese.

morels on table.jpg
making dough.jpg
Freshly made tagliatelle is an excellent pair for the cream sauce.

Freshly made tagliatelle is an excellent pair for the cream sauce.

Pappardelle with Rabbit Ragu

This is a deep and decadent ragu that is a perfect accompaniment to big fat pappardelle noodles. Video of the process below.

plate of pasta 1.jpg

Ingredients:

1 whole rabbit

¼ cup chopped bacon or pancetta 

1 onion (diced)

3 cloves garlic (minced)

½ cup thinly chopped celery

½ cup thinly chopped carrots

8 oz tomato paste

12 oz canned tomatoes (crushed) 

½ cup red wine

2 cups hot broth

1 tbsp herbs de provence

ingredients.jpg
ragu in pot.jpg
shredded meat.jpg
  1. Break down the rabbit into 6 pieces. Hind legs, forelegs, and split the body into two. Season with salt and pepper. 

  2. Brown the meat on all sides in a deep pot. Set aside. 

  3.  Cook the bacon for a few minutes to begin rendering the fat.

  4. Add the garlic, onions, celery, and carrots and cook on medium/low for another few minutes until softened.

  5. Add the tomato paste, herbs de provence, and mix together until well incorporated.

  6. Pour in your red wine and cook for another few minutes. 

  7. Add the hot broth, and tomatoes and bring up to a low simmer.

  8. Add the browned rabbit back into the pot, partially cover, and simmer for 1.5 hours - turning the meat every 15 minutes and stirring the sauce so it doesn’t stick to the bottom of the pan. If the sauce feels like it’s getting too thick add a little more hot broth to thin it out.

  9. Remove the meat when tender and allow to cool. Turn off the heat. 

  10. Shred the meat from the bones and pull apart into small pieces. Add the shredded meat back into the ragu and stir together. 

  11. Serve right away or refrigerate the sauce until mealtime. Can be kept in the fridge for a few days. 

  12. When serving, generously coat the noodles with the ragu by tossing in a bowl. Top each plate with a generous amount of freshly grated parmesan cheese. 

The pappardelle recipe was straight from Evan Funke of Felix. I highly recommend his book American Sfoglino: A Master Class in Homemade Pasta.

Video below.

mixing eggs.jpg
rolling dough.jpg
holding pasta.jpg

Tumminia Flour Busiate with Fire Roasted Red Sauce

I was delighted to receive a package from @gustiamo with this incredible tumminia flour from Filippo Drago's flour mill in Castelvetrano, Sicily. I've never worked with this variety before - an ancient variety of wheat native to Sicily. I was intending on making a wood fired pasta alla norma with handmade tumminia busiate, but because of the chaos at the supermarkets and the threat of coronavirus I wasn't able to source all my ingredients and instead just opted for a simpler wood fired red sauce in the @oonihq Pro. The flour has an amazing smell and flavor, and I'm looking forward to using it to make a traditional pane nero next. A compromised vision - but a pretty tasty dish none-the-less. Full video about the process below.

plate of busiate 2.jpg

The Dough

1/2 cup of Tumminia Flour (or regular whole wheat)

1/2 semolina flour

1 cup of cold water

Olive oil

Salt

The Pasta

Form a mound in the center of your work surface with your blended flour. Using your finger tips, create a well in the center like a volcano. Slowly pour in the water a little at a time and use a fork to start combining the flour with the water. Incorporate the water completely and the mixture will be somewhat crumbly. Now start working the dough together with your hands for about 5 minutes. it will start to feel smoother. Drizzle on a little bit of olive oil, a pinch of salt, and continue working the dough for another 5 minutes until it is very smooth. If the dough feels too sticky, use a little more flour to dust the surface until the dough does not stick to the work surface or your hands. Wrap the dough ball in plastic wrap and set aside for 30 minutes at room temperature.

Unwrap a corner of the dough and start pulling out one of the side to form the shape of an elongated pear. You’ll keep pulling more dough off the end while keeping the remainder wrapped in plastic so it doesn’t dry out as you work. Rip off small balls about the size of a large grape and roll them into thin “snakes” about 6 inches long with the palm of your hands. Gently dust with more flour.

There is one essential tool you’ll need for this which essentially is a thin wooden dowel which in Sicily is referred to as a busa. Any thin wood dowel safe for food should work for this. The original way to roll the pasta was with the stem of a piece of native grass grown in Sicily. The translation of stem is busa. Hence busiate.

Take the tip of the busa and lay it over one of the ends of the rolled out dough “snake” and it should be at about a 45 degree angle. Now gently roll the busa so that the dough begins to wrap around the wood. Use gentle pressure but don’t push too hard. Here is where you’ll realize that if you don’t dust the dough enough, it will start sticking to the wood, and you’ll start to get frustrated. I promise. So be calm and make sure the dough is not sticky. After the dough is coiled around fully, gently wiggle the busa so it comes loose, and slide it out of the corkscrew shape that you just created. Repeat. Repeat, until there is no dough left. This recipe makes about 4 medium sized plates of pasta.

The video is helpful to visualize how the process looks.

flour in hand.jpg
pulling dough.jpg
corkscrews.jpg

The Sauce

Stewed whole San Marzano tomatoes

Garlic

Yellow onion

Basil

Parmesan Rind

Salt

Pepper

Extra virgin olive oil

The key here is simplicity, and good ingredients (especially the tomatoes).

For this recipe I’m using my wood fired Ooni Pro, but this is wonderful done on the stove top as well. When cooking with fire, you’ll just need to be more mindful of temperature regular but it makes more a wonderful rustic and smoky sauce. Lightly puree the tomatoes in a processor or with a stick blender. Be careful not to aerate the tomatoes too much. For a chunkier sauce you can simply crush the tomatoes by hand. Set aside in a bowl. Peel and dice three to five cloves of garlic and set aside. Peel and chop the onion in half. By cooking the entire halves you will impart the flavor of the onion and the sauce won’t have chunks of onion in it. 

Heat a generous pour of EVOO in your saucepan at medium to low heat. Add your garlic and onion halves and let saute for a few minutes. Be careful not to burn anything. Add a piece of parmesan rind into the hot oil, and let it simmer for another minute. The oils from the cheese will add depth to the sauce. Add your tomatoes to the pan, and bring to a simmer. Add salt and pepper to taste. Add some chopped basil, stir, and set on medium/low. You want your sauce to simmer for about 30 minutes. Stir frequently to make sure it's not sticking to the bottom.

fire roasted sauce.jpg

Finishing

Boil the pasta for about 4 minutes. Drain and transfer to a bowl with the sauce. Use tongs to roll the pasta around so it coats all of the noodles. Plate your pasta and finish with a generous amount of freshly grated parmesan and fresh basil. Enjoy.

Creamy Chanterelle Tagliatelle

After weeks of searching with limited results I finally found myself a proper patch of chanterelles. It was 100 F and muggy as s***, but I trekked out to check a spot I had a feeling about. After an hour of searching I caught a glimpse of the golden beacons on a steep hillside - cantharellus laterius, smooth chanterelles. It was enough to make a real meal and I wanted to make something simple that showcased the mushrooms.

creamy chant pasta.jpg
smooth chant.jpg

I decided to do a simple pasta dish, with an herb & cream sauce. After cleaning off the dirt I gently sauteed the mushrooms in butter, thyme, salt, and pepper. After about 5 -7 minutes I added in a generous pour of heavy cream and brought it to a light simmer for another 2 minutes. At this point the smell is incredible. To the pan I added the cooked tagliatelle, and tossed everything until the noodles were completed coated. After plating, I topped the dish with freshly grated parmesan and black pepper. 

chants on moss.jpg

This is a dish that can convert even the most discerning mushroom skeptics. See video below.

Friar's Beard Bucatini

Agretti, also known as Salsola Soda, saltwort, friar’s beard or “land seaweed” has a high salt tolerance and has been traditionally cultivated in coastal areas of the Mediterranean. It also has a notoriously poor germination rate. I was lucky to get three plants out the 24 seeds that I sowed. So this dish of sautéed agretti, fresh garlic, twisted together with bucatini and topped with cayenne salt cured egg yolks and breadcrumbs was completely savored. It’s always fun experimenting with new varieties in the garden.

friars bucatini.jpg
agretti growing.jpg
agretti bundle.jpg

For the cured egg yolk, I used a common recipe found online which involves curing the yolks in a mix of sugar and salt for up to one week in the refrigerator. After a week you remove the yolks, gently rince them off with cold water, and place them on a wire rack and back them at a very low temperature (150 F) in the oven for 1.5 hours. That’t it, super easy. Where I modified the recipe was with the introduction of hot cayenne powder in the mix, which really infused a spicy flavor to the yolks.

IMG_8752.jpg

Chicken & Eggs: Wild Mushroom Carbonara

After almost giving up on a morning mushroom foray, I stumbled into a beautiful specimen of Chicken of the Woods on my way back to the car.

COW carbonara 1.jpg

After deliberating about how best to prepare it, I came up with the idea of a wild mushroom carbonara using the COTW instead of traditional guanciale. It’s not quite the same thing as real carbonara but it was a fun way to use the wild ingredient and is a solid vegetarian option. In the absence of the rendered pork fat I used a generous amount of olive oil to lubricate the pasta. Below is a video of the process, which details how to make a homemade semolina spaghetti, the creamy sauce, and the preparation of the mushrooms.

9E6E2265-A99C-469B-97FC-5BDC3A135266.jpg

Homemade Cavatelli with Wild Ramp Pesto

Ramp season is fleeting. Next year I plan on making a few extra batches of pesto to keep in the freezer to extend the season a little longer.

cavatelli pesto 2.jpg

Ramp pesto is so simple and tasty. I puree the ramp leaves (stems removed and bulbs left in the ground) with good extra virgin olive oil, toasted pine nuts, salt, and pepper. If using right away I’ll finish it by incorporating a healthy amount of grated parmesan and a little melted butter to make it creamy. If freezing, I’ll leave out the cheese and butter and add this in fresh after it is defrosted. I garnished this plate with fresh chive blossoms and more toasted pine nuts. The pasta was a handmade semolina cavatelli which are deceptively easy to make. See video below for the whole process.

cavatelli pesto 3.jpg