Orecchiette with spring greens and guanciale

I got inspired by seeing all the orecchiette action over at @pastasocialclub and had my first go at it.
It's one of those pastas that might seem daunting, but is actually somewhat simple and doesn't require any fancy equipment. I prepared them with some wonderful guanciale from @fa.lu.cioli , charred spring greens (chard, and agretti), scapes, ricotta, lemon zest, and parmesan cheese. I'll definitely be making these again! Video of the whole process below.

orecchiette birds eye.jpg

The Orecchiette

Ingredients

1.5 cups Semolina ( 265 g)

.5 cups Tumminia Flour ( 85 g Sicilian whole wheat from from Molini del Ponte)

1 cup Water ( 215 g)

*Portion is good for 5-6 people.

Instructions

  1. Mix together the dry ingredients, and dump them out onto a clean work surface. Form them into a mountain shape with your hands. Using the tips of your fingers, create a well in the center.

  2. Slowly pour the water into the center and in a circular motion, begin incorporating the flour into the water, working outwards as you go. I find eggless dough is always a bit easier to work with.

  3. Once you’ve poured out all of the water the mixture should be a bit clumpy. Now you can start using your hands to begin working the dough. Scraping up all the clump, and pressing them together firmly. Do this methodically for about 5 minutes, until the mass begin to take on a smooth form. Use the palm of your hand to press down, rotating 25 degrees clockwise each time. If you have a flat bench knife/scraper, use this to scrape all any dough that has stuck to the work surface. Resist the urge to add more flour until you’ve worked it for a few minutes and still determine it feels too wet.

  4. After about 5 - 10 minutes, the dough ball should be very smooth, and it should not stick to your hands when you touch it. Wrap the ball in plastic wrap tightly, and allow to rest for 30 minutes.

  5. Unwrap the dough, and divide into about 6 pieces. Cover 5 of the pieces with the plastic wrap again as you begin working with the first smaller piece. This will prevent them from drying out as you work with the dough.

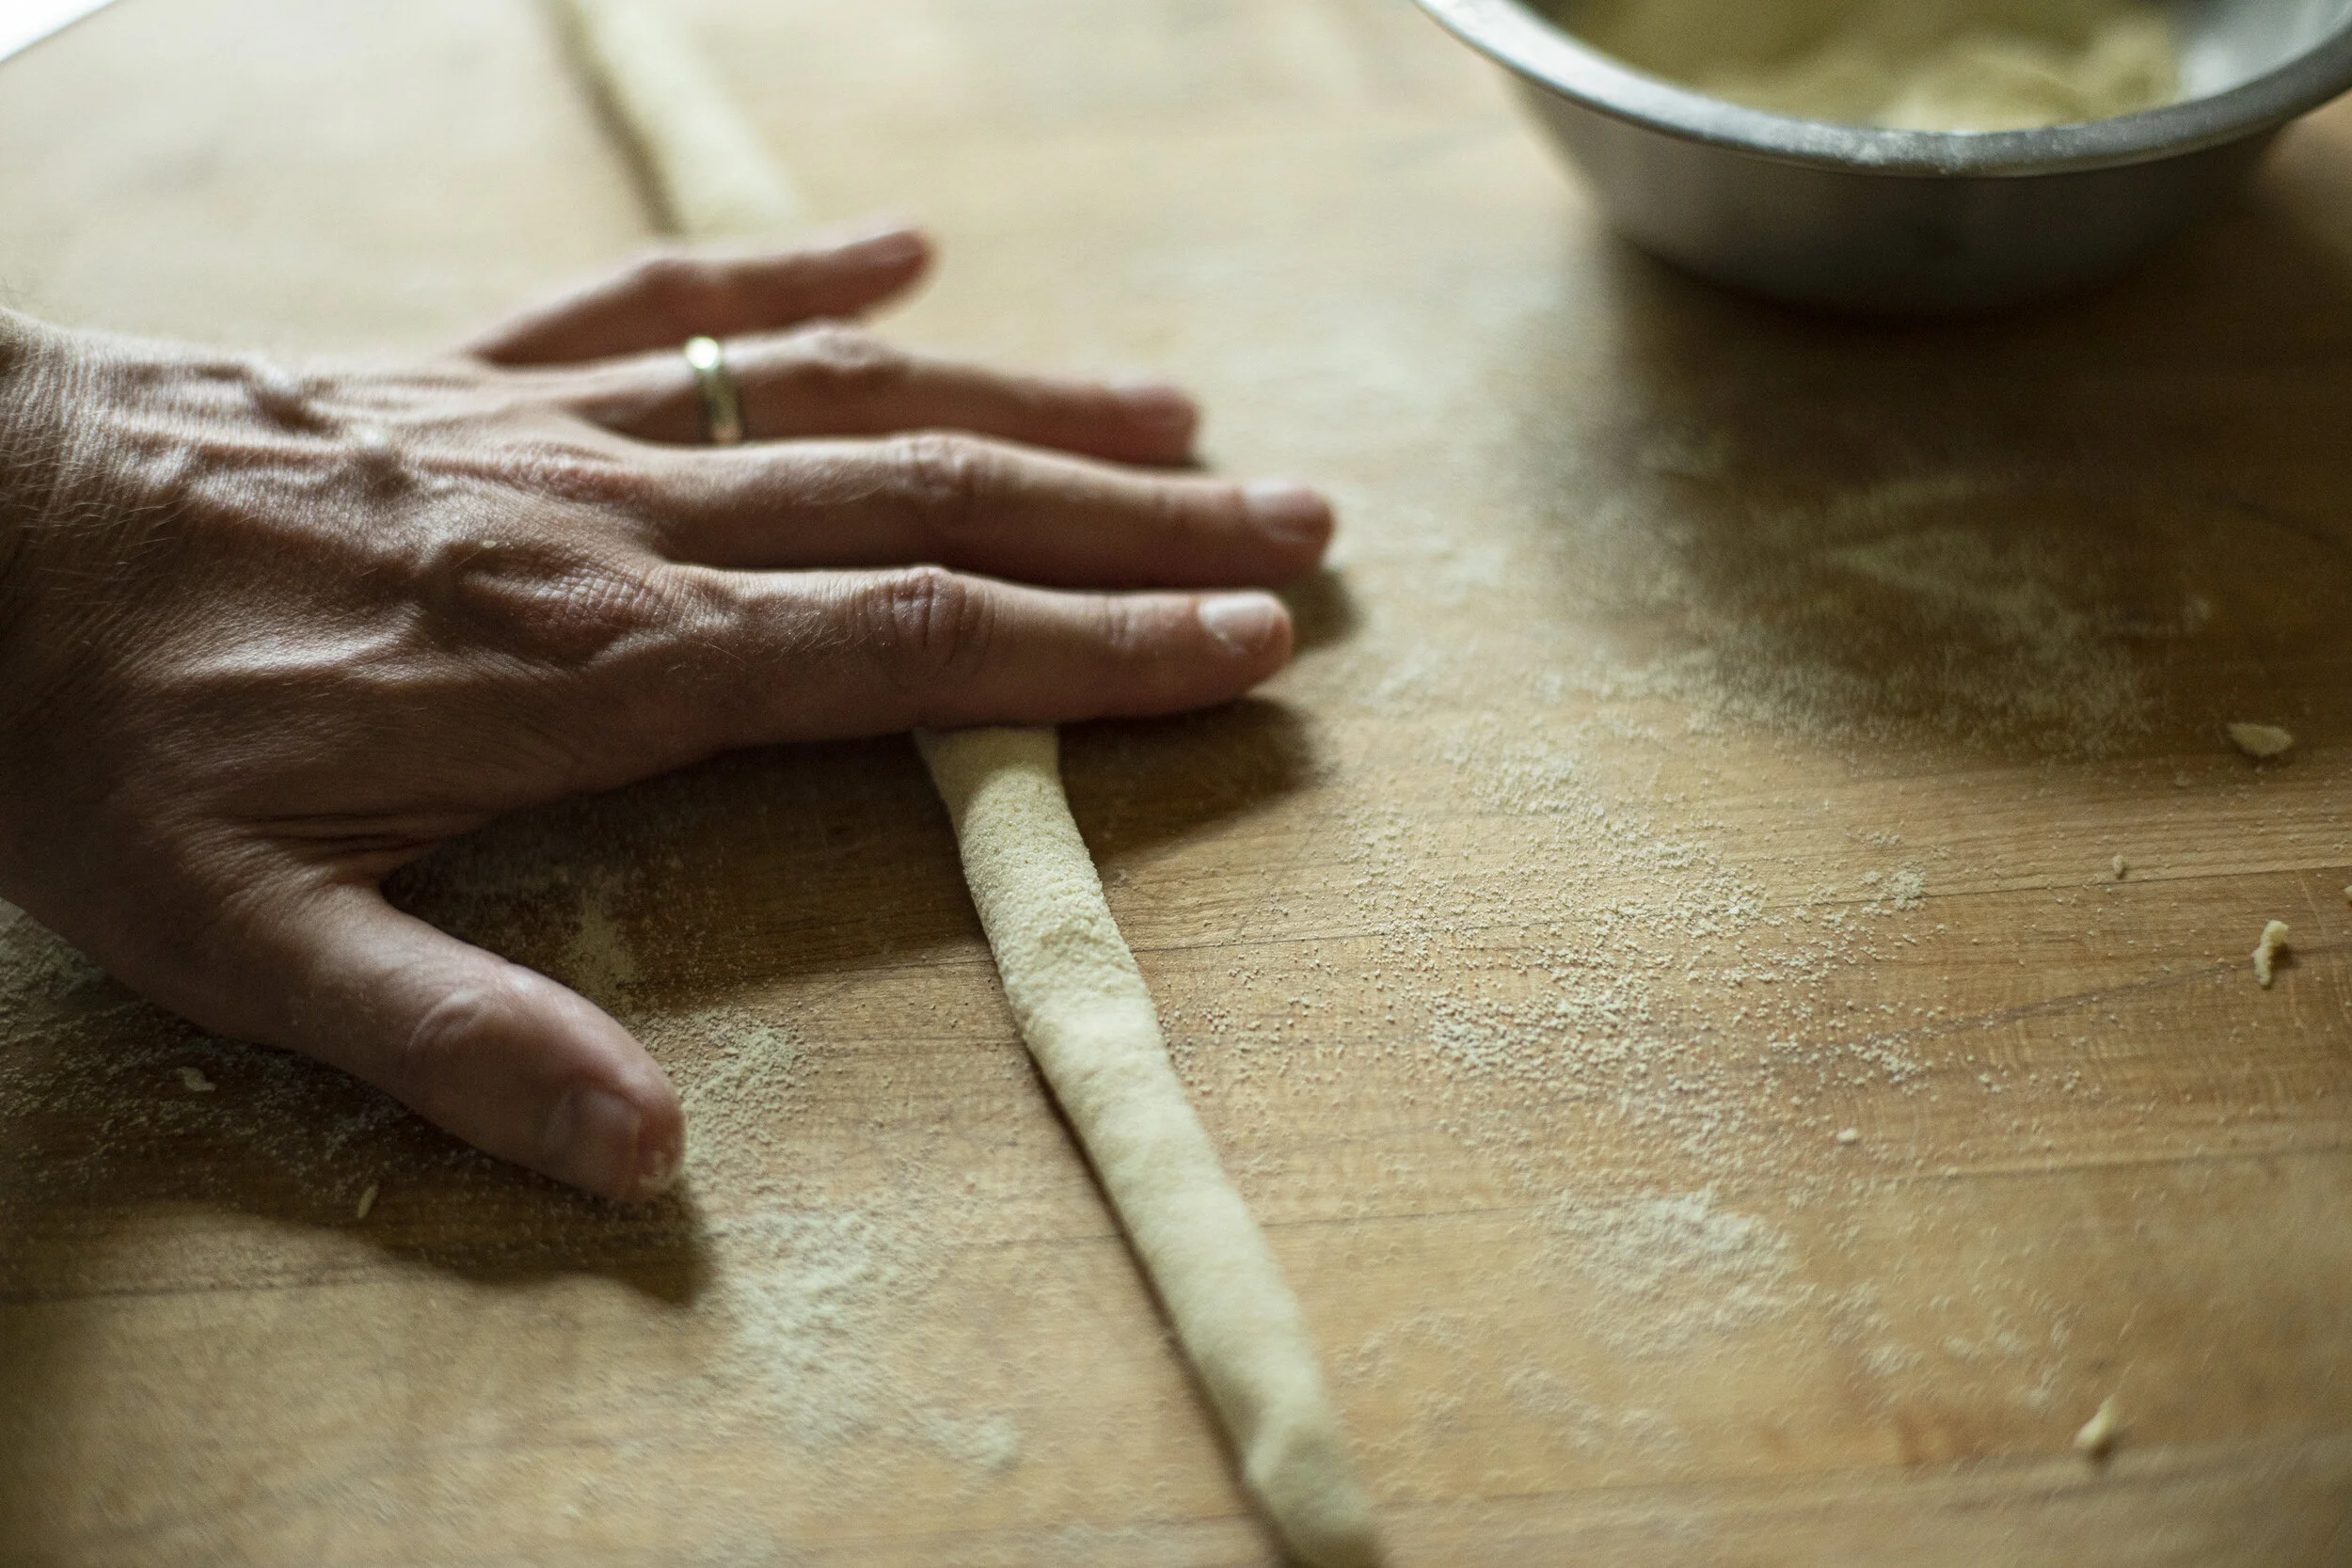
  6. Lightly dust the divided piece with semolina, and begin rolling it out with the palms of your hand into a long rope that is no more than .5 inch thick or the size of your smallest finger. Lightly dust the work surface with more semolina. It is best if your work surface is wood for this as the grain of the wood helps the dough grip the surface. This will be more difficult on a very smooth surface.

  7. Using a butter knife with a serated edge, cut off a small piece of dough and gently rolling it into a ball with your finger tips.

  8. Carefully, with two hands holding the knife, press the edge of the knife into the edge of the dough ball. Begin applying pressure and at the same time start dragging the knife towards you. The pressure and motion will cause the dough to flip back over on top of itself in your direction. It might take a few times to get a hang of it, but it’s really a rather simple movement.

  9. Very gently unfurl the curled shape with the tips of your fingers. Use your thumb or pointer finger to hold the orecchiette in place as you roll down the edges so that it creates a inverted well in the center. Watching the video (below) will help get a better visual on this part of the process.

  10. Repeat this process until you’re through with all of your dough. The finished orecchiette should be set onto a drying rack or clean surface dusted with a light coat of semolina and left to air dray for at least an hour or can be set out to dry overnight.

  11. Fresh pasta should take about 4 - 5 minutes to cook, and if drying out completely they will a few minutes longer.

making dough.jpg
rolling dough.jpg
drying pasta.jpg

The Pasta Dish

Ingredients

Orecchiette

A bunch of spring greens (I used agretti and Swiss chard but any heartier greens will work well for this)

2 finely diced scapes (or 2 cloves of garlic if scapes are not available)

Guanciale (1/2 cup)

Fresh ricotta

Lemon zest

Freshly grated parmesan

Salt and pepper

Instructions

  1. Chop and blanch your greens for 1 - 2 minutes and rinse in cold water. For more tender greens, you can skip ahead to step 6.

  2. Bring pot of water to boil.

  3. Saute the guanciale in a cast iron skillet on medium heat. This time of year I like to use an outdoor wood fired oven, but this can easily be done on the stove top. Make sure however you’re cooking it, the temperature is set to medium as you don’t want to burn the guanciale as the fat renders out. Cook for about 8 minutes, stirring frequently until the guanciale starts to get crispy.

  4. Add in the diced scapes (or garlic) and continue to saute for about another 4 minutes.

  5. At the same time, add the fresh made pasta to the boiling water and cook until tender. Fresh made pasta will typically take no more than 5 minutes. Reserve some pasta water when you drain the cooked pasta to use if you find your pasta to be too dry.

  6. Toss in your greens with the guanciale and scapes and stir together for another minute or two.

  7. Remove from the heat and add the cooked pasta directly into the same pan with the greens and guanciale. Toss together until all the noodles are evenly coated.

  8. Plate each portion and add a dollop of fresh ricotta cheese on top, freshly grated lemon zest, freshly grated parmesan, and some black pepper. Enjoy!

sauteeing guanciale.jpg
tossing pasta.jpg
agretti.jpg
chard.jpg

Meatball Sub (With Venison)

This sandwich was inspired by Daniel Uditi, the chef over at Pizzana. My spin on the classic meatball sub was to swap out the beef with freshly ground venison from this year’s harvest. Since the venison is so lean I cut the blend with 50% ground pork to add some fat back into the equation. The meatballs were packed into homemade sesame rolls and finished off in a wood fired oven. Video showing the entire process below.

whole sandwich.jpg

The Meatballs

1 pound ground venison (or substitute with beef)

1 pound ground pork

2 cloves of garlic (finely minced)

¼ cup chopped parsley

1 cup of torn stale bread pieces, soaked in buttermilk*

¾ cup grated parmesan

Dried chili flakes (to your liking)

1 Egg

Salt and Pepper

Buttermilk

*I like to use any stale homemade sourdough bread I have laying around, but store bought works just as well. I like larger torn pieces as they give the meatball some airiness that you won’t get with the store-bought breadcrumbs. But if the pieces are too big, the meatball might begin to fall apart.

Stale bread soaking in buttermilk

Stale bread soaking in buttermilk

balls.jpg
browning.jpg

I brown my meatballs in a wood fired oven to give it a little smokey flavor but this can easily be done in a cast iron skillet. Brown all sides of each meatball and set aside as they cook. Once all the meatballs are browned, transfer them over to your simmering pot of red sauce and continue simmering (on low) for another 30 - 45 minutes until the meatballs are cooked all the way through.

in the sauce.jpg

This is my Nonna’s classic red sauce that I rarely deviate from. 

Stewed whole San Marzano tomatoes

Garlic

Yellow onion

Basil

Parmesan Rind

Salt

Pepper

Extra virgin olive oil

The key here is simplicity, and good ingredients (especially the tomatoes). Lightly puree the tomatoes in a processor or with a stick blender. Be careful not to aerate the tomatoes too much. For a chunkier sauce you can simply crush the tomatoes by hand. Set aside in a bowl. Peel and dice three to five cloves of garlic and set aside. Peel and chop the onion in half. By cooking the entire halves you will impart the flavor of the onion and the sauce won’t have chunks of onion in it. 

Heat a generous pour of EVOO in your saucepan at medium to low heat. Add your garlic and onion halves and let simmer for a few minutes. Be careful not to burn anything. Add a piece of parmesan rind into the hot oil, and let it simmer for another minute. The oils from the cheese will add depth to the sauce. Add your tomatoes to the pan, and bring to a simmer. Add salt and pepper to taste. My Nonna would often use a pinch of white granulated sugar just to add a little more sweetness but if you’re using good quality tomatoes this step is not necessary. Add some chopped basil, stir, and set on medium/low. You want your sauce to simmer for about 30 - 45 minutes. Stir frequently to make sure it's not sticking to the bottom.

melting cheese.jpg

Finishing Touches

I serve the meatballs (and sauce) on homemade sesame rolls that I’ve been iterating on this for the past year. That recipe can be found here. Slice each roll and open up like a book and set into a skillet or pan. Fill the entire surface with meatballs and ladle on a generous helping of sauce. Top with good quality buffalo mozzarella. Put the entire skillet back into the wood fire (or in your oven) until the cheese is completely melted. Remove from the heat, garnish with some fresh basil and your sandwich is ready to go.

two halves.jpg

Traditional Fried Cardoon

The mysterious cardoon. In the same family as thistle and artichoke, it has been cultivated in the Mediterranean for centuries. It was one of those foods that I occasionally encountered growing up but never fully understood - food from the “old world” that became uncommon as immigrants became more Americanized overtime. Video about the process below.

fried cardoon.jpg

But this was the year that I finally decided to grow some myself. When you read about how to cultivate and prepare it, you ask yourself why you’re going through the trouble. The plant is covered in sharp spines and needs to be handled with gloves. The only edible part (when mature) is the most tender part of the stalk, but only after it is peeled, blanched, and cooked. It’s a lot of work but it also posed a new challenge.

cardoon bundle.jpg

I mostly remember it being breaded and fried so I decided to keep it classic and simple with the hopes that the artichoke-like flavor carried through. I’m not sure that cardoon will be taking up valuable real estate in my plot next season but it was a worthwhile experiment this year. 

stalks.jpg

Panelle Sandwich on Rustic Wood Fired Sourdough

Panelle is one of those iconic street foods that is ubiquitous in Palermo. Chickpea flour, seasoned with salt, pepper, olive oil, and parsley. Fried quickly until crispy and served with fresh squeezed lemon, sometimes in the form of a sandwich. It’s so simple and yet feels exotic. This version was served on top of a rustic wood fired sourdough bun baked in the Ooni Pro along with charred lemon. Video about the process below.

panelle sandwich 1.jpg
charred lemon.jpg

Lemons charred right in the coals of the oven.

rustic buns.jpg

The sourdough buns were wood fired at approximately 425F for 20 minutes. Temperature regulation remains a challenge in the wood fired oven. For more consistency a traditional convection oven works great.