Grandma Style Pan Pizza 2.0
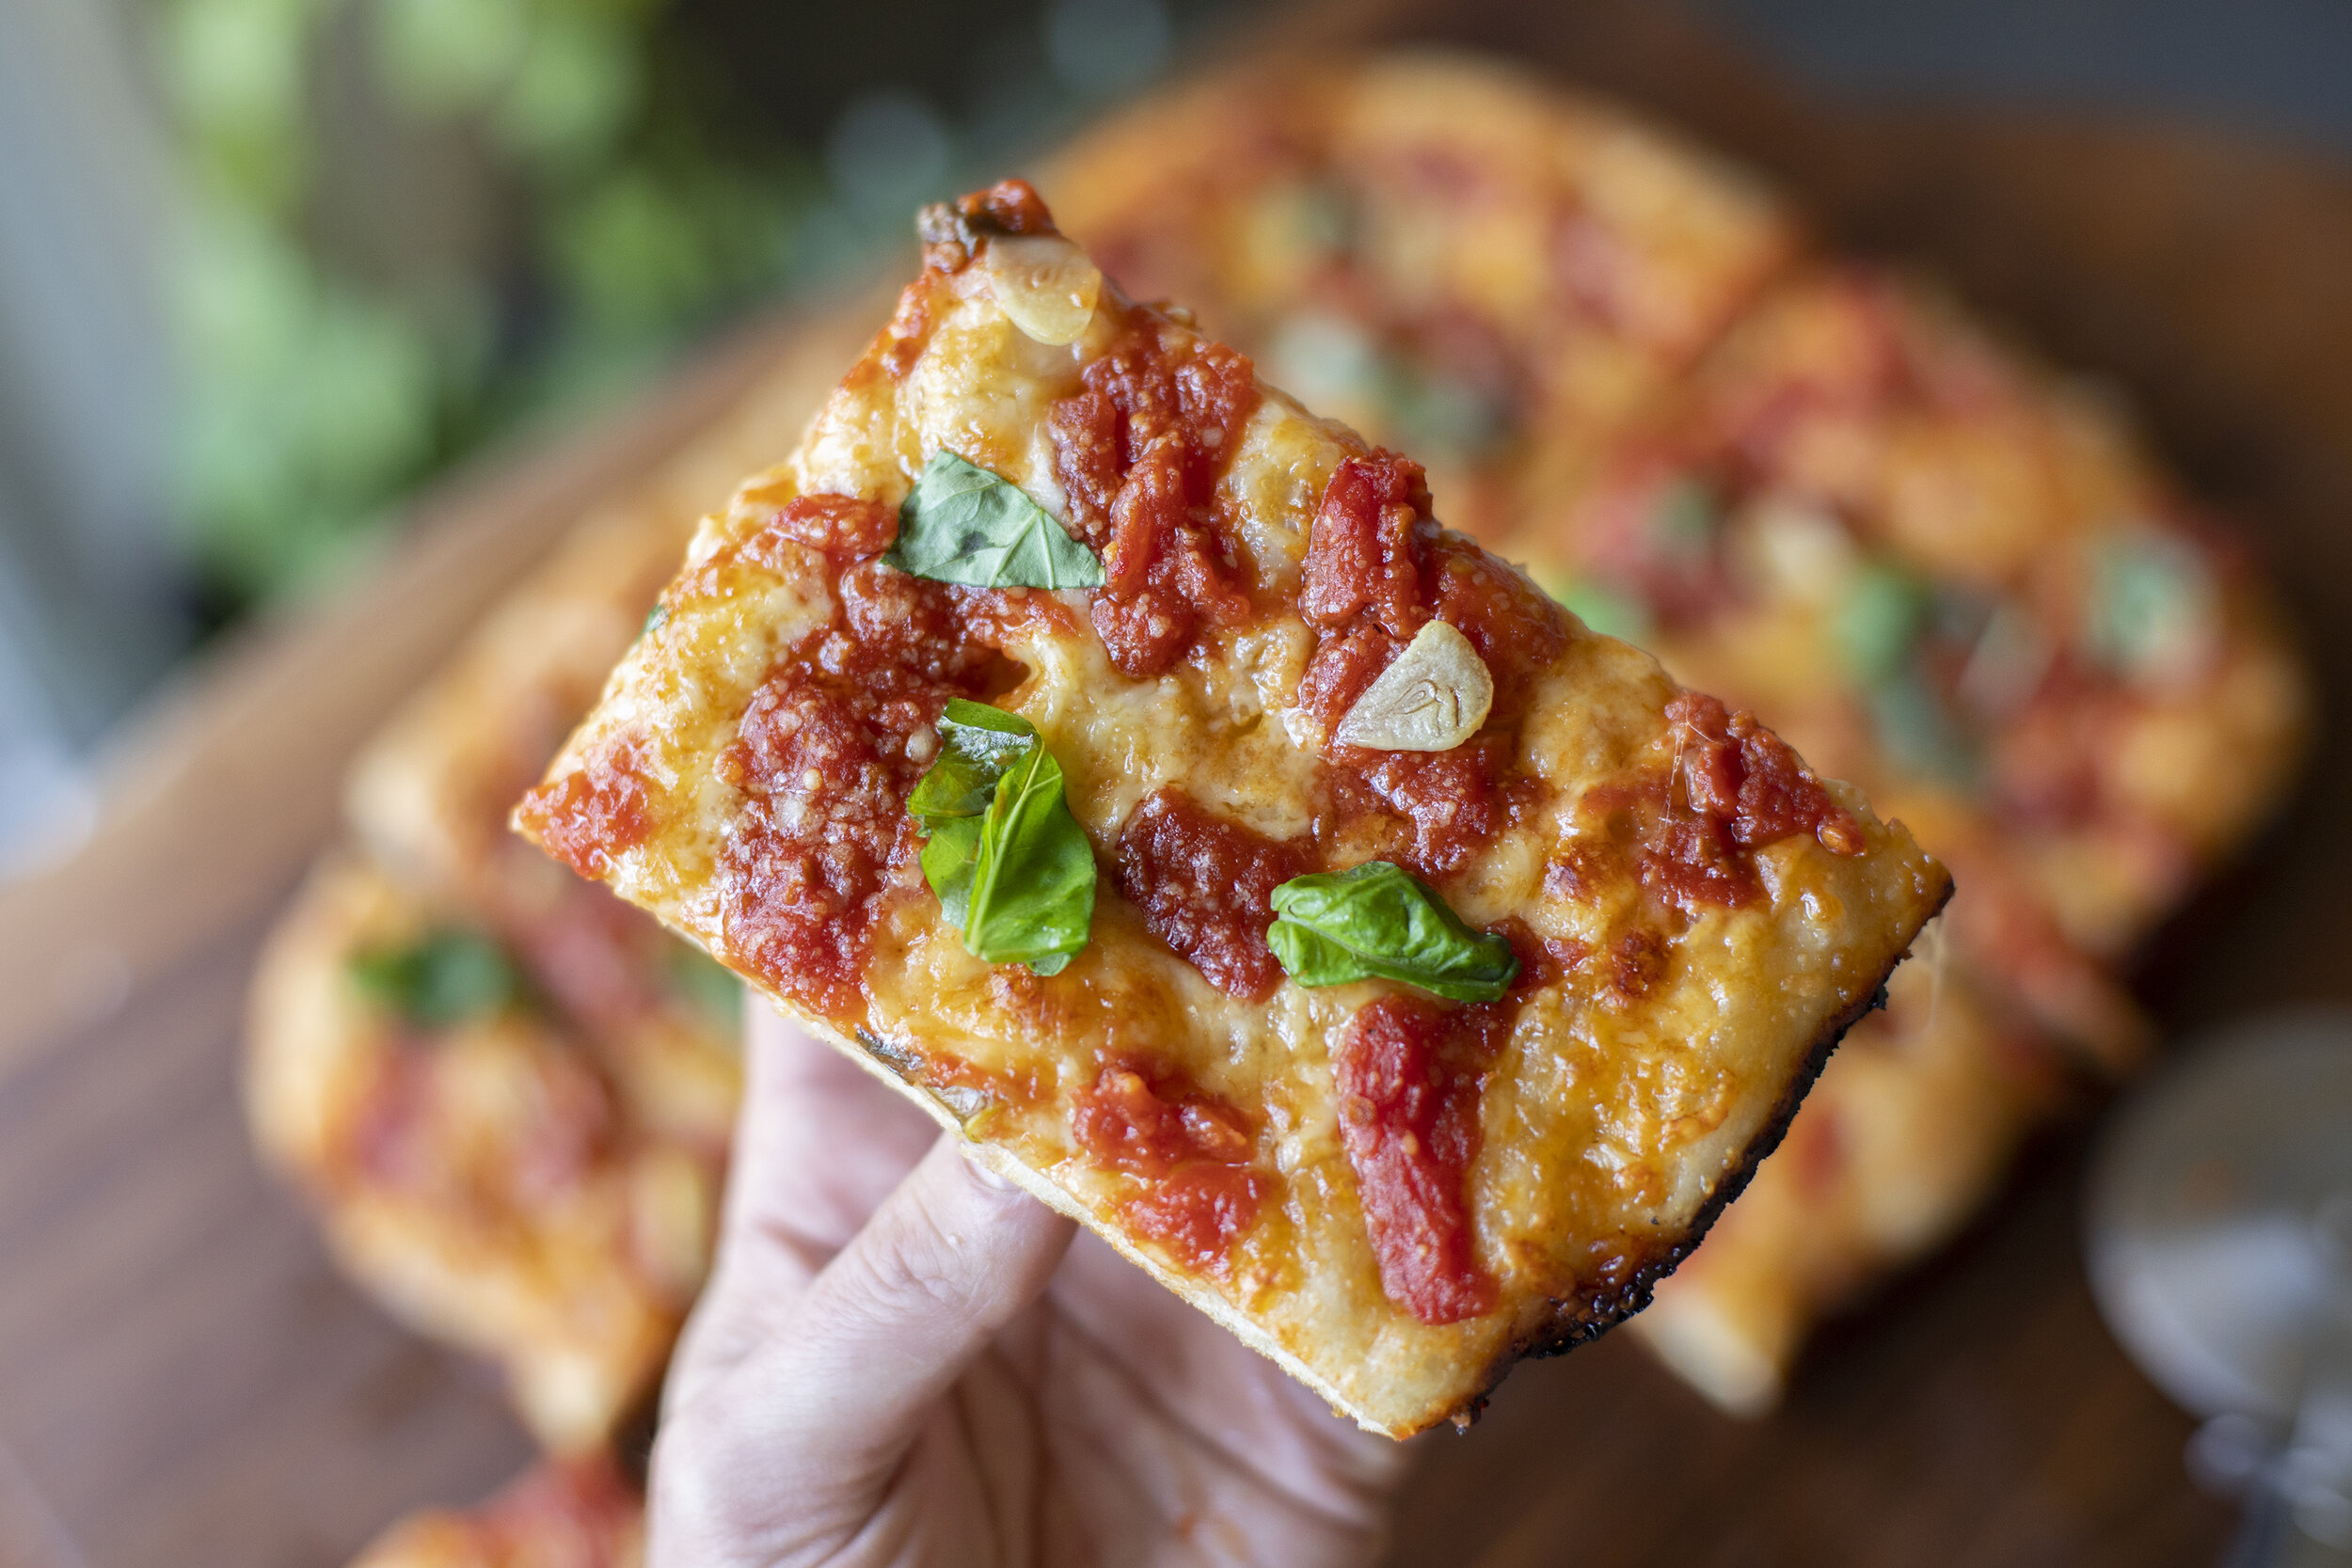
After much trial and error I’ve landed on a Grandma style pan pizza dough formulation that I’m really happy with. The end result is a 75% hydration naturally leavened dough that yields a wonderfully light and thin pizza with crispy edges. It’s a higher hydration pizza dough but because there really is no shaping involved it’s very easy to work with. The fermentation time is very flexible; from 20 hrs up to 36 hrs once it goes into the refrigerator. In my opinion, the key things for a Grandma pie are 1) lots of garlic 2) a classic red sauce on top of the cheese 3) a thin, crispy edged dough baked in a pan vs directly on a stone.
The Dough
Ingredients
533 grams Type 0 Manitoba Flour
400 grams Water
96 grams Active Starter
10 grams Salt
These quantities are designed for 2 X 11” x 14” pans.
Mix together the water and the flour and set to autolyse for one hour up to six hours. At about 7 pm add the salt and active sourdough starter and start working into the dough with your hands or with a rubber spatula until more or less homogenous. Let rest for 45 minutes.
You’ll want to fold the dough two more times (with your hands) over the course of the next 1 - 2 hours to develop the gluten. By the end the dough should be very smooth and should not stick to your hands while folding. Cover and rest overnight at room temperature.
In the morning (approximately 7am) divide the dough and keep in air tight containers. Transfer to the refrigerator and take out 30 minutes before you’ll be making your pizza. If making pizza that evening you’re looking at about 12 hours of room temperature fermentation followed by about 10 hours of cold fermentation. I’ve kept the dough in the fridge until the next day and still have been very pleased with the results. If baking early in the day, there’s no need to put it into the fridge. You can transfer directly to your baking pan from the bulk ferment container.
Classic Grandma Recipe
Ingredients
Olive Oil
Red Sauce (see recipe for red sauce here)
Shredded mozzarella cheese
Thinly sliced garlic (2 -3 cloves)
Grated parmesan
Basil
Instructions
Set oven to 425F.
Slice 2-3 cloves of garlic as thin as you can. Cover them with enough olive oil so they are completely submerged in a small bowl.
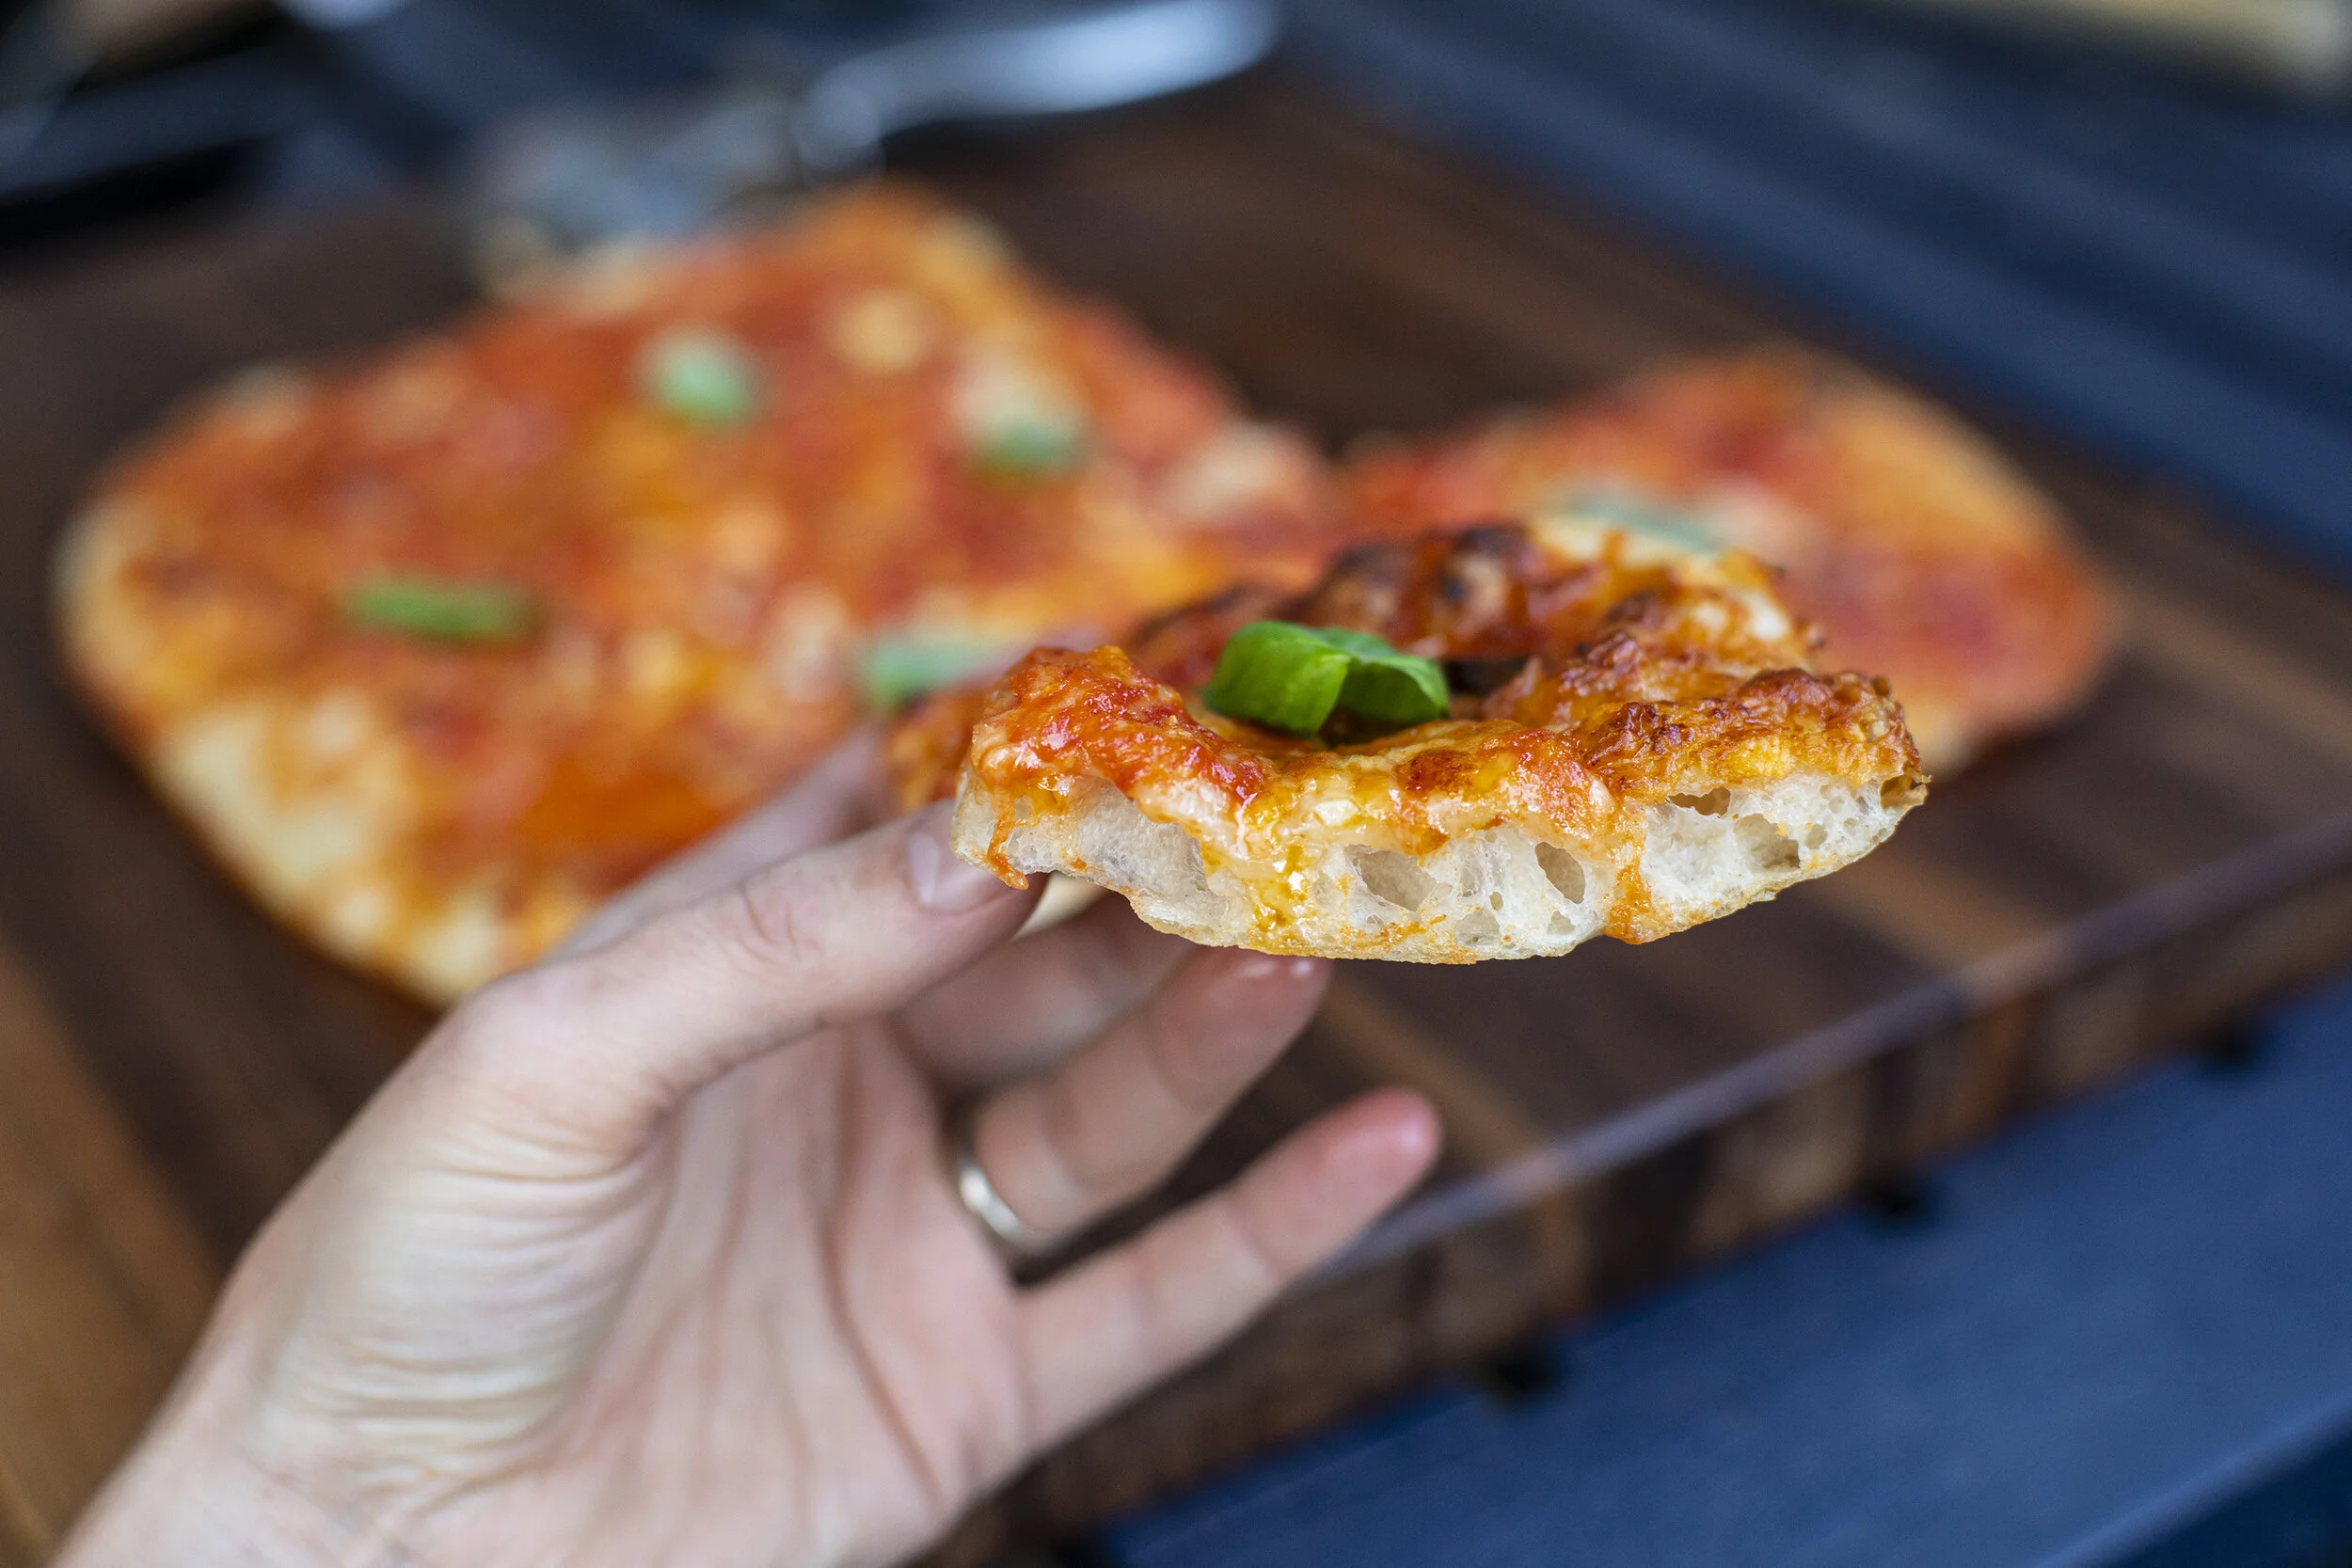
After the dough has come to room temperature, dump it out into a well oiled pan. Spread the dough out so it has a uniform thickness. Use the tips of your fingers to press down into dough to push it into the edges of the pan. Pop any large bubbles. Grandma is a generally thinner pie, so it should be worked into the pan fairly well. Drizzle a little more olive oil on top.
Cover the entire surface of the dough with shredded cheese.
Ladle on the tomato sauce generously on top of the cheese. For Grandma style pies I like to ladle on dollops of sauce evenly, but leave a little cheese exposed for visual effect.
Spoon on the thinly sliced garlic over the surface along with some of the oil.
Sprinkle freshly grated parmesan or pecorino on top.
Bake for 25 - 30 minutes and serve.
Garnish with fresh basil.


Other Variations
Using this dough recipe as a foundation, the possibilities are endless. Here are a few of my favorites so far.

Marinated artichoke, prosciutto, pickled pepperoncini peppers, mozzarella, grated cacciocavallo, basil.
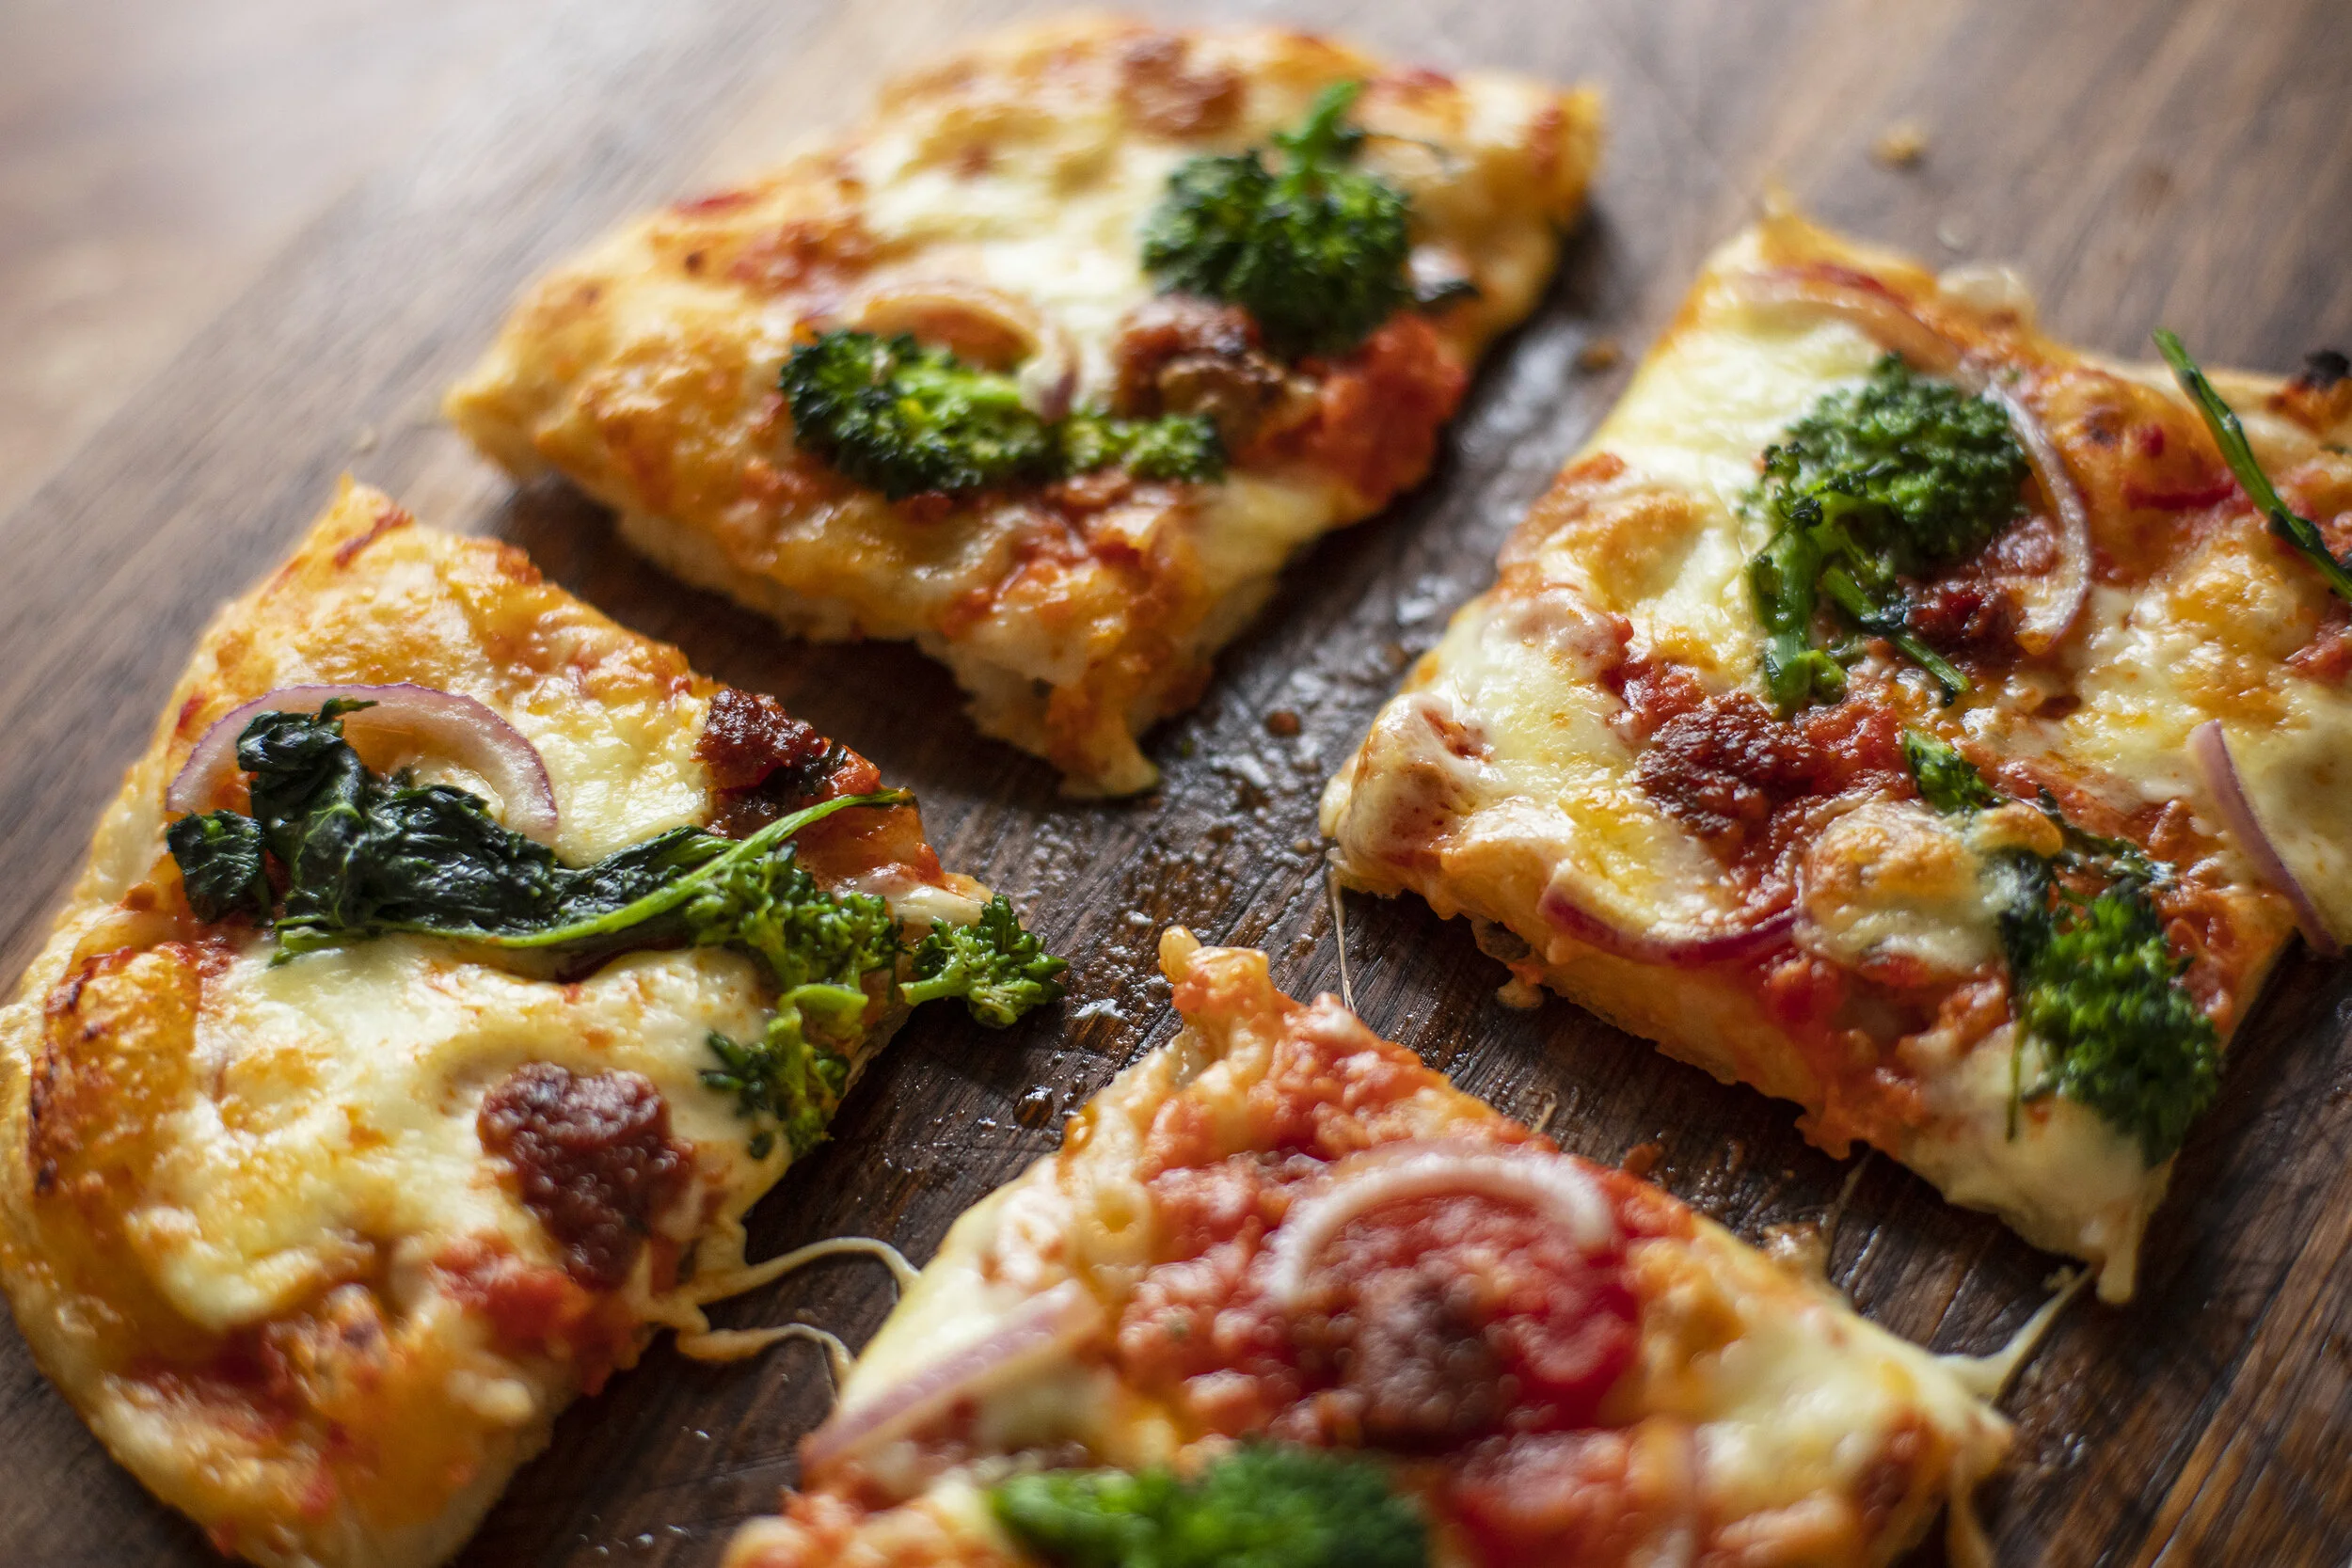
Nduja, Broccoli rabe, red onion, mozzarella, red sauce base.

Morel mushrooms, ramp oil, pecorino.