Venison + Ramp Sausage with Creamy Polenta

We made it through another week. Tomorrow might be one of those days filled with dread and anxiety, but right now is filled with the simple comfort of a big plate of creamy polenta, venison + ramp sausage, and a fried farm egg. This dish transports me back to the table with my parents and grandparents and hits on all the nostalgic notes that you could ask for. Video of the process is below.

sausage and polenta.jpg

The Sausage

I use about 40% pork fat to mix with the ground venison in this recipe.

2.8 lbs freshly ground venison

1.1 lbs ground pork fat

10 grams dehydrated ramp powder (recipe can be found here)

Dried chili flakes to taste

15 grams salt

2 tsp fennel seeds

15 grams brown sugar

Natural hog casings

Instructions

  1. Mix together, by hand, all of your filling ingredients in a large bowl.

  2. Carefully slide the sausage casing up onto the stuffing tube. Insert whatever joke you want here. Leave the end untied to allow air to pass through. You’ll tie it off at the end.

  3. On the slowest setting, carefully feed the sausage mixture down into the hopper. You’ll want to work slow and steady, and pause whenever you have any complications. The goal is to have a uniform filling all the way through the casing, without it being packed too tight where the casing will break apart or burst. If you’re attempting this recipe, you’ll likely have made your own sausages before.

  4. When you’ve finished stuffing your sausage now it’s time to tie your links. I typically will make small batches, so I’ll tie each link individually, gently applying pressure with my fingers where I want there to be a break, and then twisting it around to create a nice clean break between links. There are much more elegant and efficient ways to do this and lots of great Youtube videos from professional butchers who can help visualize this process.

  5. Heat up some olive oil in a skillet and brown the sausage on all sides. Transfer the sausage to a pot of simmering red sauce to continue cooking for another 20 minutes. My classic red sauce recipe can be found here.

ramp powder.jpg
links.jpg
crushing tomatoes.jpg

Creamy Polenta

1 cup coarse cornmeal

1/2 stick Butter

1 cup cubed provolone cheese

1 cup whole milk

2 - 3 cups chicken stock

Salt

Instructions

  1. Bring 1 cup of milk and 2 cups of stock to a simmer and add the cornmeal.

  2. You’ll need to constantly stir the polenta to ensure it doesn’t stick to the bottom of the pan.

  3. Add in the butter and cubed provolone and keep stirring until it melts. Add salt to taste.

  4. If it starts to feel a little too thick, add some reserved stock to thin it out. Keep adding more stock to maintain the right creamy texture. In total it will take about 30 minutes start to finish.

Spring Wintercress Frittata

This frittata is built around wild wintercress (Barbarea vulgaris) which you can find during early spring in the Northeast. Wintercress is a wild green in the brassacacea family, and when harvested at this stage it is very reminiscent of broccoli rabe. Its other common name is bittercress because as the name suggests it can be very bitter raw. When blanched it takes on a more mild flavor profile and is perfect as a central ingredient to a frittata. Video of the process below.

frittata 2.jpg

The other two greens are wild alliums. A handful of ramp leaves (Allium tricoccum) and finely diced field garlic (Allium vineale) as a garnish. Whenever I’m writing a recipe involving ramps I have to do my obligatory reminder to not harvest the bulbs. It take seven years for ramps to reach maturity. Leaving the bulbs in the ground helps maintain healthy populations. Ramps have been totally devastated in many parts of the country.

ingredients.jpg

Ingredients

Tender wintercress florets
Field garlic
Ramp leaves
Eggs
Shredded mozzarella and fontina
Butter
Sour cream

Instructions

1. Separate and reserve the tender tips of the wintercress from the tougher sections of the stem. Blanch for 1-2 minutes in simmering water. Run under cold water and drain. Set aside. Set oven to 375F.

2. Scramble the eggs in a medium sized bowl and set aside. For an 8” skillet I used 8 eggs.

3. In a cast iron skillet or oven proof pan, melt a generous amount of butter. Add the ramp leaves and sauté for 2-3 minutes. Add in the blanched wintercress and season with salt and pepper.

4. Pour in the eggs to cover the greens.

5. Cover the entire surface with the shredded cheese.

6. Transfer to the oven and bake for about 20 minutes until the top is puffy, and starting to turn golden brown. Remove from the oven and allow to cool for a few minutes. It will lose a little height as it cools.

7. Spoon in a dollop of sour cream and sprinkle the diced forks garlic all over the top. Cut into wedges and enjoy.

ramps.jpg
wintercress in hand.jpg

Mock Horseradish Sauce with Invasive Garlic Mustard

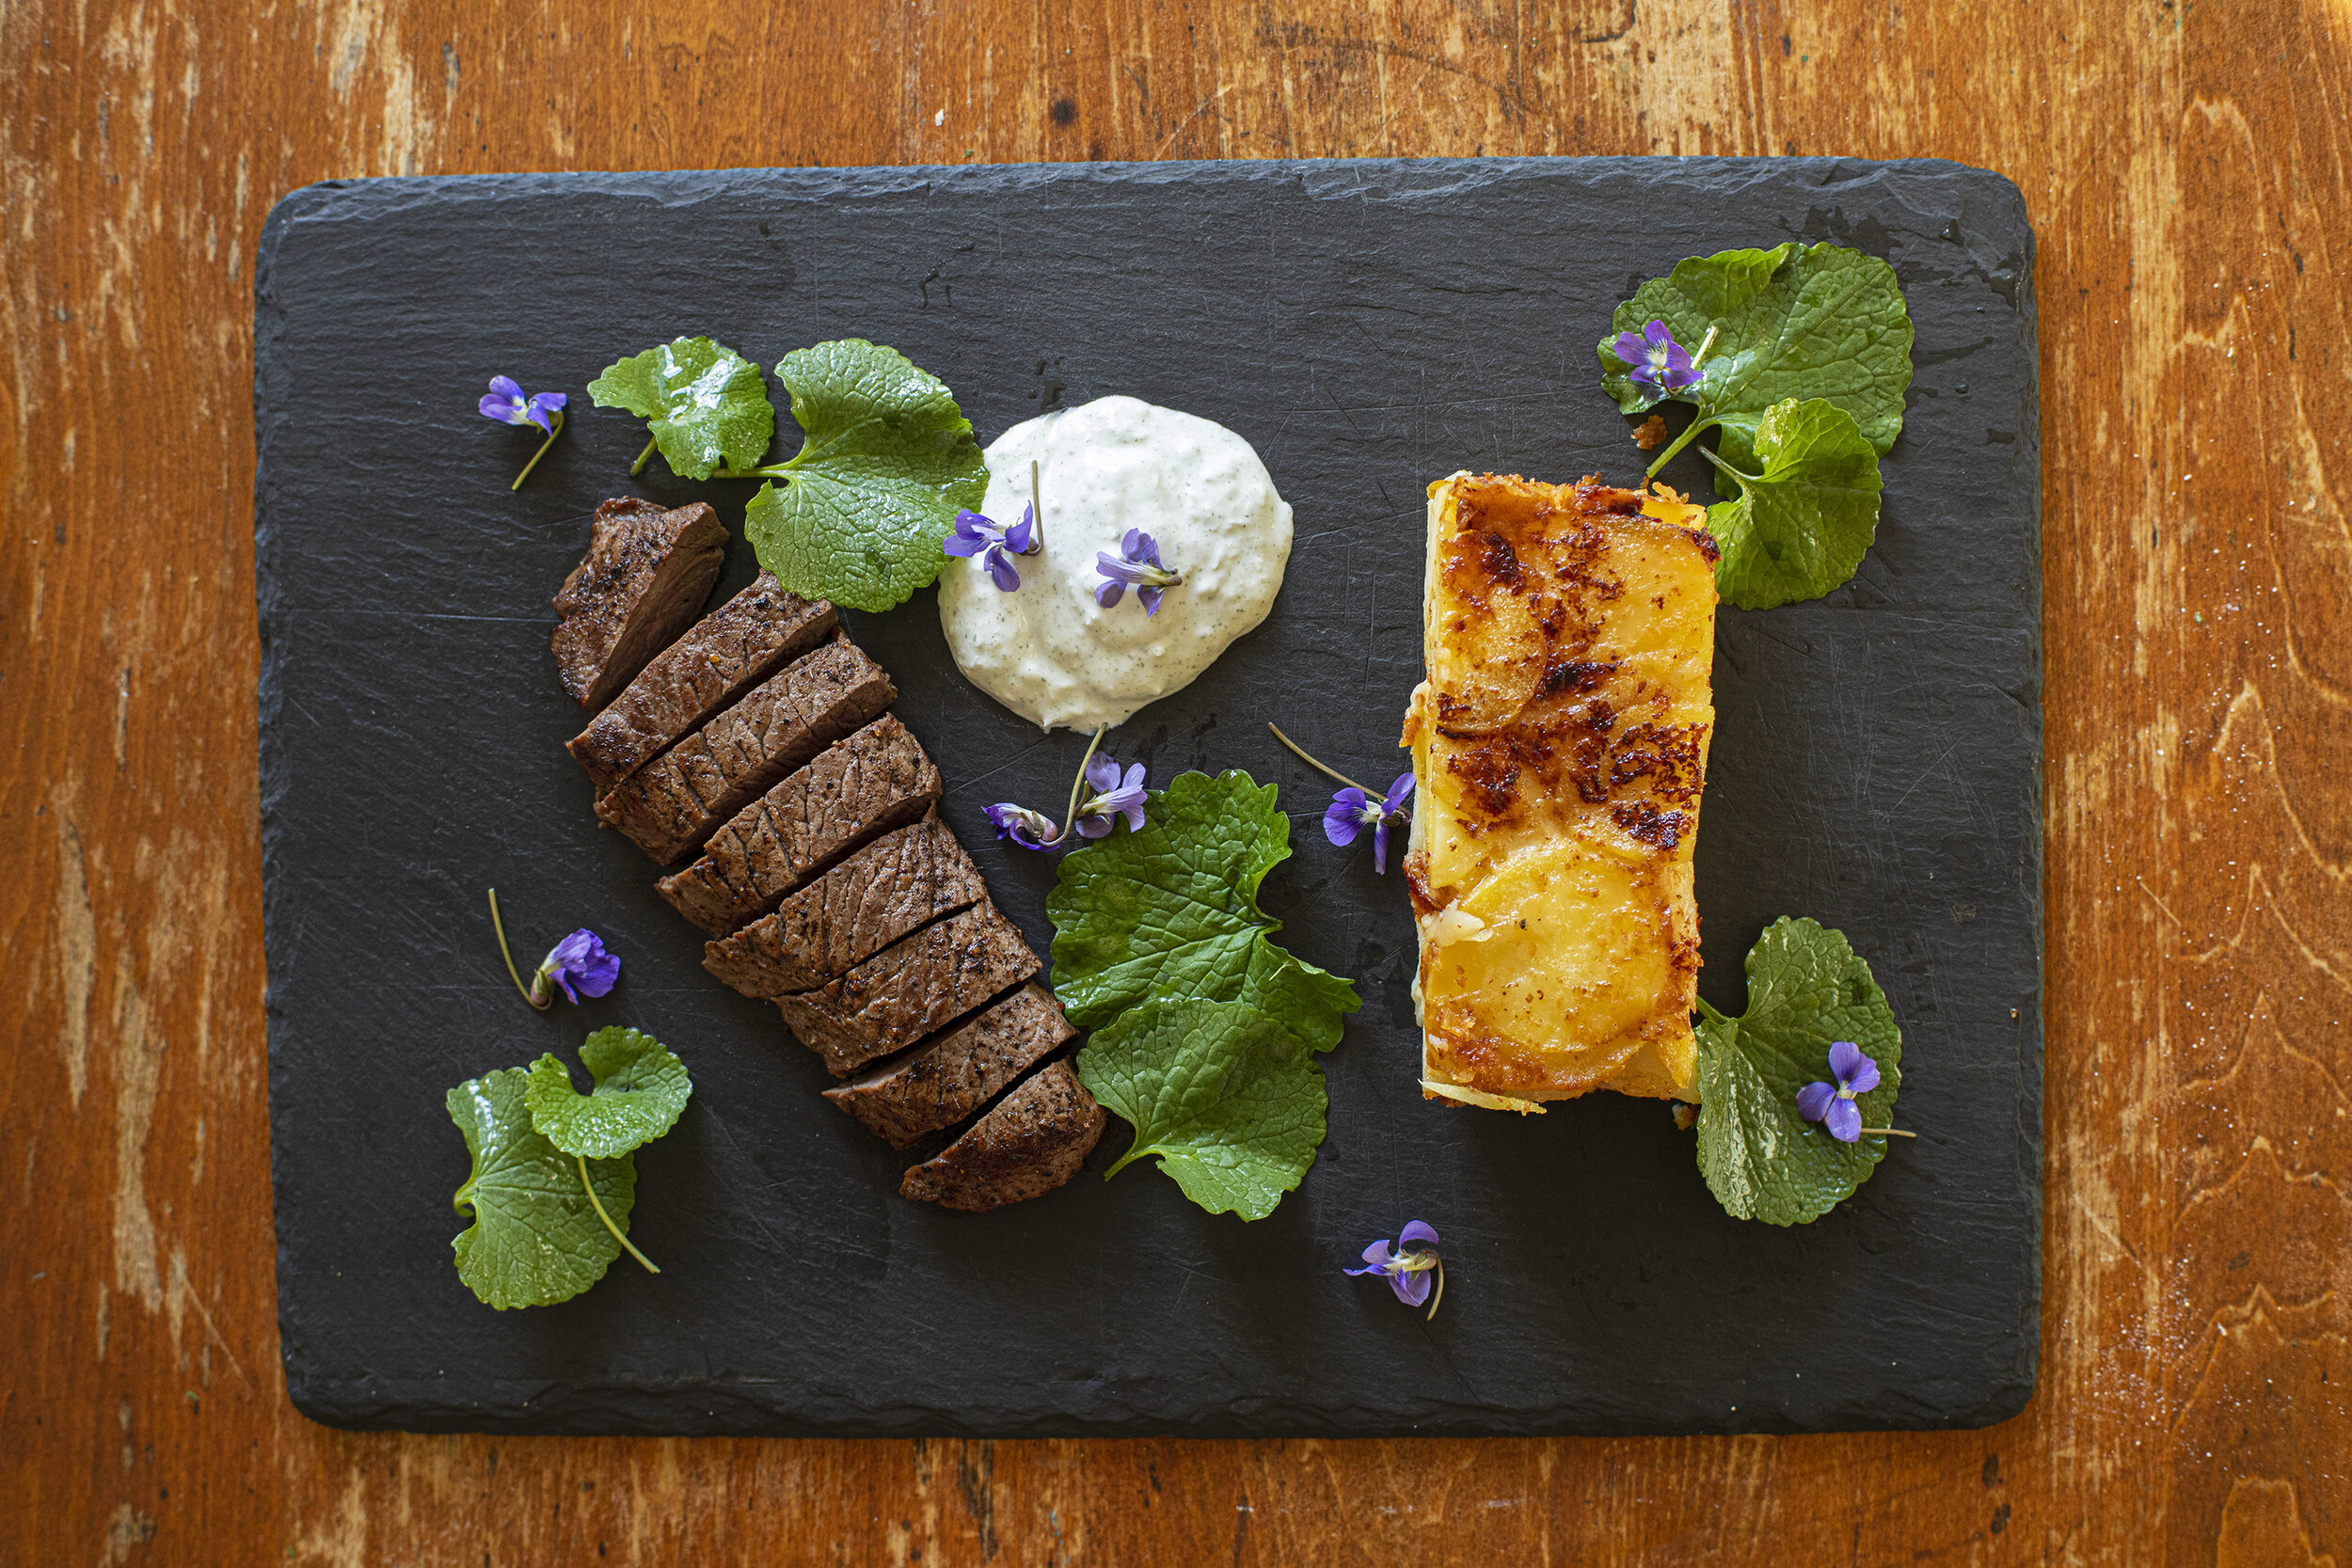
Experimenting with using invasive garlic mustard and I’m pretty in love with this mock horseradish cream sauce using garlic mustard root, white vinegar, dehydrated ramp powder, and sour cream. While not quite as spicy as true horseradish, it delivers on everything else and goes perfectly with venison or other red meat. The ongoing covid situation is just one more reason to avoid grocery stores and to think outside the box. Video of the process below.

venison with sauce.jpg
garlic mustard in bag.jpg
roots in hand.jpg

Ingredients

Garlic Mustard Root

White Vinegar

Dehydrated Ramp Powder

Sour cream

Instructions

I recommend focusing on the larger roots as you’ll have difficulty peeling the smaller sections. This is invasive, and aggressive so there is plenty to go around.

Clean and peel the roots and chop into small sized pieces that will fit into your food processor. Blitz on high until the roots are fully grated. Slowly add in white vinegar and blitz again until there is a nice consistency. Not too thin. It should look like the jarred horseradish you might buy in the store.

Now mix into a bowl of sour cream and taste to mix to your liking. Sprinkle on ramp powder and stir together. Taste again and adjust to your liking. You can add a dash of salt here, a step I would skip if you’re using this as a sauce for a well seasoned piece of meat.

The recipe for the dehydrated ramp powder can be found here.

GM horse radish.jpg

Seasonal Spring Sea of Green Pie with Ramp Dust

I drew some inspiration from @danieleuditi at @pizzana with his use of dehydrated basil. This time of year in the northeast, ramps (allium tricoccum) are in their full glory. If you know where to look, you'll find vast hillsides of vibrant green ramps. I wanted to make a seasonal pie that pays tribute to this incredible woodland ingredient. I harvested just the tender leaves of the plant, leaving the bulbs in the ground, and made a dehydrated ramp dust that is central to this pie. The powder retains the most amazing deep green color so we decided to call it the Sea of Green. Fired in my @oonihq Pro. Video of the whole process below.

whole pie.jpg

Just a reminder to harvest ramps responsibly. Don't yank the bulbs or harvest more than you need! It takes seven years for ramps to reach maturity from seed.

ramps on log.jpg

Once you have your fresh ramps, I like to trim the stems off so you’re only drying the green leafy section of the plant. The stems are great as a pickled condiment, which can get eaten as is or processed into salad dressing. Any of your favorite pickling recipes will be great for the stems.

IMG_7407.jpg
ramp leaving ready to dry.jpg

Place the leaves in the dehydrator and it should take about 2 - 3 hours until the leaves are fully dry. When done, they should be brittle and break apart in your fingertips.

crumbles.jpg

In a bowl, crush the leaves with your hands to break them down to a smaller size. You can use a mortar and pestle to break down further or just skip ahead and blitz everything in a spice grinder to create a fine powder. You’ll be left with an amazing green colored dust that you can store by itself or mix it 50/50 with salt to make ramp salt. The raw ramp dust is extremely versatile and can be used to spice meat, vegetables, fused into sauces, etc.  I keep a jar of it in my spice cabinet and I store the rest in the freezer for future use. Like any spices, it will lose its potency over time.

green dust.jpg

For the pizza I have been very happy using a Ken Forkish recipe from Flour Water Salt Yeast for an overnight dough with levain. It’s one of the few recipes that I have decided not to mess with as it always yields great results.

dough balls.jpg

The foundation of the pizza is a plain pie, with a parmesan laden red sauce, shredded mozzarella cheese and a drizzle of olive oil. The pie comes to life with a generous dusting of the ramp dust all over the top of the pie, followed by fresh basil leaves. It’s subtle and delicious.

slice of sea of green.jpg

Pan Fried Gnocchi with Ramp Pesto

It’s still a bit early in the season so most ramps are too young to harvest. With a little effort we found a more mature patch along a sunny south eastern facing ridge. We harvested just enough leaves for a small batch of pesto and left the bulbs in the ground. For the pesto I kept it super simple. Ramps, pistachios, olive oil, and salt blitz in the food processor and served on top of pan fried gnocchi (in lots of butter) and some freshly grated Parmesan and ground pepper. It’s a once a year kind of meal. 

If harvesting ramps, don’t yank the bulbs, don’t raze entire hillsides, don’t take more than you need. They take seven years to reach maturity.

Video of the process below.

plate of gnocchi.jpg
forming gnocchi.jpg
pan fried gnocchi.jpg

Gnocchi Ingredients

2½ pounds russet potatoes (about 4 large)

1¼ cups all-purpose flour, plus more for dusting

2 teaspoons kosher salt

1 egg

Butter 

Instructions

  1. Boil potatoes for 35 - 45 minutes until fork tender.

  2. Drain and allow to cool so you can handle them but they need to still be warm for the next step. If allowed to cool they’ll become gummy.

  3. Peel the potatoes with your fingers or by using the edge of a spoon. Cut up the potatoes into small chunks.

  4. Press all of the warm potatoes through a potato ricer into a large bowl. 

  5. Sprinkle on the flour and salt, and work together with your hands for about 30 seconds. Make a well in the center of the bowl and pour in the egg, which should already be beaten. 

  6. Mix together with your hands for another 30 seconds. 

  7. Pour out the contents of the bowl onto a well dusted work surface and continue to knead together for another 1 - 2 minutes. An important note is to not overwork this dough. The more you work it, the denser the gnocchi will be. 

  8. Divide the dough into about 4 - 6 different balls and dust each with more flour. 

  9. Begin rolling each ball out with your hands to create a long rope of rough about ¾ inch thick. Use more flour if it feels like the dough is sticky. And again, don’t overwork!

  10. Using a knife or bench knife, cut each rope into approximately 1 inch pieces. 

  11. You could stop here, and transfer them to a tray dusted with semolina to prevent sticking. 

  12. Or you can continue with embellishing them a bit by using the tines of a fork to create the classic dimples and grooves you might often see. Carefully take each individual piece in your fingers, and with your other hand press the tip of your fork into the center of the gnocchi, and roll it gently to form the grooves. Now you can set it into your tray with semolina until ready to cook.

  13. Bring a big pot of water to boil. Cook the gnocchi for about 4 minutes until they float to the surface. Drain the gnocchi. 

  14. In a heavy skillet, melt butter and bring up to medium/high heat. 

  15. Transfer the boiled gnocchi into the hot pan and allow to crisp for about 3 minutes on each side. They’ll start to turn golden brown and form a nice texture on the shell, while the interior stays light and fluffy.

  16. Now toss the pan fried gnocchi with the pesto. Plate each portion and top generously with freshly grated parmesan and black pepper.

family ramping.jpg
making pesto.jpg

Pesto Ingredients

¼ cup of pistachios

½ cup olive oil

Sprinkle of salt

Two handfuls of washed ramp leaves

Grated parmesan (optional)

Instructions

  1. Shell the pistachios and blitz in the blender

  2. Add all of the other ingredients and blend until smooth 

  3. Add more olive oil if pesto is too thick

Tunisian Style Braised Venison Shank with Bone Broth

Before coming to America, my grandparents on my dad’s side took a detour through North Africa. They lived on the outskirts of Tunis, where my dad was born and raised. My Nonno had an eclectic series of business ventures, from driving taxis to operating a canned fish factory. My Nonna took care of everything else. Ultimately they would leave when the climate towards Europeans shifted, but during those two decades during the 1940’s and 1950’s they absorbed a lot of the food culture from the region. This dish is reminiscent of something my Nonna would make during her time in Tunisia and something she brought with her when she immigrated to America. It’s traditionally centered around lamb, but I’ve swapped out the lamb with venison shanks. Beef would be another option that would work well. It is meant to be served family style and makes for an impressive centerpiece to the dinner table. Video of the whole process below.

shanks from above.jpg

Bone Broth:

Simmer deer neck (or whatever bones you are working with), onion, garlic, carrots, bay leaf, and a little salt for 4 - 6 hours until meat is tender and falling off the bone. Pull all of the meat off the bones and set aside for any recipe where shredded meat would be ideal (ie: tacos). Return the bones to the stock and continue cooking for as long as you have time for. This can be made a few days in advance.

bone broth.jpg

Aromatics:

Heat up a drizzle of olive oil in a large pot to medium heat. Layer in ¼ cup of tomato paste, 1 teaspoon of caraway seeds, 1 teaspoon of coriander seeds, halved onion, 2 garlic cloves, salt, pepper, dried chilies to your liking, a few teaspoons of plum vinegar. Saute gently for a few minutes and then add in 2 cups of bone broth. Continue to simmer on low.

shanks in fire.jpg

The Shanks:

Brown the meat in wood fired oven or in cast iron skillet. Transfer the shanks to the simmering broth and cover. Braise in the oven at 300F for about 4 - 6 hours until almost perfectly tender. 

While the meat is cooking, peel your carrots and squash, breaking them down to uniform medium sized chunks.With about 30 minutes to go add in the carrots, squash, pre-cooked chickpeas and ¼ cup diced dried apricots. Return to the oven, covered, and finish cooking for about another 30 minutes until all the vegetables are fork tender.

As it finishes, prepare your couscous. I like using Les Moulins Mahjoub brand which is hand made in Tunisia but you can use whatever couscous is available. Gently layer in the cooked couscous onto a platter and drizzle with a nice olive oil.

shanks final.jpg

Assembly:

Remove from the oven and start layering all of the cooked vegetables on top of the cous cous. Next take the entire shank(s) and lay it on top of the mountain of couscous and vegetables. Set aside a bowl of the rendered juices to ladle on top of the individual portions. Garnish with fresh mint.

Pani ca' Cori : Deer Heart Sandwich

This was the year that we lost my dad. It was also the year that I harvested my first deer after five years of trying. I grew up watching my dad hunt and was witness to the entire process from the forest, to the barn, and eventually to the dinner plate. He never forced it on me and as I became a teenager I grew disinterested. As an adult my appreciation of it returned along with my unease with concentrated animal feeding lots and the factory farm food system. But ultimately it was also a good excuse to get out in the woods with my dad as two adults even as I began to see his health begin to decline. He couldn’t come out the last two years but I persisted and kept him with me in my thoughts this season. I know he’d be smiling right now. This animal will be appreciated in the fullest sense of the word and I hope to transmit a sense of respect and responsibility that comes with it to my own two boys.

deer heart sandwich.jpg

The first meal I wanted to make was a tribute to my dad and his Sicilian origins. Pani ca' Meusa is a Sicilian sandwich traditionally made with stewed organ meats that get cooked over a long period of time in giant pots. It has become one of the most iconic foods in Palermo served at a handful of old school street vendors throughout the city. You’ll find them smothered in freshly grated caciocavallo cheese and served with a squeeze of lemon. The offal is typically spleen and lungs of a cow. Originally this was a sandwich designed for the poor but eventually, like other culinary feats of frugality and ingenuity, it has become widely popularized thanks in part to food fanatics like Palermo Street Food.

deer in snow.jpg
heart in the snow.jpg

For months leading up to this year’s deer hunting season I had been dreaming up different recipes in anticipation. I didn’t want anything to go to waste. What came to me was a spin on the classic Pani ca' Meusa but instead of using the traditional offal I would instead focus the sandwich on the deer heart. The heart was broken down into several beautiful steaks which were marinated with olive oil, garlic, homemade plum vinegar, salt and pepper. I then grilled them quickly on a hot grill and sliced them super thin, smothered them in grated caciocavallo from Jersey Girl Cheese and delivered them on my homemade sesame sourdough rolls. The concept, which I’m calling Pani ca' Cori, is distinctly Sicilian but it takes on new meaning with the notable addition of the deer heart. Video of the whole process below.

sesame rolls.jpg
grilling.jpg
dad with deer.jpg

My dad in the 80’s.

Nashville Hot Chicken of the Woods

Experiments in the mushroom lab. This is a play on the classic Nashville Hot Chicken sandwich where I’ve replaced the chicken with wild Chicken of the Woods mushrooms. After finding a perfect early season Chicken of the Woods I spent several months thinking about this idea. Weeks went by without finding any more good specimens. I was always a few days too late. Finally I came across a small grouping of laetiporus sulphureus right when I was feeling most defeated. Video about the process below.

sandwich 2.jpg

It was prepared in the same way that you would use real chicken, battered in a mix of flour, salt, pepper, buttermilk, and homemade one-year vintage fermented hot sauce. Deep fried at 350F and slathered with rendered duck fat, paprika, garlic powder, cayenne, and brown sugar. Then it’s layered onto homemade sourdough buns and topped with butter pickles and red slaw. 

sourdough buns.jpg

The buns are a work in progress but getting closer to the softness and texture that I’m looking for.

pickles and slaw.jpg

The butter pickles and the coleslaw both used a homemade perry vinegar which is aromatic and on the mild side.

hot sauce mash.jpg

The hot sauce I used was from a 2018 batch of fermented chilies and garlic. After being milled it’s blended with 50% white vinegar and stored in the refrigerator. Each year I use a slightly different combination of peppers but this year I’m growing Cornito Rossos, Paper Lanterns, and Arapahos.

chicken spread.jpg
chicken on tree.jpg

Overall, it wasn’t a bad first attempt but it definitely needs some work. After getting a lot of feedback on the recipe it seems like the mushrooms should be water-sauteed briefly before they are battered and fried to reduce the amount of retained oil and to make the interior more tender. Definitely a suggestion that I will take into consideration next time around.

Chanterelle and Pesto Pizza

Summer is in full effect. With a bounty of chanterelles the next obvious thing to do was pizza. This pie features fresh chanterelles, basil pesto, shredded mozzarella, and nastrutium flowers. I wanted to keep it limited to simple fresh ingredients and make the mushrooms really shine. The nasturtium flowers add a subtle sweet and peppery kick and I loved the way the mimic the shape and color of the chanterelles.

The crust is naturally leavened using a Ken Forkish (Flour Water Salt Yeast) recipe as the basis of the dough with some slight timing deviations. Wood fired in the Ooni pro in approximately 60 seconds. I made a short video about the forage and pizza making process. (Embedded below)

chant pesto pie 2.jpg

These were the best chanterelles that I’ve ever found - a large patch of Cantharellus Lateritius in western New Jersey. They were in perfect condition and we came home with a few bags full.

handful of chants.jpg
chants on counter.jpg

I highly recommend Flour Water Salt Yeast if you’re interested in making bread and pizza dough. There are recipes that use commercial yeasts and wild yeasts and all recipes are flexible and easy to adapt for real-world schedules.

chant pesto pie.jpg

Creamy Chanterelle Tagliatelle

After weeks of searching with limited results I finally found myself a proper patch of chanterelles. It was 100 F and muggy as s***, but I trekked out to check a spot I had a feeling about. After an hour of searching I caught a glimpse of the golden beacons on a steep hillside - cantharellus laterius, smooth chanterelles. It was enough to make a real meal and I wanted to make something simple that showcased the mushrooms.

creamy chant pasta.jpg
smooth chant.jpg

I decided to do a simple pasta dish, with an herb & cream sauce. After cleaning off the dirt I gently sauteed the mushrooms in butter, thyme, salt, and pepper. After about 5 -7 minutes I added in a generous pour of heavy cream and brought it to a light simmer for another 2 minutes. At this point the smell is incredible. To the pan I added the cooked tagliatelle, and tossed everything until the noodles were completed coated. After plating, I topped the dish with freshly grated parmesan and black pepper. 

chants on moss.jpg

This is a dish that can convert even the most discerning mushroom skeptics. See video below.

Chicken & Eggs: Wild Mushroom Carbonara

After almost giving up on a morning mushroom foray, I stumbled into a beautiful specimen of Chicken of the Woods on my way back to the car.

COW carbonara 1.jpg

After deliberating about how best to prepare it, I came up with the idea of a wild mushroom carbonara using the COTW instead of traditional guanciale. It’s not quite the same thing as real carbonara but it was a fun way to use the wild ingredient and is a solid vegetarian option. In the absence of the rendered pork fat I used a generous amount of olive oil to lubricate the pasta. Below is a video of the process, which details how to make a homemade semolina spaghetti, the creamy sauce, and the preparation of the mushrooms.

9E6E2265-A99C-469B-97FC-5BDC3A135266.jpg

The Spring Fling Pie: Seasonal Toppings from Garden and Forest

Before we hit our stride in mid to late summer I started to brainstorm what kind of pizza to make with early season ingredients. What started off as a late spring garden pie took on a new form after a successful day foraging for spring mushrooms.

1E8E47B1-FD95-4D65-AEB9-44AC97CF4A2F.jpg

Tatsoi greens, Egyptian Walking Onions, wild Crown Tipped Coral and Chicken of the Woods mushrooms, sweet and sour chive blossoms, tatsoi blossoms and a blend of mozzarella, fontina, and provolone cheese all on a sourdough crust - wood fired with the Ooni Pro.

Perfect specimen of Laetiporus Sulphureus.

Homemade Cavatelli with Wild Ramp Pesto

Ramp season is fleeting. Next year I plan on making a few extra batches of pesto to keep in the freezer to extend the season a little longer.

cavatelli pesto 2.jpg

Ramp pesto is so simple and tasty. I puree the ramp leaves (stems removed and bulbs left in the ground) with good extra virgin olive oil, toasted pine nuts, salt, and pepper. If using right away I’ll finish it by incorporating a healthy amount of grated parmesan and a little melted butter to make it creamy. If freezing, I’ll leave out the cheese and butter and add this in fresh after it is defrosted. I garnished this plate with fresh chive blossoms and more toasted pine nuts. The pasta was a handmade semolina cavatelli which are deceptively easy to make. See video below for the whole process.

cavatelli pesto 3.jpg

Pheasant Back Mushroom and Wild Ramp Risotto

It was another unsuccessful attempt to find morels but I ended up with a basket of young pheasant backs and ramps.

risotto4.jpg

The risotto was cooked simply with chicken stock, sherry and a hunk of parmesan rind. The mushrooms were first sauteed with thyme and folded into the simmering risotto. Ramp pesto was incorporated at the end to keep it’s brightness and color. I reserved a few crispy slices of the mushrooms to add as a garnish on top along with more freshly grated parmesan. See video below.

IMG_6967.jpg